Skype is popular software used by millions of people to connect with loved ones anytime, anywhere. The chat service app helps individuals and businesses make voice and video calls, send instant messages, and share files for free.
Skype is the epitome of online, face-to-face communication. We often use webcams while using Skype for video conferencing, daily online meetings, training, etc. However, many Skype users have encountered problems with webcams while making Skype video calls on Windows PC. Your Webcam may be problematic if your Skype friends can’t see you on a video call or they can only see some blurry grey images.
Fix Skype camera not working
Webcam issues can be annoying, and if you have encountered one while using Skype, you are in the right place. In this article, we outline a few steps for quickly troubleshooting webcam problems.
1] Test Webcam
The first and foremost thing to do when you face a webcam issue is to make sure that you have switched on the webcam. Adjust the device so that the camera points to you. Many Skype users face webcam issues due to faulty installation. So check if the camera is installed properly. Follow the below step to check your webcam
In the Windows search bar, type Camera. Click on the Camera app and allow your system to use the camera app.
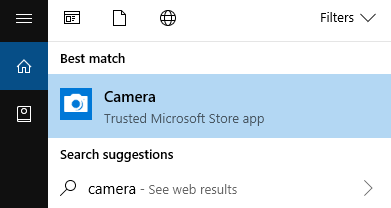
Check the video feed from your camera. If the output is proper close to the Camera app. Else it means that you are using a defective camera. The solution would be to replace the defective camera with a new one.
Detailed read: How to test if the Webcam is working?
2] Update Webcam driver
Updating the webcam driver with the latest version can solve the video call issues. Follow the steps below to update the webcam driver.
Open Control Panel and click Device Manager. In the Device Manager window, Click and expand Imaging devices.
Select your webcam from the list and right-click on the webcam device.
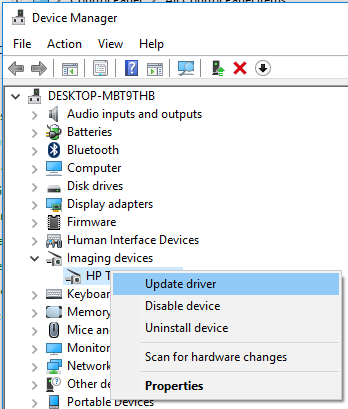
Click Update driver from the drop-down menu.
In the update Wizard pop up window, click the option Search automatically for updated driver software.
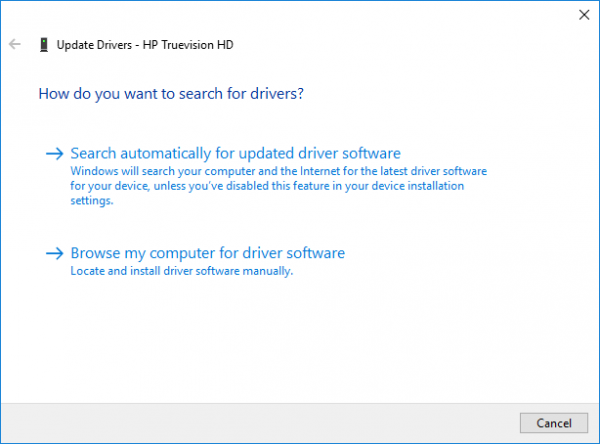
Install if new drivers are available.
3] Update Skype
Launch Skype. Go to Help & Feedback.
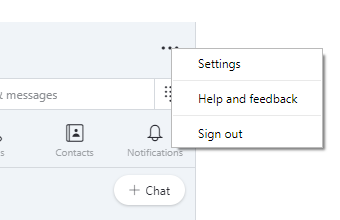
Check for updates. You will be notified with the latest version of Skype if it is available.
4] Use Generic drivers for Webcam
Use a generic USB video device driver for your Webcam if you use an old one. Follow the below steps to use a generic device driver for your old webcam.
Open Control Panel and click Device Manager. In the Device Manager window, Click and expand Imaging devices.
Select your webcam from the list and right-click on the webcam device. Click Update driver from the drop-down menu
In the update Wizard pop up window, click Browse my computer for driver software
Select the option Let me pick from a list of available drivers on my computer and click Next.
Now select the USB Video Device from the list and click the Next button.
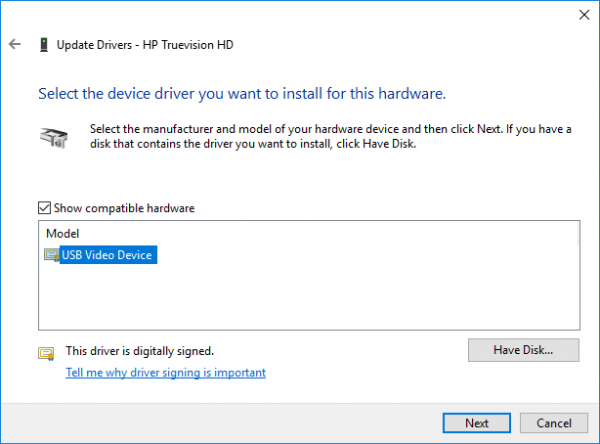
The device driver will be installed and once done Close the window. Restart the system.
Once the system reboots, you should be able to make a video call on Skype
5] Configure Skype’s video settings
Most of the webcam problems in Skype are solved by configuring video settings. Follow the below steps to set up your webcam in video settings.
Launch Skype. Navigate to Settings and click Audio & Video Settings from the menu.
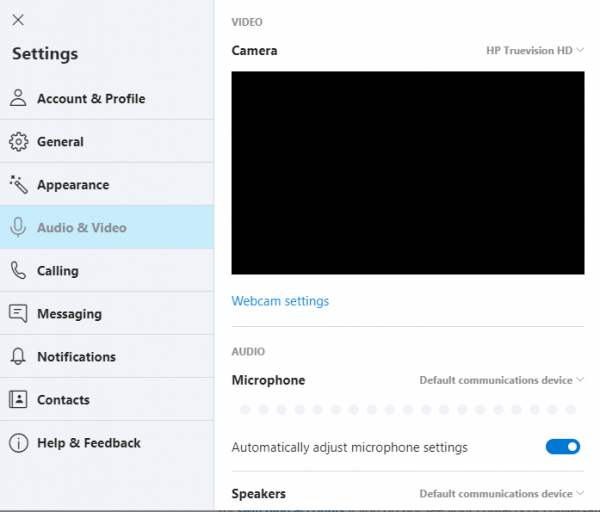
On the right side in the Select webcam option, choose a correct webcam device from the drop-down list, if in case the skype is using a wrong video device as a webcam. You should now see a video feed from your camera on the video settings page.
Click Save to apply changes.
6] Close apps that interfere with the webcam
Suppose you have other apps than Skype that are capable of performing video calls. In that case, we recommend you to close all the apps because if the webcam is already being used by an application, it may not give webcam access to another application like Skype. Most of the webcams are not designed to grant video access to more than one application. To avoid such problems, make sure you close all the other apps that can use a webcam.
7] Disable and Enable Webcam in Device Manager
This is a quick way to fix the webcam problem while using Skype. Follow the below steps to reenable the Webcam
Open Control Panel and click Device Manager. In the Device Manager window, Click and expand Imaging devices.
Select your webcam from the list and right click on the webcam device.
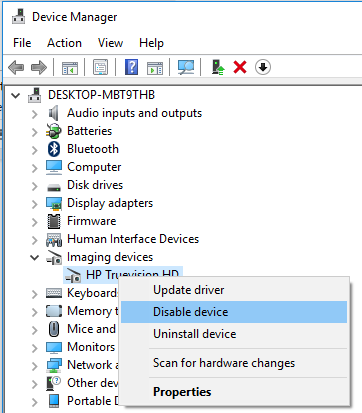
Click Disable device from the drop-down menu.
Now, to re-enable the device, right-click on the webcam again and select Enable device option from the drop-down menu.
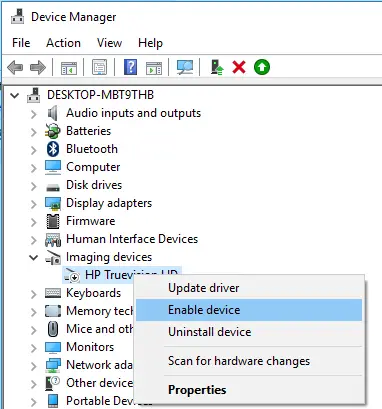
Close the Device Manager and check if the webcam is working on Skype.
8] Connect Webcam to a different USB port
If you are using USB webcams or an external webcam, try reconnecting the webcam to a different USB port. This method is useful if there is a problem with the USB port, and reconnecting to a different USB port can restart the device, temporarily solving the webcam problem.
If the above solution doesn’t help to fix your problems with webcams, you may have to replace the webcam with a new device.
Related read: Laptop Camera not working in Windows.