In Windows 10, Microsoft has introduced a new app ‘Snip & Sketch‘ which is replacing the popular Snipping Tool. This tool offers similar functionality and can be used to take screenshots, use tools like a pen or pencil to draw on it, and share it wherever you want. In this guide, I will share how to use Snip and Sketch app to capture and annotate screenshots in Windows 10.
Snip & Sketch app in Windows 10

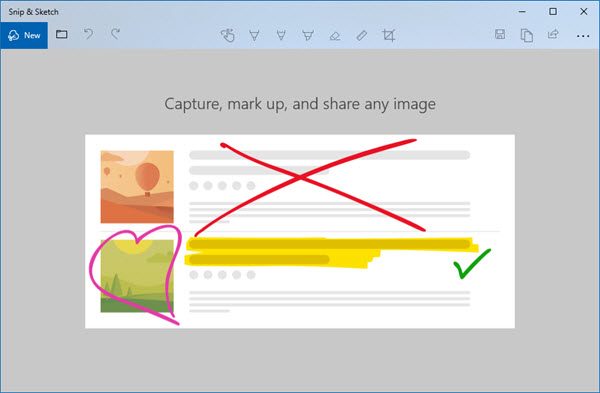
The app is available under App list or you can search for Snip & Sketch in the Cortana Search box. Click on the Snip and Sketch app once it appears. Once it appears, you will be welcomed with the message – ‘Capture, mark up, and share any image’.
Take a screenshot using Snip & Sketch
Click on the New button on the top left.
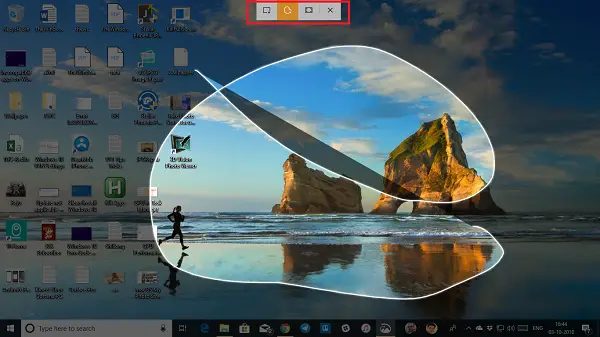
This will minimize the interface, and offer you a floating toolset where you can choose to use a rectangular clip or freeform clip or fullscreen clip.

Select any of them, and if you are using anything except fullscreen clip, you can select an area of which you want to take a screenshot. Hold the left key while doing it. Once complete, release the left key.
The marked area will now appear in the canvas of the Snip and Sketch App.
The images can be saved in the .png format.
TIP: Take a look at some of the new features in the Snip and Sketch app of Windows 10.
Edit a screenshot using Snip & Sketch
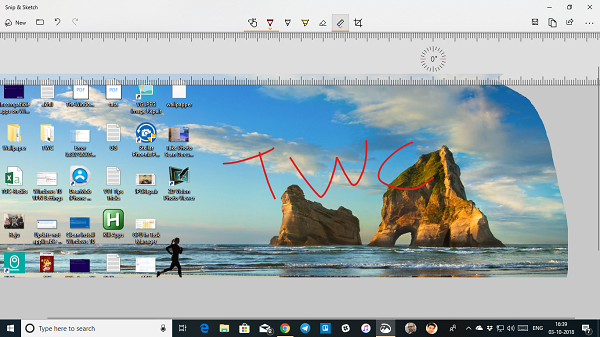
Once you have the screenshot, you have a set of Markup tools you can use. Do note that as soon as the editor opens, you get a PEN to write with. However, if you move your mouse with the left button pressed, it will start drawing.

1] On middle-top you have tools including Touch Writing, Ballpoint pen, Pencil, Highlighter, Ruler/Protractor, and Crop tool.
2] Click on the lower part of any of these tools, except for Touch Writing, and Crop Tool, and you get extra options. Here you can change the color, and size of the pen. When you click on the Ruler tool, you can switch to Protector.

3] On the top left, you have the option to save, copy and share the screenshot.
4] You can also edit any other images by click on the folder icon which is next to the new button on the top left.
Once you enable the ruler or protractor tool, it doesn’t seem to go away unless you close, and start the app again.
Read: Snip and Sketch tool doesn’t cover the whole screen
Launch Snip & Sketch app with Print Screen key
A tool like a Snip and Sketch without a screenshot is useless if one cannot launch using a hardware key. While Print Screen captures a screenshot in the clipboard or saves it to OneDrive or Dropbox when configured, it will make sense if you can launch this app instead.
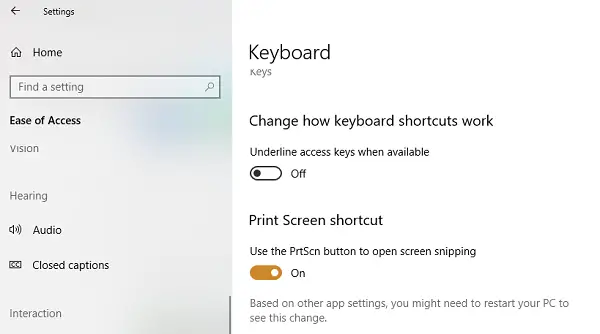
Go to Settings > Ease of Access > Keyboard. Turn on the toggle under Print Screen shortcut which says ‘Use the PrtScn‘ to open screen snipping.

However, you will have to disable the configuration of Print Screen with any other apps and restart your Windows 10 PC to make it work.
Launch Snip & Sketch via CMD or Run
Type the following command and hit Enter to open Snip & Sketch:
ms-screenclip:?source=QuickActions
Create a shortcut for Snip & Sketch
For creating the desktop shortcut, right-click in an empty space of your Desktop screen and choose ‘New’ option from the menu. Next, select ‘Shortcut’ to open the ‘Create Shortcut wizard’.
When seen, copy and paste the following address into its location field
%windir%\explorer.exe ms-screenclip:
After that, hit the Next button and enter a suitable name for the shortcut. When done, press the Finish button to create the shortcut on the Desktop screen.
If you would like to add an icon to the shortcut, right-click on the shortcut on the Desktop, and choose Properties.
Next, under the Properties screen, select Change Icon button, and then under “Look for icons in this file”, copy and paste the following address, and press Enter.
%windir%\system32\SnippingTool.exe
Select the icon corresponding to it as shown in the image above. Click the ‘OK’ button when done and in the end, hit the ‘Apply’ button to change the icon.
Keyboard shortcuts to use in Snip & Sketch
|
Ctrl + N |
?Create a new snip |
|
?Ctrl + O |
?Open a file |
|
?Shift + arrow keys |
?Move the cursor to select a rectangular snip area |
|
?Ctrl + E |
?Select the eraser |
|
?Ctrl + P |
?Print an annotation |
|
?Ctrl +?Z |
?Undo an annotation |
Let us know how you enjoy using this new screenshot tool.
Just playing with it now – quite handy and upmarket from Snipping Tool, but some obvious questions.
1) The only output file type is .png Why not a choice to .jpg? When will that option be created?
2) Where are the settings for user options or does the ruler scale default to the primary user settings – here for me being metric.
3) Why are there not measurement markers, even if 5 unit blocks to make measuring easy, because as it is, one must count every individual mark, and it’s easy to loose track.
4) Ditto with the Protractor.
5) Why cannot the protractor be rotated to align with a known point, and a measurement taken from there? As it is, the protractor is useless.
I have tried all combinations of keys to create other functionalities (above) but to no avail.
Trying to use it. Ran into some problems.
1) I have a Logitech keyboard/mouse combo on my Desktop PC using the latest mouse drivers. I can NOT rotate either the ruler or compass? I’ve seen reports how to use it with a mouse but it doesn’t work for me (hold down mouse button and use mouse wheel to rotate).
2) Unlike the old snipping tool, when I add markups they are NOT saved to the Clipboard.
Useful upgrade. Ruler rotates around the point of the mouse using the wheel (mouse must be on the ruler) and drags to any known point. The angle measurement is aligned to a horizontal rule and geometry takes care of the rest. Missing jpg and tif output is a drag though/