If your Snipping tool is slow to open or work in Windows 11/10, then this post will help you fix this issue. This issue can be frustrating because if you want to take screenshots of games or videos without pausing them, you cannot do that, as it opens slowly.
Fix Snipping Tool is slow on Windows 11/10
If the Snipping Tool is slow to open or work in Windows 11/10, then take these steps to fix the issue successfully:
- Update Snipping tool
- Repair System files
- Repair or Reset the Snipping Tool
- Uninstall and reinstall the Snipping Tool with the PowerShell command
- Troubleshoot in the Clean Boot state
- Are you running Windows 11 on an unsupported hardware?
Let’s start.
1] Update Snipping tool
Outdated software can sometimes cause the issue. Make sure you have the latest updates installed for the Snipping Tool. To check the update, use the below steps:
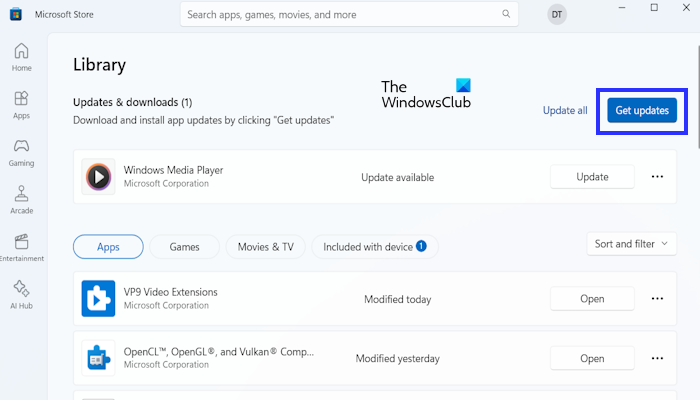
- Open the Microsoft Store app.
- Click on the Library in the bottom left corner.
- Click on Get updates.
- If any update is pending for the Snipping Tool in the list of updates, then Click on Update.
Once the update is complete, check if the issue persists.
2] Repair System files
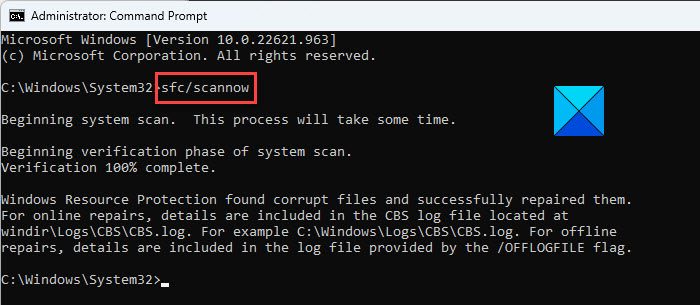
There is the possibility that corrupted system files cause the Snipping tool performance issue. System File Checker and Deployment Image Servicing and Management are two built-in tools in Windows computers that help users repair corrupted system image files. Use these tools to repair the corrupted system image files.
Do not interrupt the process. After the process is completed, check if the Snipping tool works fine.
3] Repair or Reset Snipping Tool
You can also try to repair and reset the Snipping tool. Check the following steps to repair or reset the Snipping tool:
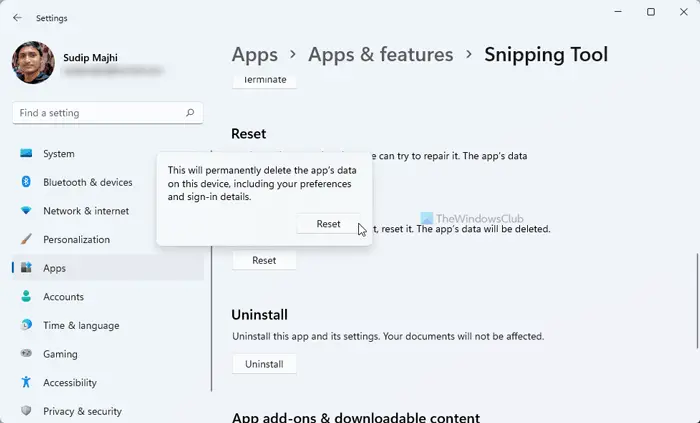
- Open Windows Settings and go to Apps > Apps & features.
- Click the three-dotted button of the Snipping tool and select Advanced options.
- Click on the Repair button.
- Try to open the Snipping Tool.
- If it doesn’t work, click on the Reset button.
4] Uninstall and reinstall Snipping Tool with the PowerShell command
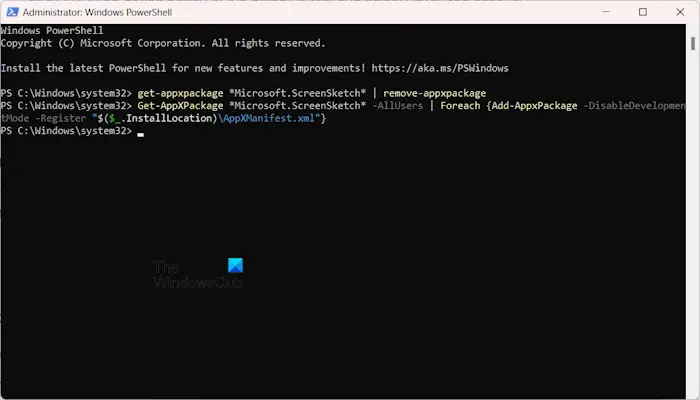
Uninstalling and reinstalling the Snipping Tool with PowerShell gives it a fresh start, potentially resolving slow speeds caused by corrupted files. To do so, use the below steps:
- Press the Windows + S key and search for PowerShell.
- Right-click on it and Run as administrator.
Copy and paste the following command into the PowerShell window and press Enter:
get-appxpackage *Microsoft.ScreenSketch* | remove-appxpackage
This command will uninstall the Snipping Tool from your system. After uninstalling the Snipping Tool, reinstall it by running the following command in the elevated PowerShell window.
Get-AppXPackage *Microsoft.ScreenSketch* -AllUsers | Foreach {Add-AppxPackage -DisableDevelopmentMode -Register "$($_.InstallLocation)\AppXManifest.xml"}
5] Troubleshoot in the Clean Boot state
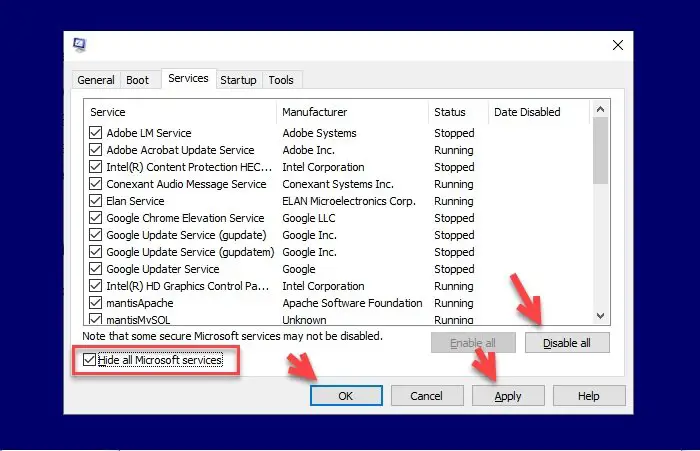
A third-party background application or service might be conflicting with the Snipping Tool due to which you are experiencing this performance issue. Start your computer in the Clean Boot state and use the Snipping tool.
If the Snipping tool works fine, a third-party application or service is responsible for this error. Now, you have to identify that problematic application or service.
6] Are you running Windows 11 on an unsupported hardware?
When Microsoft released Windows 11, it also released the list of supported CPUs and mentioned other hardware requirements. However, some Registry hacks made users install Windows 11 on their computers with unsupported hardware by bypassing the hardware requirements.
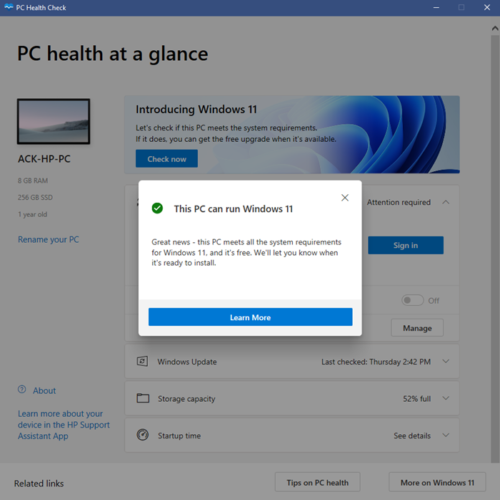
Windows 11 can be on the computers with unsupported hardware but such computers cannot deliver the required performance. In other words, installing Windows 11 on computers with unsupported hardware makes them slow. Therefore, if you are running Windows 11 on unsupported hardware, you will experience slow performance. In this case, upgrading your hardware will fix this problem.
That’s it.
Why is my Snipping Tool so laggy?
There can be a few reasons why your Snipping Tool is so laggy. Some of the most common reasons are corrupted app data, outdated version of Snipping Tool, graphics card driver issues, etc. To fix this issue, you can run some troubleshooting like restarting your PC, updating your graphics card driver, resetting the snip tool, etc. Also, ensure you have the latest version of the Snipping Tool installed. Check for updates in the Microsoft Store.
What is the shortcut for Snipping Tool?
Win + Shift + S key is a Shortcut for the Snipping Tool. This is the quickest way to open the Snipping Tool. Simply press these keys together. Drag to capture the area you want, and your screenshot will be automatically copied to your clipboard.
Read next: Snipping Tool This app can’t open error.
Leave a Reply