Snipping Tool in Windows 11 also allows users to record the screen and take screenshots. Some users experienced issues with the Snipping Tool screen recorder. According to them, the recorded videos do not have a sound. This article will help you if the Snipping Tool screen recorder does not have sound.

Fix Snipping Tool screen recorder No sound problem in Windows 11
Use the following fixes for the Snipping Tool screen recorder no sound problem in Windows 11/10:
- Test your microphone
- Check your default microphone
- Check your microphone volume
- Check the Privacy and Security settings
- Enable the Stereo Mix
- Check the Snipping Tool Settings
- Repair or reset the Snipping Tool
- Uninstall and reinstall the Snipping Tool
- Use an alternate screen recorder software
All these fixes are explained below in detail:
1] Test your microphone
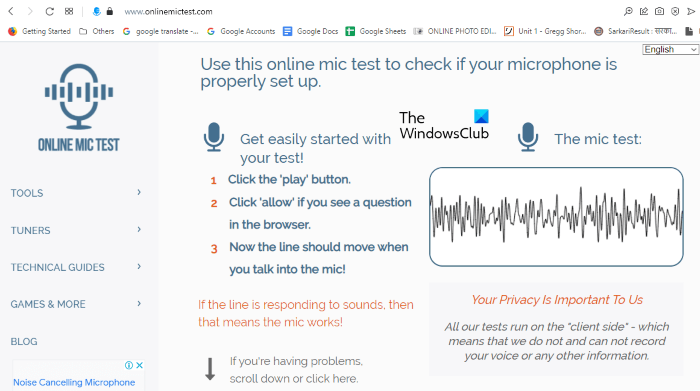
Make sure that your microphone is working properly. You can test it in Windows 11 Settings or through free online mic testing websites. If it is faulty, replace it.
2] Check your default microphone
The next troubleshooting step is to check your default microphone. If you use an external microphone, make sure it is set as the default device. The steps to do this are as follows:
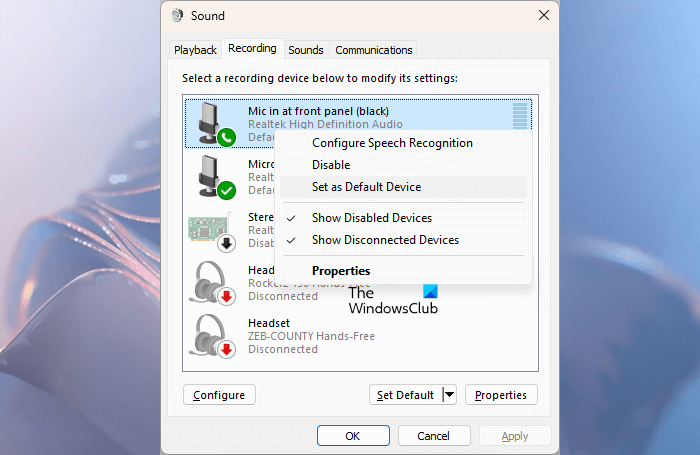
- Open the Control Panel.
- Type sound in the Control Panel search bar and select Sound from the search results.
- Go to the Recording tab.
- Right-click on your microphone and select the Set as Default Device option.
- Click Apply and then click OK to save changes.
3] Check your microphone volume
Check your microphone volume. It might be that the volume of your microphone is too low or set to zero.
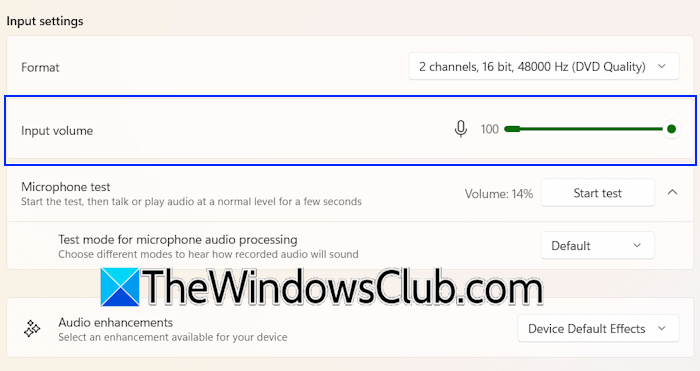
Follow the steps provided below:
- Open Windows 11 Settings.
- Go to Settings > Sound.
- Expand the Microphone tab under the Input section.
- Select your microphone from the list to open its properties.
- Set its volume to 100%.
You can also try selecting different formats for your microphone and see if it helps.
Read: How to copy all Text as Table from a Screenshot in Snipping Tool
4] Check the Privacy and Security settings
Check your privacy and security settings. Make sure that the Snipping Tool is allowed to access your microphone.
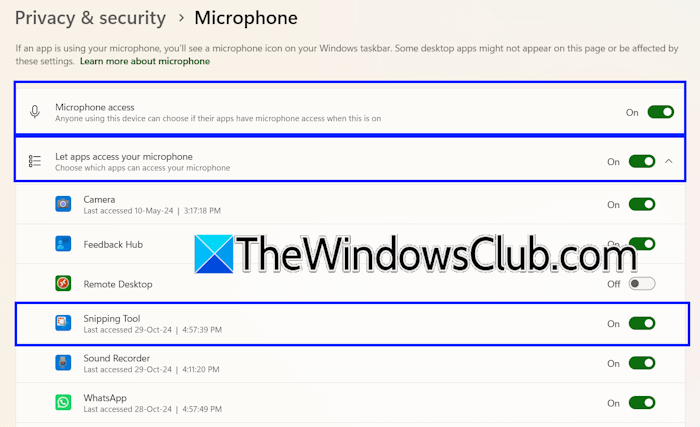
Go through the following instructions:
- Open Windows 11 Settings.
- Select Privacy & security from the left side.
- Scroll down and select Microphone under the App permissions.
- Turn on Microphone access.
- Now, turn on the switch next to the Let apps access your microphone and expand that tab.
- Turn on the switch next to the Snipping Tool.
5] Enable the Stereo Mix
If the issue persists, check if the Stereo Mix is enabled or not. The following steps will guide you on this:
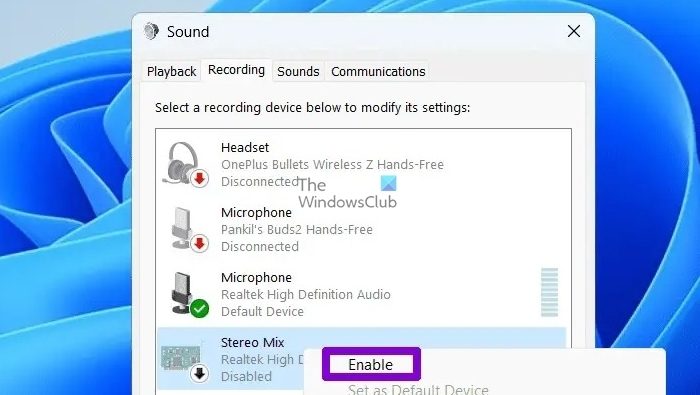
- Open the Control Panel.
- Type sound in the Control Panel search bar and select Sound from the search results.
- Select the Recording tab, right-click on Stereo Mix, and select Enable.
- Click OK.
6] Check the Snipping Tool Settings
By default, the microphone is disabled for screen recording in the Snipping Tool. You need to enable it every time you start screen recording by clicking on the mic icon in the Snipping Tool. You can change this default setting.
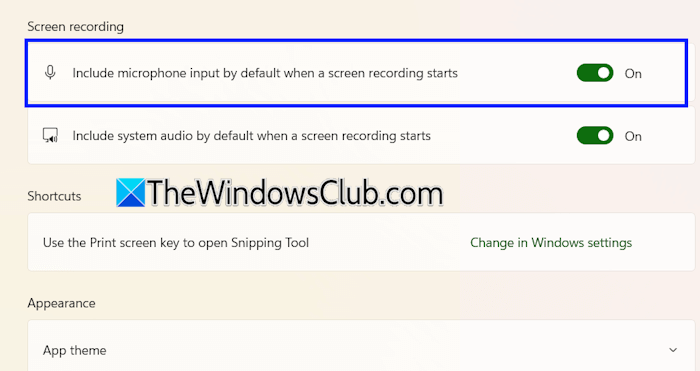
- Type Snipping Tool in Windows 11 Search and select the same to open the Snipping Tool.
- Click on the three dots on the top right side and select Settings.
- Scroll down to the Screen recording section and turn on the Include microphone input by default when a screen recording starts option.
7] Repair or reset the Snipping Tool
One possible cause for the Snipping Tool screen recorder no sound problem is the corrupt files. Repairing or resetting the Snipping Tool can help.
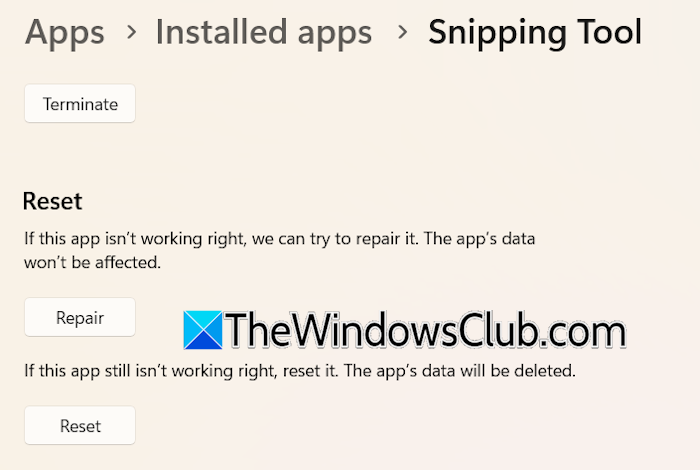
Go through the following instructions:
- Open Windows 11 Settings.
- Go to Apps > Installed apps.
- Locate Snipping Tool in the list of installed apps, click on the three dots next to it, and select Advanced options.
- Click on the Repair button to repair the Snipping Tool.
If repairing the Snipping Tool does not work, reset it.
8] Uninstall and reinstall the Snipping Tool
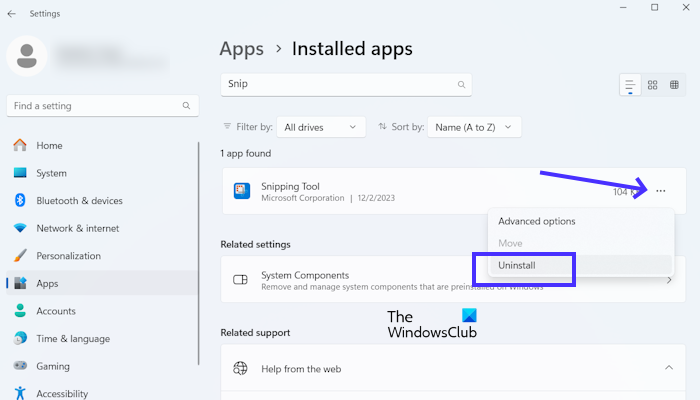
If none of the above fixes work, uninstalling and reinstalling the Snipping Tool can help. Uninstall the Snipping Tool through Windows 11 Settings and restart your computer. Now, open the Microsoft Store, search for the Snipping Tool, and reinstall it.
9] Use an alternate screen recorder software
You can also use free screen recorder software, such as OBS Studio.
Why is there no sound on Snipping Tool Windows 11?
There can be many reasons why there is no sound on the Snipping Tool in Windows 11, such as incorrect privacy settings, incorrect Snipping Tool settings, tool low microphone volume, etc. Also, check if your microphone is set as the default device.
Does the Windows 11 Snipping Tool Record audio?
With Snipping Tool, you can record your screen with the sound input just like other screen recording software. If you want to record only audio, you can use the built-in Sound Recorder app in Windows 11.
Read next: Fix Snipping Tool This app can’t open error.