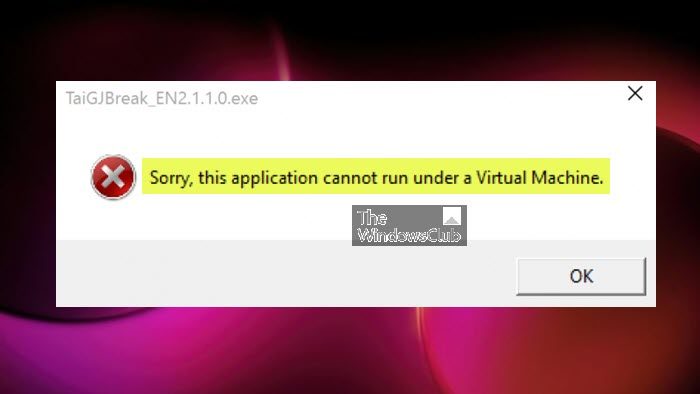
Some PC users have reported they received the error message Sorry, this application cannot run under a Virtual Machine when trying to run certain apps using virtualization software like VMware Fusion 7, Hyper-V et al on their Windows 11 or Windows 10 computer. This post provides the most applicable fixes to the issue.

Sorry, this application cannot run under a Virtual Machine
If you get the error prompt stating Sorry, this application cannot run under a Virtual Machine when you run certain apps on your Windows 11/10 host machine, then the fixes we have presented below in no particular order can be easily applied to resolve the issue on your system.
- Initial checklist
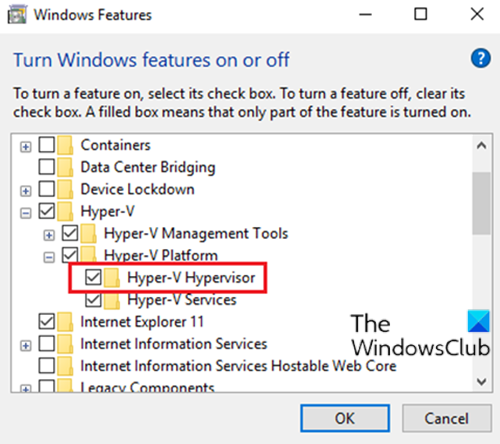
- Disable Windows Hypervisor Platform
- Modify the DriverDesc registry key
- Edit the .vmx file
- Modify the SystemBiosVersion registry key
Let’s see these fixes in detail.
1] Initial checklist
Our investigations also revealed that the Sorry, this application cannot run under a Virtual Machine and can also be triggered on a physical machine. In this case, you can perform the following prechecks. Otherwise, you can continue with the rest of the solutions presented below.
- Check your device name for generic names like “Computer” or “Device,” as in some cases, these names by default may be identified as a virtual machine.
- Check files and processes: The system can be mistakenly identified as a virtual machine as applications may check to verify if the system’s currently active processes and services are the default Windows system and if any new/third-party apps are installed.
- Check for previously installed Virtual Machine: If you had previously installed a VM application, you should examine your system for anything with the associated phrase because often VM apps create a registry containing such terms. If that’s the case, you can use a third-party Uninstaller Software to completely uninstall the virtualization software from your Windows 11/10 computer.
- Make sure you’re running a genuine copy of Windows as the processes and system files that have been altered can cause the machine to differ from a genuine copy which can cause programs to not run as intended and throw errors.
- Run AV scan: You should consider running a full system AV scan on your system for malware if you are seeing the VM error on a physical Windows PC.
2] Disable the Windows Hypervisor Platform

This fix requires you to disable Hyper-V assuming you’re running the app on a third-party virtualization software.
Read: How to enable Hyper-V on Windows 365 Cloud PC
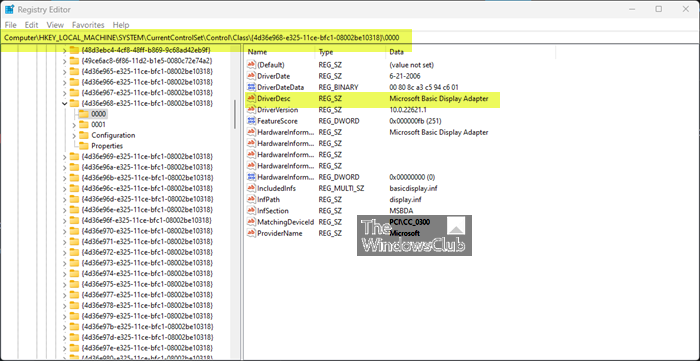
3] Modify the DriverDesc registry key

Since this is a registry operation, it is recommended that you back up the registry or create a system restore point as necessary precautionary measures. Once done, you can proceed as follows:
- Press Windows key + R to invoke the Run dialog.
- In the Run dialog box, type regedit and hit Enter to open Registry Editor.
- Navigate or jump to the registry key path below:
HKEY_LOCAL_MACHINE\SYSTEM\CurrentControlSet\Control\Class\{4d36e968-e325-11ce-bfc1-08002be10318}\0000
- At the location, on the right pane, right-click the DriverDesc registry key (If you cannot find it, search different folders such as 0001, 0002, etc) to edit its properties.
- Select Modify.
- Now, delete the data inside the Value data field.
- Click OK to save changes.
- Exit registry.
4] Edit the .vmx file
- Shut down your virtual machine completely.
- Open the virtual machine folder in ~/Documents/Virtual Machines/.
- Right-click on your virtual machine and select Show Package Contents.
- Next, find the file with the .vmx file extension and open the file with a text editor.
- Now, scroll to the bottom of the file and write the following on a new line:
monitor_control.restrict_backdoor = "true"
- Save the file
- Launch your virtual machine
- Run the app again.
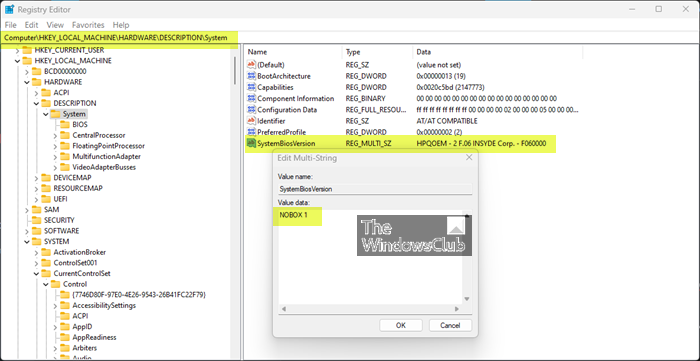
5] Modify the SystemBiosVersion registry key

- Open Registry Editor.
- Navigate or jump to the registry path below:
HKEY_LOCAL_MACHINE\HARDWARE\DESCRIPTION\System
- At the location, on the right pane, double-click the SystemBiosVersion entry to edit its properties.
- Now, change the Value data from whatever is written into NOBOX -1.
- Click OK to save changes.
- Exit Registry Editor.
We hope this helps!
Read next: BlueStacks cannot start when Hyper-V is enabled
How to solve this application cannot run under a virtual machine?
You may experience these errors on Windows 11 with certain Windows features enabled. To resolve the issue, amongst other solutions as outlined in this post above, you can try going to Turn Windows features on or off the Control Panel applet and turning off: the Hyper-V Virtual Machine Platform.
How do I run an application on a virtual machine?
You can apply the /appvpid:<PID> switch to any command, which enables that command to run within a virtual process that you select by specifying its process ID (PID). Using this method launches the new executable in the same App-V environment as an executable that is already running.
Read: Not enough memory in the system to start the virtual machine.