Some Microsoft Teams users are unable to join a meeting. Whenever they try to do the same, they get an error message that says Sorry, we couldn’t connect you. In this post, we will address this issue and see what should be done to resolve it.
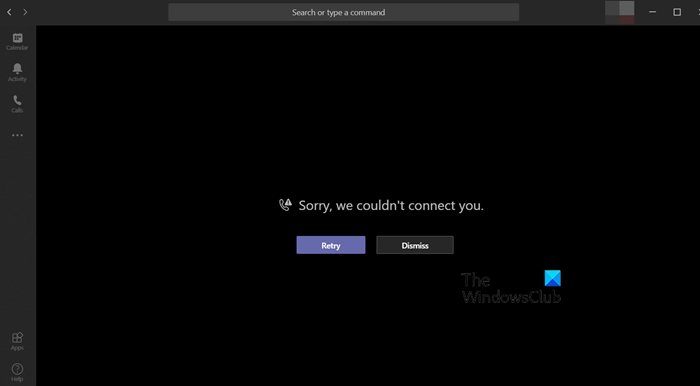
Why does Teams keep saying Sorry we couldn’t connect you?
MS Teams might fail to connect you to a meeting due to network issues. However, most of them are not just external but internal. In this guide, we will check if it’s external, but we will also talk about internal configurations you need to make to resolve the issue.
Fix Sorry, we couldn’t connect you Teams error
If you get Sorry, we couldn’t connect you in Teams; first of all, update your computer as well as Teams to the latest version. If updating does not help, follow the solutions mentioned below to resolve the issue.
- Reboot Teams and terminate other video-calling apps
- Check your Internet Connection
- Edit Registry
- Change the IPv4/IPv6 preference to use IPv4 first
- Clear the Cache of Microsoft Teams
- Repair or Reset Teams
Let us talk about them in detail.
1] Reboot Teams and terminate other video-calling apps
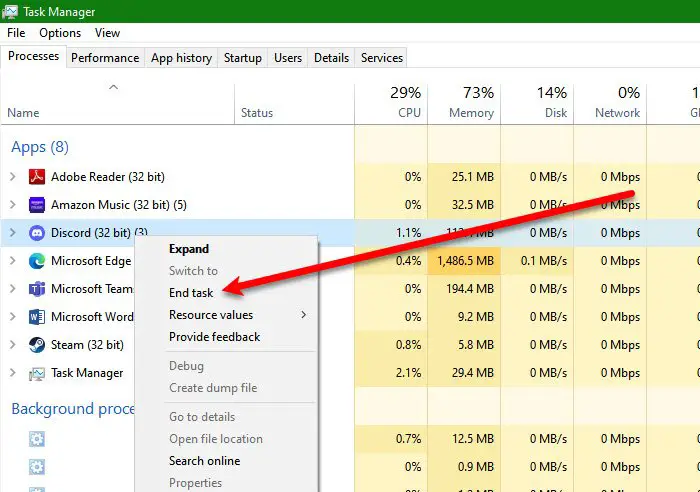
First of all, you need to close Teams and terminate apps such as Discord and Slack as they can interfere with the video calling process. To do the same, open Task Manager, right-click on the process you want to terminate, and click on End Task.
2] Check your internet connection

If you cannot connect to Teams, check if your Internet is fine. To do the same, use one of the free Internet speed testers to know what’s your bandwidth. In case the bandwidth is low, reboot your router and if that is to no avail, check if the issue is resolved.
3] Edit Registry
When some affected users went to check for events in Event Viewer, they found Event 4231: A request to allocate an ephemeral port number from the global TCP port space has failed due to all such ports being in use.
To resolve this issue, we have to make a few changes to the registry to increase the size of the TCPIP IPv4 socket pool to the maximum size, Maximum User Port, the maximum number of connections that TCP may have open simultaneously, and number of times that TCP retransmits an individual data segment before it aborts the connection.
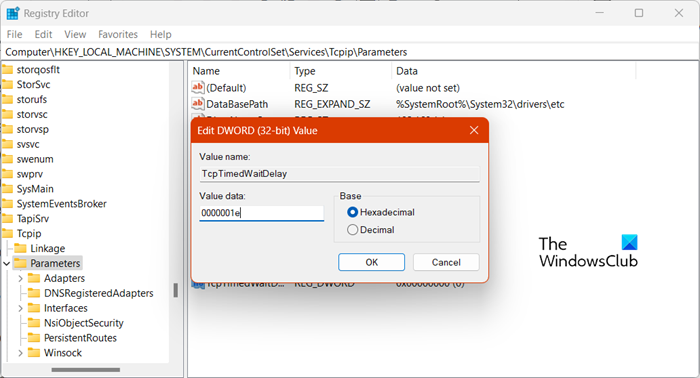
For that, open Registry Editor and then navigate to the following location.
HKLM\SYSTEM\CurrentControlSet\Services\Tcpip\Parameters
Now, you need to create and configure the following entries as mentioned below.
- TcpTimedWaitDelay -> REG_DWORD: 0000001e (hex)
- MaxUserPort -> REG_DWORD: 0000fffe (hex)
- TcpNumConnections -> REG_DWORD: 00fffffe (hex)
- TcpMaxDataRetransmissions -> REG_DWORD: 00000005 (hex)
To do the same, right-click on the empty space and select New > DWORD (32-bit). Name the newly created key, double-click on it, and change its Value data.
Finally, reboot your system and then check if the issue is resolved.
4] Change the IPv4/IPv6 preference to use IPv4 first
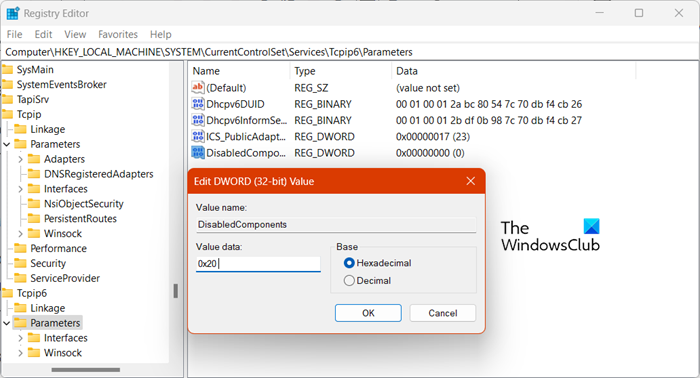
We need to prioritize IPv6 over IPv4 to resolve this issue if Teams is facing network issues. To make the change, open Registry Editor and go to the below location.
HKLM\SYSTEM\CurrentControlSet\Services\Tcpip6\Parameters
Right-click on Parameters and select New > DWORD (32-bit) Value. Name the newly created value DisabledComponents, double-click on it, enter 0x20 in the Value data field, and click on OK.
You can finally restart your computer and check if the issue is resolved.
5] Clear the Cache of Microsoft Teams
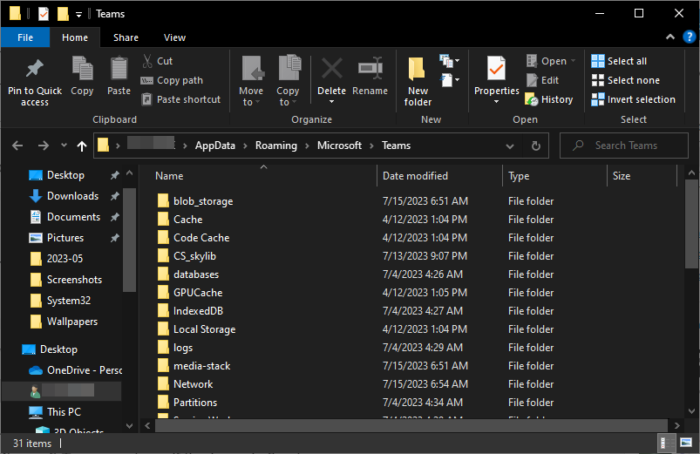
Since the client is facing issues when logging in to the server, they should clear the cache of MS Teams. Clearing caches will resolve the issue if it was caused due corrupted caches. To do the same, follow the steps mentioned below.
- Terminate all tasks related to MS Teams.
- Open File Explorer by Win + E.
- Navigate to %appdata%\Microsoft\teams.
- Open the following specified folders and delete the files they contain. Delete all the files but keep the folders:
- %appdata%\Microsoft \teams\application cache\cache
- %appdata%\Microsoft \teams\blob_storage
- %appdata%\Microsoft \teams\Cache
- appdata%\Microsoft \teams\databases
- appdata%\Microsoft \teams\GPUcache
- appdata%\Microsoft \teams\IndexedDB
- appdata%\Microsoft \teams\Local Storage
- appdata%\Microsoft \teams\tmp
- If some of the files are unavailable, just skip them.
- Now, open the app.
Hopefully, this will do the job for you.
Read: Fix Microsoft Teams stuck on the Loading screen
6] Repair or Reset Teams
If nothing works, our last resort is to repair or reset the application. This should be done on the client end and not on the server. To do the same, follow the steps mentioned below.
- Open Settings.
- Go to Apps > Installed apps or Apps & features.
- Search for “Teams”.
- Windows 11: Click on three dots and select Advanced Features.
- Windows 10: Select Teams and click on Advanced Features.
- Finally, click on Repair.
Check if the issue is resolved. If it persists, click on Reset.
That’s it!
Read: Fix Microsoft Teams Login issues: We couldn’t sign you in
How do I fix Microsoft Teams unable to connect?
If Microsoft Teams is unable to connect, restart your PC and router and try. Ensure that you have a stable internet connection – and if this does not help, execute the solutions mentioned in this post.
Leave a Reply