Almost every action in Windows 11/10 is followed by a sound, especially on laptops. Now, what if you are experiencing a noticeable delay in that sound? I am not talking about a delay of a minute, but noticeable which could be 1-2 seconds. If that’s the case, in this post, we will offer a solution that can fix sound delays on a Windows 10 PC.
Sound Delay and Windows 11/10
Before we go ahead, let’s understand the reason behind the delay. According to Microsoft Low Latency delay is a routine in Windows 11/10, but it should not be noticeable. Before Windows 11/10, the latency of the Audio Engine was equal to ~12ms-~6ms, which is now reduced to 1.3ms for all applications.
Before Windows 11/10, this buffer was always set to ~10ms. Starting with Windows 11/10, the buffer size is defined by the audio driver. Bingo! So it’s not just Windows responsible, but it is also the driver.
The good news is that Microsoft also says that If an application needs to use small buffers, then it needs to use the new AudioGraph settings or the WASAPI IAudioClient3 interface, to do so. However, if one application changes it, it will be applicable to all the apps. More on the official page.
Fix Audio latency in Windows 11/10
Somebody reported this in our TWC forum as well, and when we researched a bit, it ultimately led me to an application that works in the background to reduce the latency.
The application is called REal or REduce Audio Latency. It is available on GitHub – but needs some skill to install it. It will work well with the High Definition Audio Device offered by Microsoft. To use it, you will have to:
- Run it directly from the Command prompt.
- Install HDAudio driver and run it.
1] Run REal or REduce Audio Latency from Command prompt

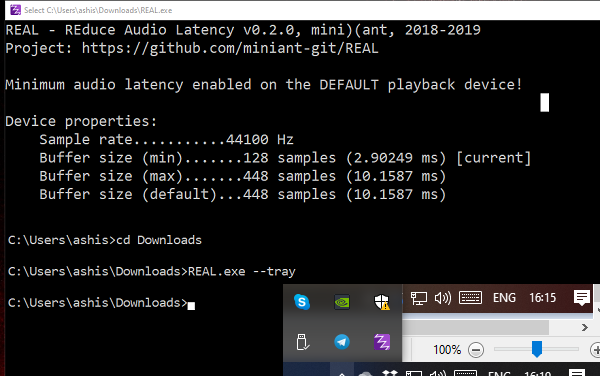
Once you download the application, open the location in the Command prompt. Type Real.exe –tray. This will keep the application running in the background. It will enable minimum auto latency enabled on the default playback device.
2] Install HDAudio driver and run it

- Use Win +X and then click on the Device Manager.
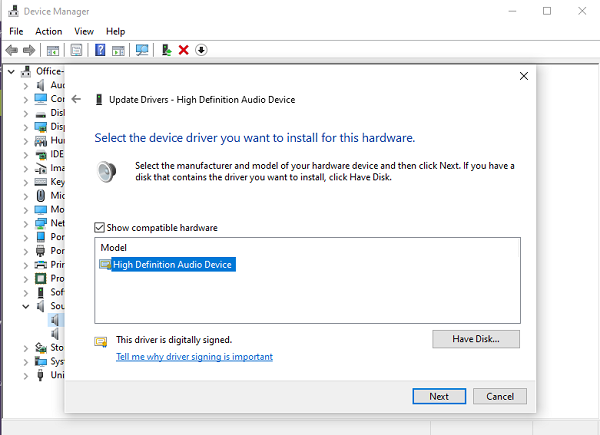
- Under Sound, video and game controllers, right-click and select Update Driver.
- Next, Browse my computer for driver software -> Let me pick from a list of available drivers on my computer.
- Select High Definition Audio Device and click Next.
- If a window titled “Update Driver warning” appears, click Yes.
- Select Close.
- If asked to reboot the system, select Yes to reboot.
You should know that the new driver might reset your volume to uncomfortably high levels.
You can download this tool from the GitHub page. The project was updated on April 14th, 2019.
Related read: Troubleshoot Windows Sound and Audio problems.
Leave a Reply