While printing something on Windows 11/10 computer, if your system shows an error message saying splwow64.exe – System Error, you can fix it using this guide. As it stops users from printing documents or images, you need to fix this issue in order to continue using your regular PC features.
splwow64.exe – System Error
The program can’t start because dll is missing from your computer. Try reinstalling the program to fix this problem.
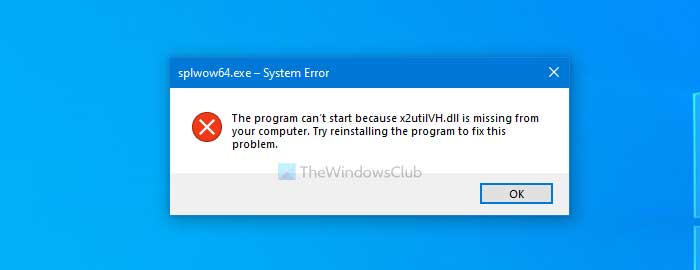
splwow64.exe process may appear in the Task Manager even if you do not have a printer connected to your computer. If you are using a 64-bit system and getting this error message, the following solution might help you.
Splwow64.exe system error when printing on Windows 11/10
To fix splwow64.exe System Error when printing on Windows 10, follow these steps-
- Disable rendering print jobs on client computers
- Change splwow64.exe timeout value in Registry
- Reinstall the program to replace the missing DLL file
- Update Printer drivers
- Restart Print Spooler
- Update Windows 11/10 Build.
To learn more about these steps, keep reading.
1] Disable rendering print jobs on client computers
As this problem mainly occurs when you share a printer with multiple computers in a local network, you need to render the print jobs on the main PC to get rid of this error. By default, your shared printer renders all printing jobs on the client computer or on the computer used to print a document or anything else. To make the change, follow these steps.
At first, search for “control panel” and open the traditional Control Panel on your computer. Make sure the view is set as Large icons. If not, change the view and click on the Devices and Printers option.
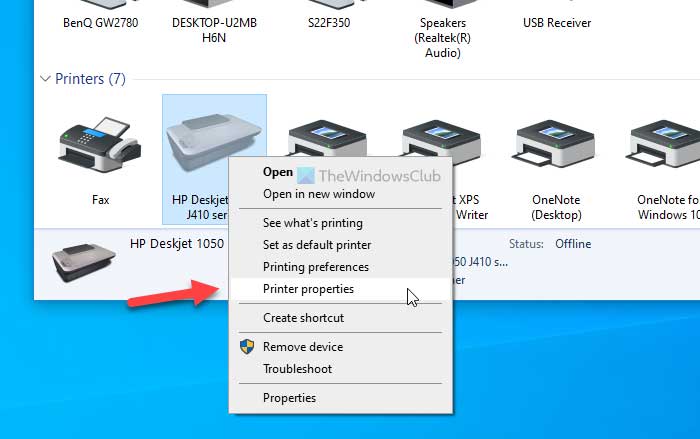
Here you can see all your connected printers. Right-click on the printer, which is creating the issue, and select the Printer properties option.
Switch to the Sharing tab and uncheck the Render print jobs on client computers box.
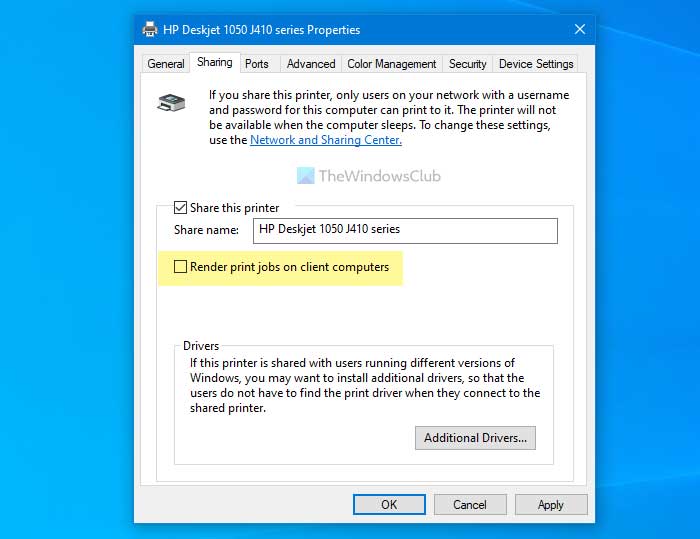
At last, click the Apply and OK button to save the change.
2] Change splwow64.exe timeout value in Registry
By default, splwow64.exe runs for 120 seconds or 2 minutes even after completing a print. However, it may keep running in the background if there are some issues, causing the error mentioned earlier. Therefore, you can change the default timeout value of splwow64.exe through Registry Editor. For that, the following steps are required to follow.
To get started, press Win+R, type regedit and hit the Enter button. If the UAC prompt appears, click the Yes option to open the Registry Editor on your computer.
After that, navigate to the following path-
HKEY_LOCAL_MACHINE\SYSTEM\CurrentControlSet\Control\Print
Right-click on Print and select the New > DWORD (32-bit) option to create a REG_DWORD value.
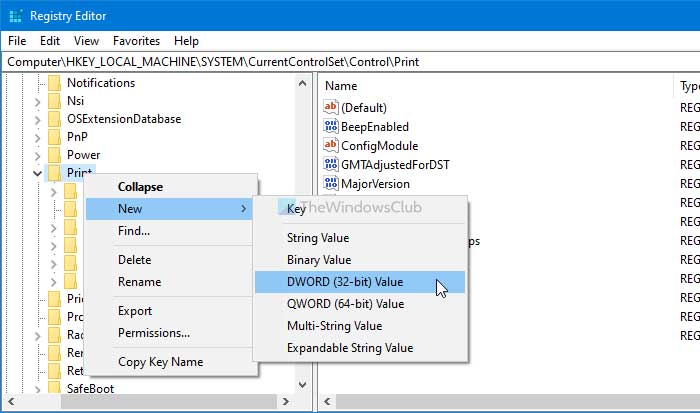
Name it as SplWOW64TimeOutSeconds. Now, double-click on SplWOW64TimeOutSeconds to change the Value data. As mentioned earlier, the default value data is 120. However, it is recommended to set something less than 120. You can enter 60 and check if it solves your issue or not.
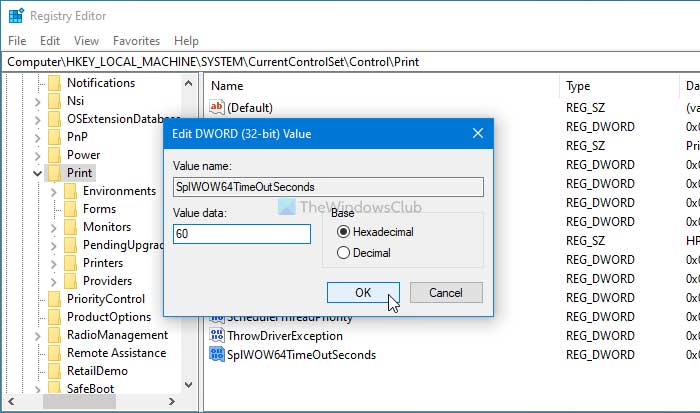
If it doesn’t, try entering a lower value. At last, click the OK button to the change.
3] Reinstall the program to replace the missing DLL file
If a missing DLL file is causing this error to appear, then reinstalling the application that is causing this message to appear may help. So do that and see.
4] Update Printer drivers
Updating your Printer drivers is also known to help. You may use the Device Manager or download the driver from the manufacturer’s website.
5] Restart Print Spooler
To turn off or disable Print Spooler, you need to open the Services window. For that, search for “services” in the Taskbar search box, and click on the individual result. After that, find out the Print Spooler service and double-click on it.
By default, it keeps running automatically. To disable or stop this service, click on the Stop button visible under the Service status label.
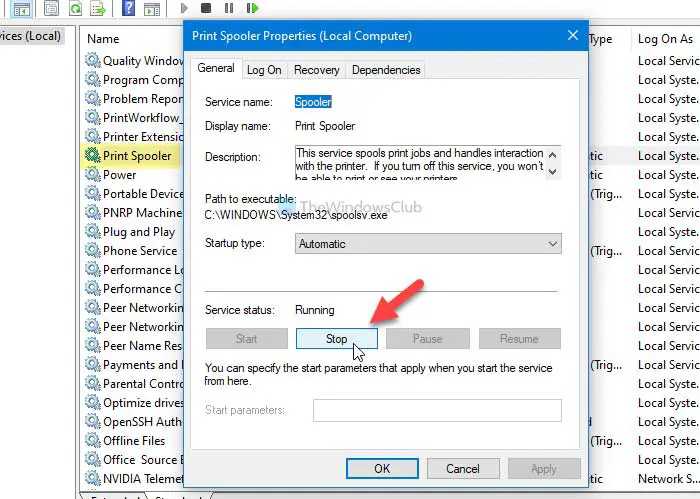
It may take a couple of seconds to complete the task.
Once done, you can click on Start.
6] Update Windows 11/10 Build
If you are using an old build of Windows 11/10, it is recommended to update it to the latest version. For that, you can follow this tutorial to check for updates.
Did these solutions help? Do let us know in the comments.