If SrTasks.exe or Microsoft Windows System Protection Background Tasks is displaying High Disk Usage in Windows 11/10 Task Manager, then this post offers suggestions that are sure to help you fix the issue.
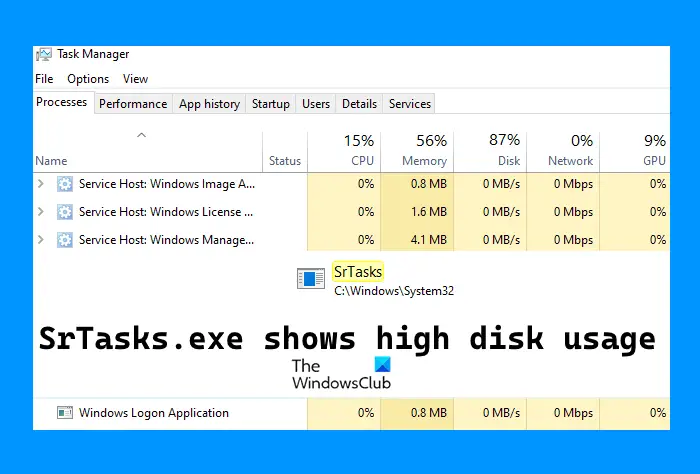
What is SrTasks.exe in Windows 11/10
SrTasks.exe is called System Protection Background Tasks. It is an executable file in Windows 11/10 OS. Windows Task Scheduler uses the SrTasks.exe process to create the restore points automatically. You can find the SrTasks.exe file at the following location on your Windows 10 computer:
C:\Windows\System32

Fix System Protection Background Tasks SrTasks.exe High Disk usage
The following solutions may help you eliminate the SrTasks.exe high disk usage issue:
- Run Performance Troubleshooter
- Run System File Checker & DISM
- Troubleshoot in Clean Boot State
- Turn off the System Restore.
1] Run Performance Troubleshooter
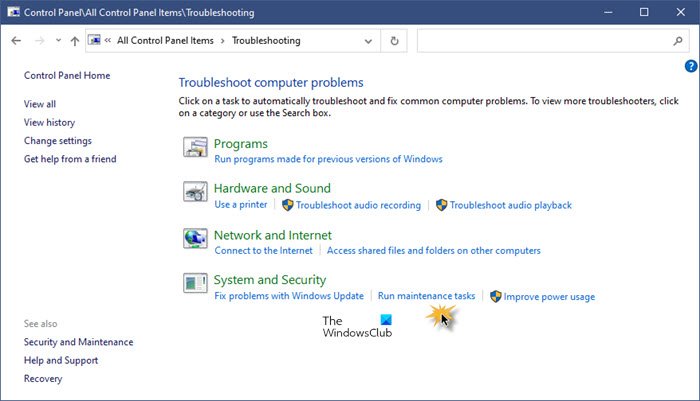
Open ControlPanel > All Control Panel Items > Troubleshooting
Click on Run maintenance tasks to open the Performance Troubleshooter.
Run it and see if it helps.
Related: Fix System and Compressed Memory High CPU, Ram, Disk Usage.
2] Repair System Image & Run SFC
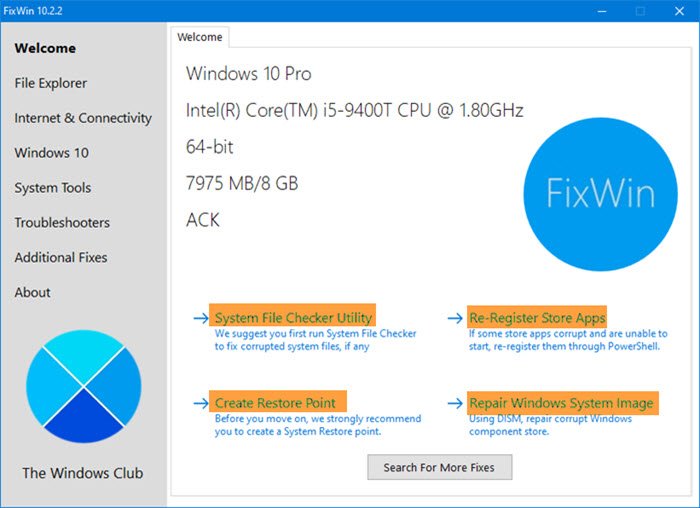
The problem can be because of corrupt System Files. To fix it, we are going to use SFC and DISM commands.
While you can use the Command Prompt, you can also download and use our portable freeware FixWin to repair the System Image using DISM, and Run System File Checker with a click. You will see the links on it Welcome page itself.
3] Troubleshoot in Clean Boot State
You may also experience this issue due to some apps or software. The Clean Booting process will help you identify the problematic apps and software.
By troubleshooting in Clean Boot State, you will be able to know if there is any app or software installed on your system that is creating the trouble. If you find such an app or software, first, boot your computer in normal mode and then uninstall it.
4] Turn off System Restore
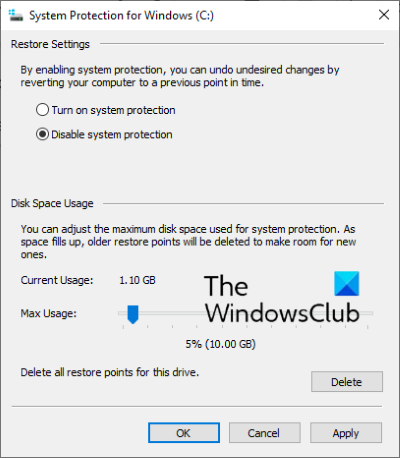
As we have explained earlier in this article, the SrTasks.exe process creates System Restore points automatically, you may find this process running in the background. If the process is causing high disk usage, disabling the System Restore in Windows 10 can help you fix this issue.
Before you proceed, keep in mind, Windows will not create the System Restore points on your computer automatically after you disable the System Restore. Hence, if any problem occurs, you will not be able to restore your system to the previous working state.
Follow the process explained below:
- Open Run command box using Win+R hotkey
- Type
systempropertiesprotection - Press the OK button.
This will open the System Protection tab directly in the System Properties.
Now, click on the Configure button and a new box will open. There, select the Disable system protection option. After that, click Apply and then OK to save the settings.
If you want to enable the System Restore process again, revert to the process explained above.
Hope this helps.
Can I disable Microsoft Windows System Protection Background Tasks?
To disable Microsoft Windows System Protection Background Tasks you need to disable System Restore – and yes that is something you can do if you want to.
Can I delete SrTasks.exe?
You may have this question in your mind. If SrTasks.exe is creating trouble by showing 100% disk usage, should you delete it? Well, we do not recommend you delete the SrTasks.exe. Under the normal permissions, you cannot delete the file, but if you think that you will delete it by taking ownership, it may cause serious errors in your system.
The process may take the high disk and high CPU usage while creating the System Restore points. You should give it an hour, after which the disk or CPU usage will drop automatically. If it doesn’t, restart your computer or apply the fixes that we have described above in this article.
Is SrTasks.exe safe or a virus or malware?
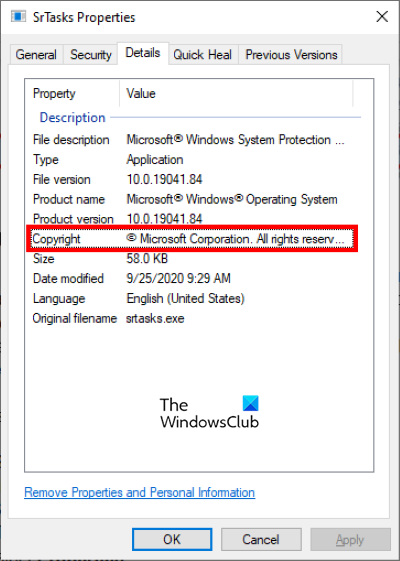
According to some users, their antivirus software flagged the SrTasks.exe process as a virus or malware. It may be a false positive because SrTasks.exe is a legitimate process. Why do some antivirus tools flag such Windows processes as a virus or malware? The answer is that some malicious programs are named by hackers or cyber criminals after Windows genuine processes to trick the antivirus software. That’s why sometimes, antiviruses generate such false-positive flags.
You can check the legitimacy of the SrTasks.exe process by following the steps below:
- Open Task Manager
- Select the SrTask.exe process
- Right-click on the process and select the Open file location option. This will open the folder where the file is located
- Now, right-click on that file and select the Properties option
- Click on the Details tab in the SrTasks Properties.
If the file shows the copyright of Microsoft Corporation, it is a genuine file.
Related posts: