Some Steam users are unable to update the app and write to its installation folder. The game saves the progress but every time they try to launch it, they get the following error.
The Steam install folder is currently not writable which can cause issues with some Steam features and running games.
Steam needs to repair the problem and then restart.
When one clicks on the Repair button, nothing happens as the error message again comes back. The Ignore button removes the error pop-up but it comes back the next time they try to launch the same game. In this post, we will see what you can do if the Steam install folder is currently not writable.
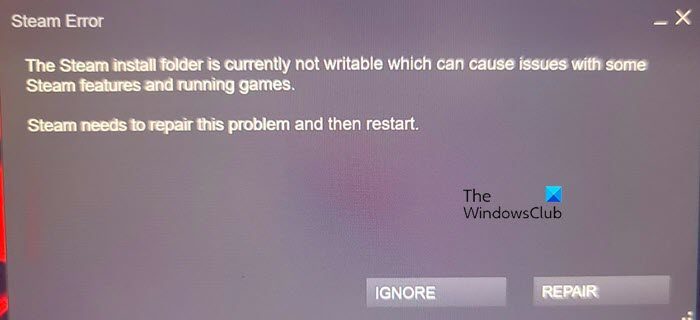
The Steam install folder is currently not writable which can cause issues with some Steam features and running games
If the Steam Install Folder is currently not writable message keeps flashing on the screen, follow the solutions mentioned below:
- Reboot the device and open Steam with administrative privileges
- Delete the problematic game folder and check if the Steamapps folder is Read-only
- Delete the corrupted cache
- Change the Steam Installation folder
- Repair the installation folder
- Take full ownership of the Steam folder
- Allow the app through the firewall
- Reinstall Steam
Let’s get started with this troubleshooting guide.
1] Reboot the device and open Steam with administrative privileges
First and foremost, check out that the issue is not because of minor glitches in the device. These glitches are notorious for causing such issues so reboot your computer. However, this time, when you open Steam, launch it with administrative access. You can do that by right-clicking on the app and selecting Run as administrative. This will allow Steam to access some important filesystems.
2] Delete the problematic game folder and check if the Steamapps folder is Read-only
If Steamapps folder attributes are set to Read-only, then this can cause the existing issue. In this solution, we are going to tweak some changes to make sure it’s in the Read-only mode. However, before that, we need to change permissions of the problematic games folder and then delete it. Follow the steps mentioned below to do the same.
- Close the Steam Client app and end its task from the Task Manager.
- Then open the File Explorer and navigate to C:\Program Files (x86)\Steam\steamapps\downloading.
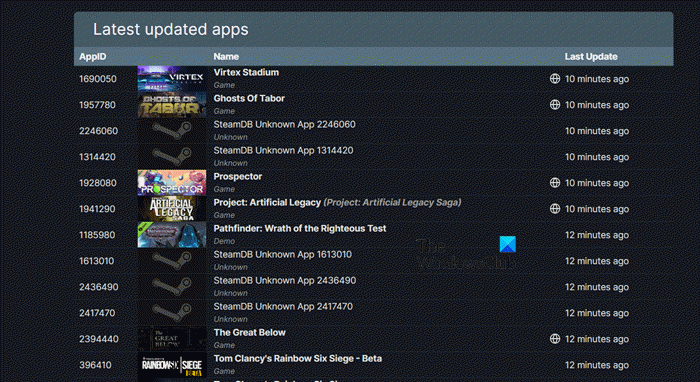
- Then navigate to steamdb.info to find out the number associated with the problematic game.
- Once you have that number, right-click on the folder and select Properties.
- Now, navigate to Security > Advanced.
- Click on the Change button next to Owner.
- In the Enter the object name to select you need to enter your username or of the user that’s getting this error and click on Check Names. In case, it doesn’t yield any results, click on Advanced and then find the correct user.
- Then, click Ok.
- Once you are back to the Advanced Security Settings window, tick Replace owner on subcontainers and objects and click Ok.
- Now that you have ownership of the folder, all that is required is to delete it.
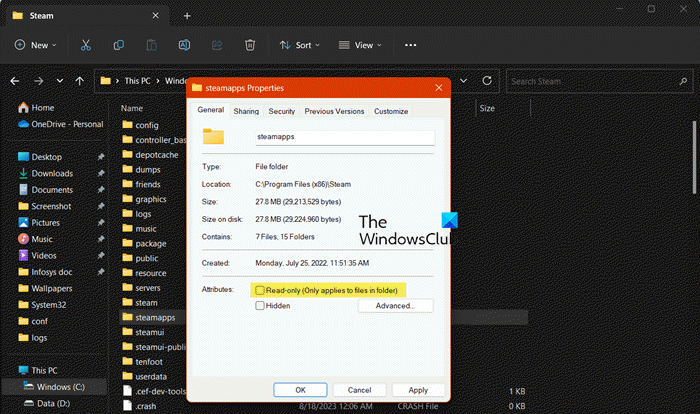
Once you have deleted the folder, go back to the Steam folder as we need to make some changes to the Steamapps folder.
- Open the File Explorer, and go to the “Steamapps” folder.
- Now, right-click on it and select Properties.
- Navigate to the General tab, untick “Read-only“, and click the OK button.
Now, check if the issue is resolved
3] Delete the corrupted cache
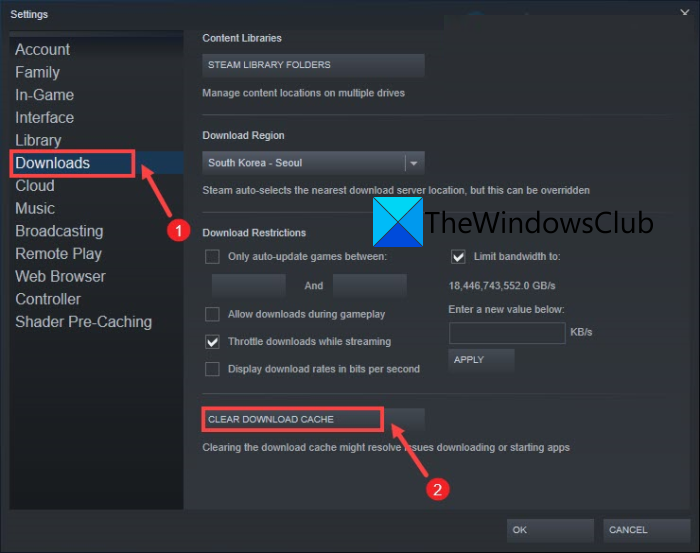
Caches are important but once they get corrupted, they cause such issues. Therefore, delete the cache and see if it helps.
- Launch Steam, click on Steam and then select Settings.
- Select the Downloads option, and then Clear Download cache option.
- Now, click the Clear cache button, and follow the on-screen procedures to confirm the decision.
After the process is complete, Steam will automatically reboot.
4] Change the Steam Installation folder
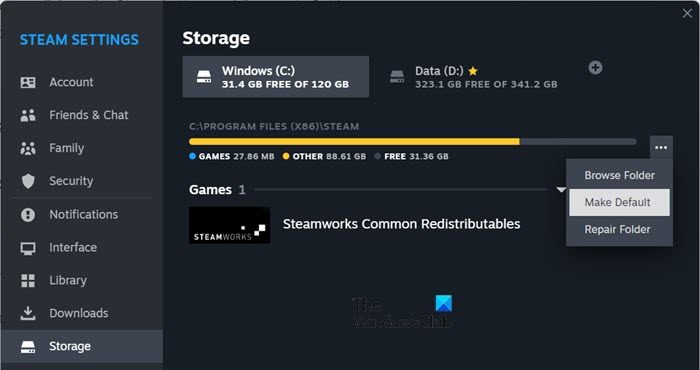
Sometimes, Steam fails to detect the presence of an installation folder even though it is added. In that case, we can add a different folder and make it default.
Here’s how to add the Steam Installation folder:
- Launch Steam, click on the Steam button, and then go to Settings.
- Find and click on the Storage button.
- Click on the Plus icon, select the target folder, and hit the Add button.
- Select the newly added folder, click on the three dots, and select Make default
Now, relaunch Steam, and see if this works or not.
5] Repair the installation folder
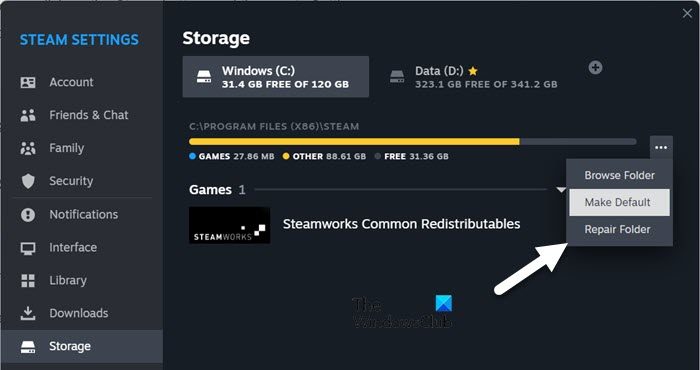
Steam will refrain from considering your folder as writable if the folder itself is corrupted. In that case, we need to repair the Steam folder. Follow the steps mentioned below to repair the Steam Library folder
- Launch Steam, and go to the Settings tab.
- Go to Storage.
- Select a folder, click on the three dots, and select Repair Folder.
Once clicked, Steam will start repairing the issues, and fingers-crossed, there won’t be any more issues.
6] Take full ownership of the Steam folder
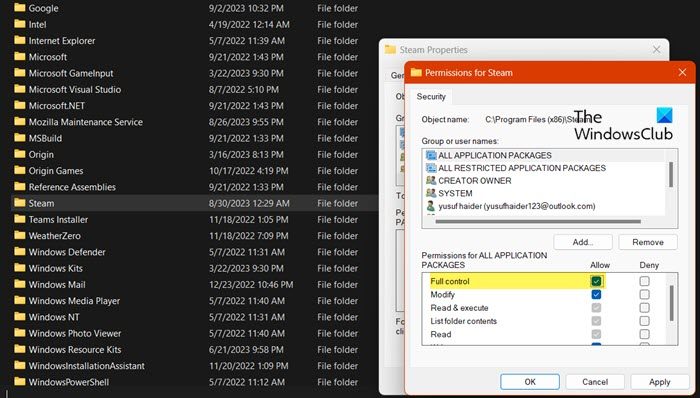
Now, let us take a step back and see if there is something wrong with the Steam folder. The only thing that can go wrong with the Steam folder is that you don’t have the ownership to access it. That is why Steam is unable to write to your computer. To take control of the folder, follow the steps mentioned below.
- Click Win+E to open the File Explorer, and then type the following address in the Address bar:C:\Program Files (x86)
- Hit the Enter button, click on the Steam folder, and click Alt+Enter to open its Properties window.
- Once opened, click on the Security tab, and then on the Edit button.
- Select the user profile > Edit button > check the Full Control box.
- Finally, click the Apply button, and then the OK button.
In case, you get any message when taking control of the folder, take ownership of the folder first as we did with the Steamapps folder earlier.
This should do the job for you.
7] Allow the app through the firewall
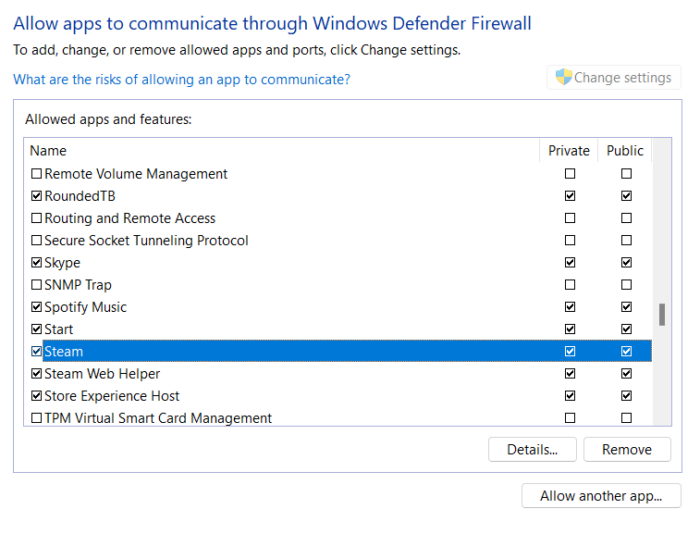
At times, there have been various occurrences where third-party antivirus apps and in-built Firewalls meddle with Steam processes. It’s strongly discouraged to disable the antivirus and push the computer in harm’s way; therefore we recommend taking a safer approach, that’s allowing the app through the firewall, or adding it to the exception list. This way, your system’s security, and the app’s functioning will be protected.
8] Reinstall Steam
If nothing mentioned above could help you get past this error message, then there is definitely something wrong with your app installation. This can only be solved if you reinstall the app. So, go ahead and uninstall Steam. Once done, install a fresh copy of the app. This should do the job for you.
Hopefully, you can resolve the issue using the solutions mentioned in this post.
Read: Steam Game unpacking slow
How do I make my Steam drive writable?
You might get Steam library folder must be writable error if the Steamapps folder is set to Read-only. In that case, we first need to delete the folder of the problematic game and then reconfigure the Steamapps folder properties to make it writable.
Read: Fix Steam Slow disk usage issues.
How to fix the Steam install folder is currently not writable?
If the Steam install folder is currently not writable, first of all, reboot your system but this time, open Steam as admin. In this case, giving administrative privileges is to no avail, we need to change the permission of the folder and if that doesn’t work, we will repair it. If you want to know more, scroll up and check out the solutions.
Leave a Reply