If you want to stop the UAC from appearing when using the Repair option for programs in Windows 11/10, here is how you can do that. You can use the Registry Editor to disable or turn off UAC when using the Repair option for any installed program, app, or game.
When you use the Repair option in Settings or Control Panel to repair an installed program, the UAC appears. It asks for administrator credentials since many internal files change when you repair a program. If you are the only user of your computer, you might want to disable it for some reason. If so, then this post will help you.
Stop UAC when using Repair option for Programs in Windows
To stop the UAC from appearing when using Repair option for programs in Windows 11/10, follow these steps:
- Press Win+R to open the Run prompt.
- Type regedit > hit the Enter button.
- Go to
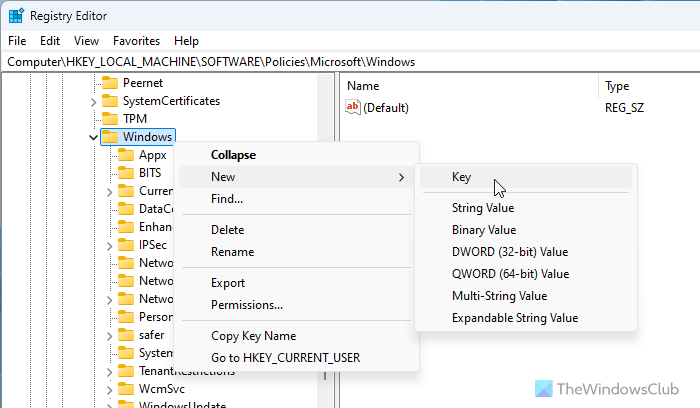
HKEY_LOCAL_MACHINE\SOFTWARE\Policies\Microsoft\Windows - Right-click on Windows > New > Key.
- Name it as Installer.
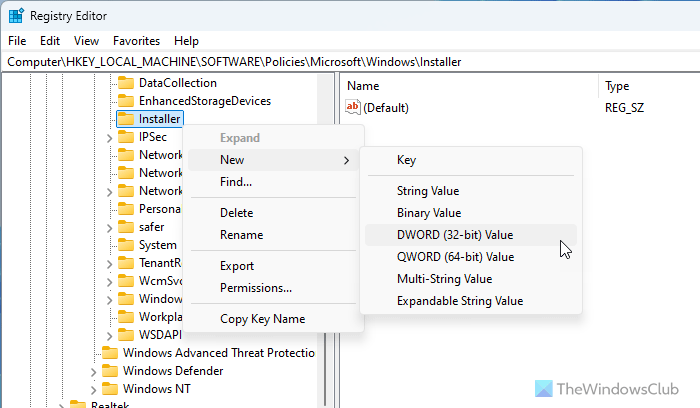
- Right-click on Installer > New > DWORD (32-bit) Value.
- Name it as DisableLUAInRepair.
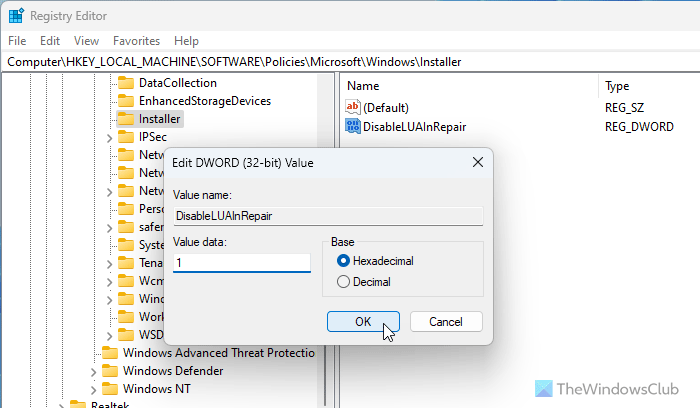
- Double-click on it to set the Value data as 1.
- Click the OK button.
- Restart your computer.
First, you need to open the Registry Editor on your computer. For that, press Win+R to open the Run prompt, type regedit, hit the Enter button, and click on the Yes button on the UAC prompt.
Once the Registry Editor is opened, you need to navigate to this path:
HKEY_LOCAL_MACHINE\SOFTWARE\Policies\Microsoft\Windows
Here you need to create a sub-key. For that, right-click on the Windows key, select New > Key, and set the name as Installer.

However, you do not need to follow this step if you already have the Installer key present. Instead, you can follow the next step, which is to create a REG_DWORD value.
For that, right-click on the Installer key, select New > DWORD (32-bit) Value, and name it as DisableLUAInRepair.

By default, it comes with a Value data of 0. You need to double-click on it and set the Value data as 1.

Finally, click the OK button to save the change. Then, close all the windows and restart your computer.
However, you have two options if you want to revert this change or get the UAC prompt when using the Repair option.
- First, you can set the Value data to 0.
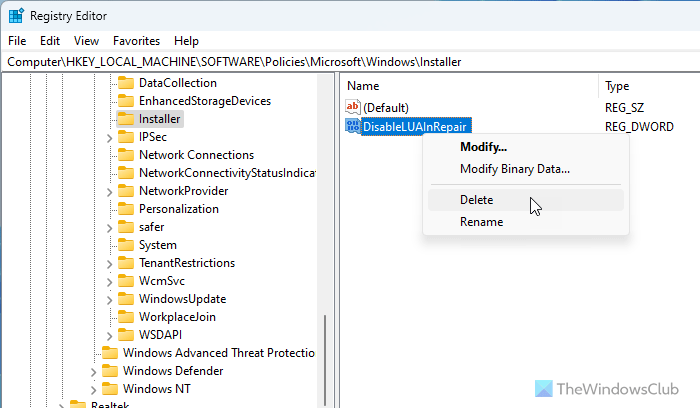
- Second, you can delete the REG_DWORD value. For that, right-click on the DisableLUAInRepair REG_DWORD value, select the Delete option, and click the Yes button.

I hope this guide helped you.
Read: Change, Enable, Disable User Account Control (UAC) settings
How do I stop a program from prompting UAC?
To stop a program from prompting UAC, you need to press Win+R, type msconfig, and hit the Enter button. Then, go to the Tools tab, select the Change UAC Settings option, and click the Launch button. Drag the slider to the Never notify section and click the OK button.
How do I remove user account control from a program?
There is no option to remove user account control from a specific program, so you need to disable the UAC for all apps. To do so, open the Control Panel and go to User Accounts > User Accounts > Change User Account Control settings. Then, drag the slider to the bottom of the line and click the OK button.
Leave a Reply