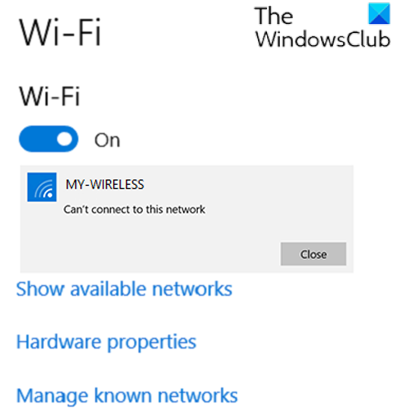
If you are experiencing the issue whereby your Surface device finds available wireless network but won’t connect, then this post is intended to help you. In this post, we will offer the most suitable solutions you can try to resolve this issue successfully.

Surface device finds available wireless network but won’t connect
If you’re faced with this issue, you can try our recommended solutions below in no particular order and see if that helps to resolve the issue.
- Check Wi-Fi settings on your Surface
- Verify the correct password for your router
- Check your network on another device
- Ensure MAC address filtering is enabled
- Run Network Troubleshooter
- Update/Install WiFi drivers
- Use wired connection
- Change Network Connection Priority
- General fix for WiFi issues
Let’s take a look at the description of the process involved concerning each of the listed solutions.
Before you try the solutions below, check for updates and install any available bits on your Windows 10-powered Surface device and see if the issue is resolved.
1] Check Wi-Fi settings on your Surface

Your first attempt to resolve the Surface device finds an available wireless network but won’t connect issue is to check the WiFi settings on your Surface device.
Go to Start, and select Settings > Network & Internet > Wi-Fi and make sure the WiFi button is toggled to On. Also, go to Settings > Network & Internet > Airplane mode and make sure Airplane mode is also Off.
Verify our wireless network is in the list of available networks and the wireless network icon is in the taskbar.
If all these pre-checks are in order, but the issue is still present, try the next solution.
2] Verify the correct password for your router
Here, you need to verify the correct password for your router. If you’re not sure what your network password is, you can find your wireless network password. If you can now connect to your wireless network, then good; if not, try the next solution.
3] Check your network on another device
If your wireless network appears in the list of available networks on your Surface but you can’t connect, you should first make sure the network is working properly on another device. Check if you can connect to your wireless network and go online from another PC, tablet, or smartphone.
If you can’t connect to your Surface or any other device, the problem might be with the network or hardware itself. In this case, you can try restarting your internet device (modem, router) and also restart your Surface device and re-connect to Wi-Fi.
On the other hand, if you can connect to Wi-Fi on another device but your Surface still can’t connect, in addition to restarting your Surface device, check and, if needed, correct your date and time settings on your Surface.
If you’re still unable to connect, try the next solution.
4] Ensure MAC address filtering is enabled
Wireless routers can prevent unauthorized network access by using a feature called MAC filtering. So, this could be a potential culprit here.
If MAC filtering on your router is turned on, try one of the following:
- Turn off MAC filtering temporarily to see if that is preventing your Surface from connecting to your wireless network.
- Add the MAC address of your Surface to your router’s authorized list.
To change MAC filtering settings on your router or to add the MAC address of your Surface to your router’s authorized list, refer to the info that came with your router or go to the hardware manufacturer’s website. If you change your router’s MAC filtering settings, restart your router before trying to connect your Surface to your wireless network.
If you still can’t connect, contact your ISP or the manufacturer of your wireless router and report that you can see your wireless network from multiple devices but can’t connect to it.
Read: How to reset Surface Earbuds to the default factory settings.
5] Run Network Troubleshooter
This solution requires you to run the inbuilt Network Troubleshooter for Windows. The wizard can help diagnose and fix Wi-Fi problems on your Surface device.
Read: Wireless Network works on other devices but not on Surface
6] Update/Install WiFi drivers
This solution requires you to update/install the WiFi drivers for Windows as well as download the latest firmware and drivers for your Surface device.
7] Use wired connection
This is more of a workaround than a solution. Here, you can simply use a wired (ethernet) connection.
8] Change Network Connection Priority
Generally, there’s no reason to change network connection priority, because Windows 10 computer chooses the right network connection. But if you want to select a preferred network and want to automatically connect to it, or you just want to make the connection sequence different, then you can change network connection priority.
9] General fix for WiFi issues
This guide will show you how you can troubleshoot WiFi problems in Windows 11/10 and use it without any problems on your Surface device.
Hope this helps!
Related post: Wi-Fi Settings are missing on Surface device