Recently, some owners of the Surface Laptop have been talking about an issue where the fans are concerned. Apparently, the fans are running very loud, more so than usual. This tends to happen when the device is plugged in, which is quite strange if you ask us.

One user said he was playing Minecraft, which is not a heavy game. Another was merely browsing the web, yet the system’s fans were going nuts. If you’ve been experiencing this issue, do not worry—we know how to fix it.
Surface Laptop fan is loud & running constantly
If your Surface Laptop fan is noisy & loud, and runs constantly, making the device hot, here are a few things you can do to address the problem.
- Adjust CPU performance
- Maximum processor state
- Run Power Troubleshooter.
1] Adjust CPU performance

You see, the meat of the problem here lies in the performance of your CPU. When the system runs on battery power, the operating system, which is Windows 10 in this case, automatically throttles the performance for more battery life.
When the device is plugged in, performance goes up, usually to Recommended. At this level, you will get decent performance, but less heat, therefore, the fans won’t spin as fast. However, if you had made changes in the past where the CPU is at Best Performance when plugged in, it means the fans will go into overdrive to keep the Surface Laptop cooled. Henceforth, there will be a lot of noise from the fans.
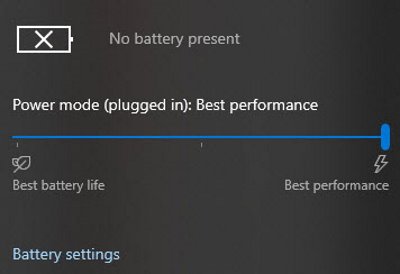
The plan, then, is to set the Power Mode to Recommended. We can do this on the Surface Laptop by clicking on the battery icon on the taskbar and dragging the blue button down until we see the word Recommended.
From there, the fans should stop with their madness; but if that doesn’t work, just simply follow the next step.
2] Maximum processor state

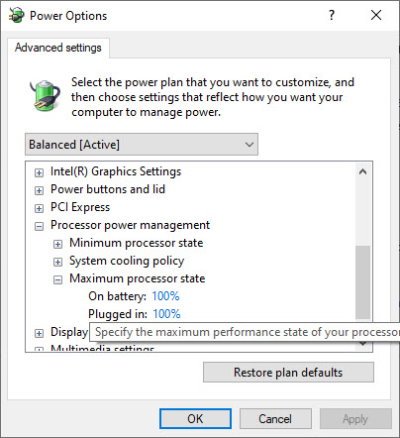
Maximum Processor Usage is all about the processor’s performance when the computer is plugged in. By default, it should be at 100 percent. But we want to bring it down to 90 percent peak performance, so how do we do that?
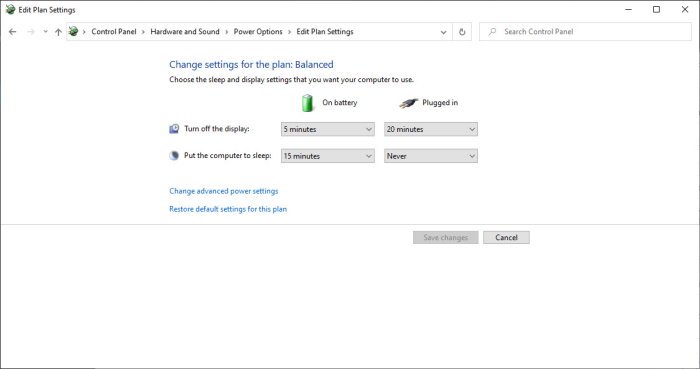
First, we must open the Control Panel by searching for the name via the search section. Once it comes up, select it, then navigate to Hardware and Sound > Power Options > Edit Plan Settings. From there, click on Change advanced power settings, and from the window that pops up, look for Processor Power Management, then Maximum Processor Rate.

Edit the plugged-in section from 100 percent to 90 percent. Hit Apply, then OK, and see if the fans are now running normally.
3] Run Power Troubleshooter
Run the built-in Power Troubleshooter and see if it helps you.
Additional reading: How to fix Overheating and Noisy Laptop Fan issues.
Leave a Reply