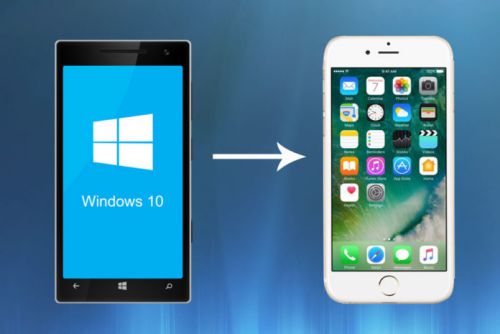
The Windows 10 Mobile Phone OS is a great OS if I may so say, and it is unfortunate that Microsoft has seemingly decided to abandon this platform. Sure rumors of the Surface Phone have been doing the rounds, but not many are ready to wait for it. Several Windows Phone users have decided to move over to the iPhone or the Android OS. Now if I’d say that the large numbers of users haven’t been seduced by the likes of new entrant iPhone 8, iPhone 8 Plus, and iPhone X despite their exorbitant pricing, that would be a blunt lie. You might have grown tired of Windows Phone because of the sad truth that they aren’t competing well in the market right now.
You have spent a reasonable amount of time with your Windows Mobile Phone. Undoubtedly, you have a substantial amount of data stored on your device including pictures, videos, calendars, favorite music, apps, messages, and more.
So, if you have finally decided to move from Windows Phone to the iPhone, you are sure to have a lot of questions like – How to switch from a Windows phone to iPhone? How to transfer contacts from a Windows Phone to iPhone? And of course, how to transfer photos from Windows phone to iPhone? Right?
It is pretty straightforward to migrate from Windows phone to iPhone, but it is important to follow the procedure carefully, so you don’t lose any of your valuable data. Worry not, we have curated the step by step guide on how to switch from a Windows Phone to iPhone that provide all the answers to your possible queries.
How to switch from a Windows Phone to iPhone

Step 1: Backup your Windows Phone Data
Backing up your phone’s data evidently is the first and foremost thing to do. As luck would have it, Apple made it pretty easy for you considering that you have been using Microsoft account to manage your contacts, calendar, and email. Now that you have all the backup, you can easily sync these three entities as Apple’s iPhone supports Microsoft account straight out of the box.
The first thing you need to ensure is that your Windows phone is syncing all your data to Microsoft’s cloud service. You simply need to upload your emails, calendar, and contacts to your Windows Live account or store them via OneDrive.
Step 2: Moving Contacts, Calendar, Email from Windows Phone to iPhone
Assuming that you have backed up your data using your Microsoft account, next step is to transfer that data to iPhone.
- Get an Apple ID – To set up a new iPhone, you are going to need an Apple ID as, without this one, you won’t be able to sign in or download apps. Create an Apple ID here.
- Once you activate your new iPhone, its time to bring all the information you have uploaded to your Microsoft account over to your iPhone. The best and easiest way to do this is to set up Outlook on your iPhone; it will take just a minute or two. You just need to navigate to the settings in the iPhone, tap mail, contacts, calendars. Then tap add account and select Outlook.com. Now fill up your Email and password and tap next.
- Now that the account has been added, what next? You need to make sure that you enable syncing for all the data you want to transfer to your iPhone. Tap on mail, contacts, calendars, and note switch to turn on and synch your data. When the sync is not, the switch is green.
- However, this is not the only way. You also have an option of using Microsoft’s Outlook app available on App Store to manage your calendars and email. Download Outlook from the Apple App Store.
Step 3: Transfer Photos and Music to iPhone
You can always start fresh with the new phone’s photo library with new memories. But you chose not to, and that’s what brought you here. We get that. Cloud services like Dropbox and OneDrive both are accessible on iOS and Windows devices. These services are the best solution for uploading and downloading your music and photos. Read on to know how you do can do that.
- If you have been using Windows 10 Mobile, then the chances are pretty high that your photo library set to auto upload on OneDrive. If not, there is still time you can do it and upload your entire photo and music library to Microsoft’s cloud. With this simple step, you will just need to install the OneDrive application from App Store, and you’ll have access to all of your pictures and videos instantly no matter wherever you are. Download OneDrive for iOS.
- The Dropbox app for Windows also works similarly. Make sure you have uploaded your Windows phone data to Dropbox. Then install the Dropbox application for iPhone, and you can download the content on your new iPhone. Download Dropbox for iOS.
Step 4: Set up OneDrive to Transfer Documents
First and foremost, make sure all the documents and information you need is already there on the OneDrive app in Microsoft Windows. The documents you create on your Windows Phone will be synced with Microsoft’s OneDrive Cloud Service. Open OneDrive and check once that all the files you want to have on your iPhone are there. Since you’ve already downloaded OneDrive for iOS by now to sync your rest of the data, the documents should automatically sync with your new device.
Hopefully, the switch from a Windows Phone to iPhone will be as painless as possible with the help of this step by step guide.
Considering Microsoft’s strong support for iOS & Android now, with a little work you’ll be able to get started with your new iPhone in no time without having to start again from scratch.
Planning to switch to Android? Read our post on how to switch from Windows Phone to Android Phone.