If System Restore is disabled or greyed out on your Windows 11/10 computer, this article will help you resolve this problem, so you can turn on System Restore. System Restore is different from System Backup. It captures resident programs, their settings, and Windows Registry as an image and backs up a few things that are necessary to reconstruct the system drive to the point – if you opt to go back.
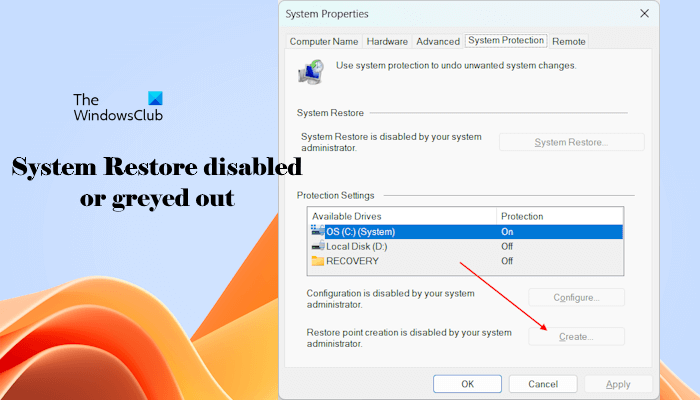
By default, System Restore is enabled on all Windows operating systems, including Windows 11 and Windows 10. However, some users who upgraded their computers reported that their System Restore feature was turned off. Due to this, they cannot create System Restore Points on their computers.
When you try to run System Restore, you may see a message:
You must enable system protection on this drive
It is therefore imperative that all users check if System Restore is enabled on their systems and if not to turn it on. This post will show you how to turn on or enable System Restore in Windows 11/10.
Turn On System Restore in Windows 11/10
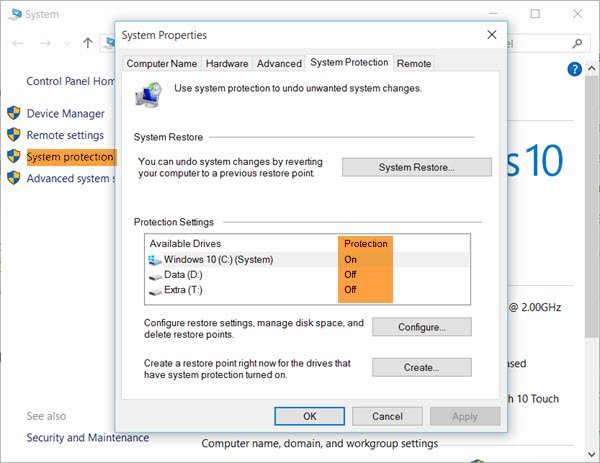
To check if your System Restore has been disabled or not, type Control Panel in Start Search and hit Enter to open it. Click on System to open the Control Panel’s System applet.
In the left pane, you will see System protection. Click on it to open System Properties. Under the System Protection tab, you will see the Configure option.
Ensure that Protection is set to ‘On’ for the System drive.
If not, select the System Drive or C Drive and press the Configure button. The following box will open.
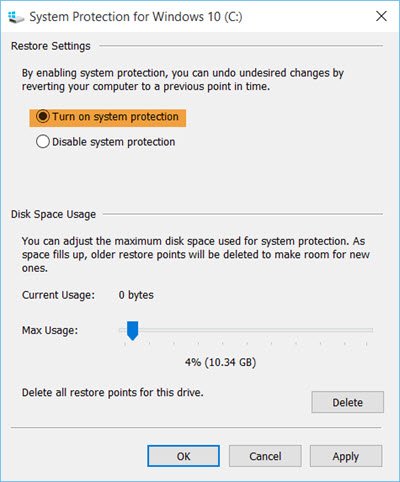
Select Turn on system protection and click on Apply.
In Windows 11, you cannot open the System Properties window from the Control Panel, as some Control Panel settings are redirected to the Settings app in Windows 11. Therefore, Windows 11 users can go through the following instructions to enable System Protection on their systems:
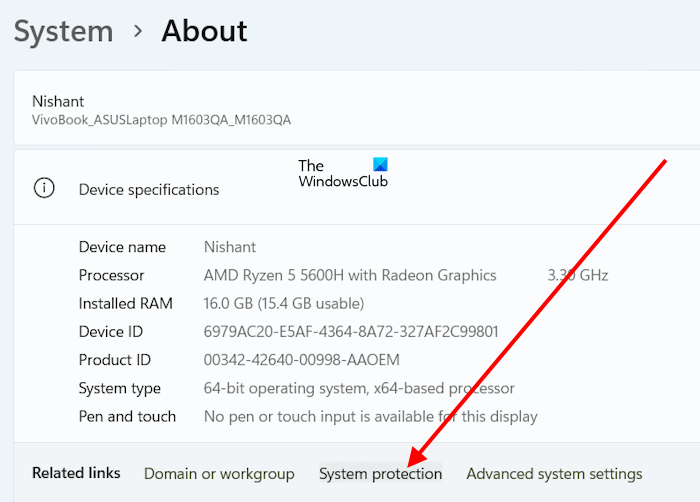
- Open Windows 11 Settings.
- Go to System > About.
- Expand the Device Specifications tab.
- Click on the System Protection link.
That’s it! You will have enabled System Restore on Windows 11/10.
Having done this, you will want to immediately create a system restore point first. Do that and check if it has been created.
Turn on System Protection is greyed out or missing
If the Turn on System Protection option is greyed out or missing on your Windows computer, maybe System Restore is disabled by your system administrator. In this case, you need to contact your system administrator to enable System Restore on your system.
If you are logged in to your system as an administrator but cannot create System Restore Points because this feature is disabled, you should check the Local Group Policy Settings and Registry Editor.
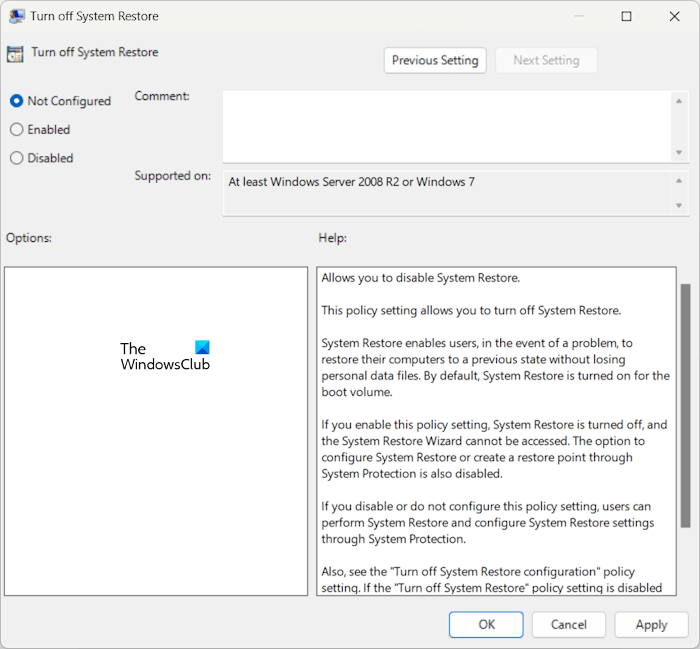
Open the Local Group Policy Editor and go to the following path:
Computer Configuration > Administrative Templates > System > System Restore
Make sure that the Turn off System Restore policy is not Enabled. If yes, disable this policy or set it to Not Configured.
The Local Group Policy Editor is not available in Windows 11/10 Home Edition. You should also check the Registry. Open the Registry Editor and navigate to the following path:
HKEY_LOCAL_MACHINE\Software\Policies\Microsoft\Windows NT\SystemRestore
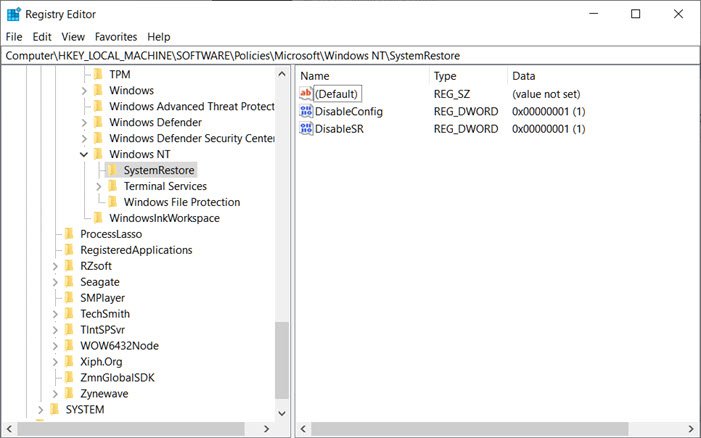
Make sure that the SystemRestore key is selected on the left side. Now, check if the following values are available on the right side. If available, delete them.
- DisableConfig
- DisableSR
You may also use the Enable-ComputerRestore cmdlet. It turns on the System Restore feature. So run the following command in an elevated PowerShell window:
PS C:\> Enable-ComputerRestore -Drive "C:\"
This command enables System Restore on the C: drive of the local computer.
If System Restore is not working and system restore points are not created, you may want to open Run box from the WinX menu, type services.msc to open the Services Manager and ensure that the Volume Shadow Copy & Task Scheduler & Microsoft Software Shadow Copy Provider Service is Running and set to Automatic.
Using system protection on a drive that contains system image backups will cause other shadow copies to be deleted faster than normal
If you see this message after you turn on System Restore, then you need to know this.
System protection (System restore) uses a reserved space to backup file versions for every Restore point. Now as this reserved space starts filling up, older versions start getting deleted. Now if you have configured your Windows Backup to save System Image Backups to this drive, then because these image backups take up large disk space, the other file backups (shadow copies) will start getting deleted faster. If this is your case, then Windows warns you about this.
So in this case, you can let the reserved disk space settings remain as it is knowing that the shadow copies will get deleted faster or you may increase the Reserved Space allotted to System protection.
That’s it. I hope this helps.
What happens if you disable System Restore?
System Restore is a built-in tool in Windows 11/10 that allows users to create different restore points so they can restore their computer systems to the previous working state whenever a problem occurs. Windows also creates System Restore Points automatically. If you disable System Restore, neither you nor Windows will be able to create restore points; and you cannot restore your system if any problem occurs.
Should I enable System Restore?
System Restore is a helpful tool in Windows computers. This tool helps users restore their computer system to the previous working state if any problem occurs. Therefore, System Restore should be enabled on your system. However, you can disable it but in this case, you won’t be able to create system restore points.
Read next: The restore point could not be created for the following reason.
Who cares!
After upgrading to #Windows10 Build 10525, System Restore was turned off for me…so please check after upgrade and turn it on.
mine was turned off by default
Those who’s computer got encrypted for money cares…
Good to know.. thanks
Thank you man!
Thank you for sharing the valuable information. It worked well for me.
my pc does not allow me to turn on the system resore every box to turn on is disabled. what to do now?
Try this: http://forum.thewindowsclub.com/windows-tips-tutorials-articles/34531-system-restore-greyed-out-disabled-your-system-administrator.html
Don’t expect the “previous versions” tabs on folders to start
working, like in Windows 7. For that you ALSO need to go into Services
and enable “Volume Shadow Copy”.
(It’s all very well trying to push the
new Win10 feature “File History” but not so much fun when you needed it, and discovered it’s not working by default, as before,)
How much should data should I allow it? My C drive is a 117GB capacity SSD with 91.9 used space
Right click start – system goes to About Windows 10 (completely different screen), and not to System. There’s no option for system protection.
Type Control Panel in Start Search and hit Enter to open it. Then click on System,
Thanks, now it gives an option to Backup and Restore (Windows 7), Security and Maintenance, File History, Adm tools. Why Windows 7 when I’m in 10?
I was directed to your site as a first step to solving an update problem which takes forever or crashes and slows down the system. I have to keep the computer sleeping or I might not be able to work.
Type sysdm.cpl in Start Search and hit Enter to open System settings.
Windows 10 still uses the Windows 7 syetem backup functionality and so they have retained hat name.
My Windows 10 will not let me enable System Restore that shows that it is disabled. I just formatted a new drive with partitions so that I could have System Restore (and a Recovery Drive on separate) partition(s). Why is this enabling System Restore not working? Some-one-thing locked my 10 into disable System Restore.
Do you mean you have to manually set “Volume Shadow Copy” service to Automatic (default is Manual) on Windows 10 to re-enable file history as it was with Win7 (RMB on a file, and then Properties > Previous versions)?
… wanted to add that enabling System Protection and having saved a restore point, allows you to use also ‘Properties > Previous versions’ to restore the old version of a file/folder/drive at the time the restore point was taken.
After upgrade to 1803, My System Restore was forced off. Thanks, Anand, for the info on the command to reinstate it without having to do complex Regedit hacking!
I fixed mine by going to “system properties” -> system protection -> now at the middle of that window you should see your drives, in my case C drive D Drive (DATA) and Recovery E drive.
They should be off for you, on your first look there under protection. Now, what i did to fix the issue was press on the C drive which is Windows (C) (system) for me, double click on it and press the configure button which should be under it, and once you’re there, you should be able to turn on the system protection.
Note: this might seem stupid but even i tried turning it on, seeing a greyed out option, but once i clicked on C it worked, and after it worked on my C drive, all my other drives were open for recovery… its weird, but i hope it helps, comment on this if it worked for you C: