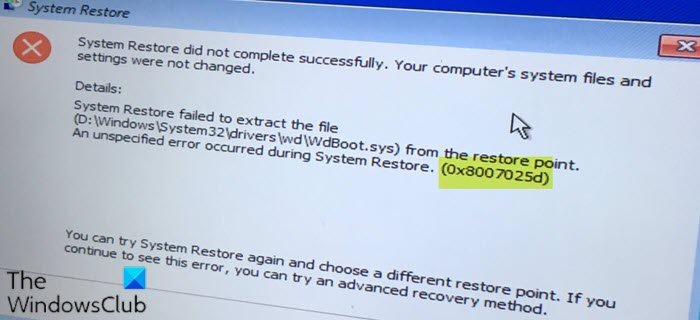
If when you try to perform a system restore but receive the error code 0x8007025d, 0x80070017, 0x8007018b or 0x800701b1, then this post is intended to help you. When you encounter this issue, you’ll receive the following full error message:
System Restore did not complete successfully. Your computer’s system files and settings were not changed.
Details:
System Restore failed to extract the file
(D:\Windows\System32\drivers\wd\WdBoot.sys) from the restore point.
An unspecified error occurred during System Restore. (0x8007025d)
You can try System Restore again and choose a different restore point. If you continue to see this error, you can try an advanced recovery method.

The accompanying error codes could also be 0x80070017, 0x8007018b or 0x800701b1. You’ll encounter this error if the system cannot read, or write to execute the operation. The error may also occur when there are some corrupt system files present on your system. These corrupt system files prevent the system from reverting to an earlier restore point because the files are not compatible with the operating system. In this case, it is WdBoot.sys, which is the Microsoft antimalware boot driver OS file.
Fix System Restore error 0x8007025d, 0x80070017, 0x8007018b or 0x800701b1
If you’re faced with this issue, you can try our recommended solutions below in no particular order and see if that helps to resolve the issue.
- Temporarily disable 3rd-party antivirus program (if applicable)
- Run SFC scan in Safe Mode
- Run DISM scan
- System Restore from Advanced Recovery Environment
- Perform Windows In-Place Upgrade Repair
Let’s take a look at the description of the process involved concerning each of the listed solutions.
1] Temporarily disable 3rd-party antivirus program (if applicable)
Third-party security software installed on your system could trigger this error 0x8007025d during the restore operation. To rule out this possibility, you can temporarily disable the AV program. This largely depends on the security software you have installed. Refer to the instruction manual – generally, to disable your antivirus software, locate its icon in the notification area or system tray on the taskbar (usually in the lower right corner of the desktop). Right-click the icon and choose the option to disable or exit the program.
Try the restore operation again and if it completes successfully, you can re-enable the AV program.
2] Run SFC scan in Safe Mode
This solution requires you to run an SFC scan in Safe Mode and see if the issue is resolved. If not, try the next solution.
3] Run DISM scan
DISM scan is the next viable solution if SFC scan fails to resolve the issue at hand.
See this post if the DISM scan fails with the error message The source files could not be found.
4] System Restore from Advanced Recovery Environment

Since it’s probably because of permission issues, the Advanced Recovery Environment offers better support in this case. You can boot into Advanced Startup Options from within Windows or using a Windows Bootable USB drive.
- Open Windows Settings (Win + I)
- Navigate to Update and Security > Recovery > Click on Restart now button under Advanced Startup
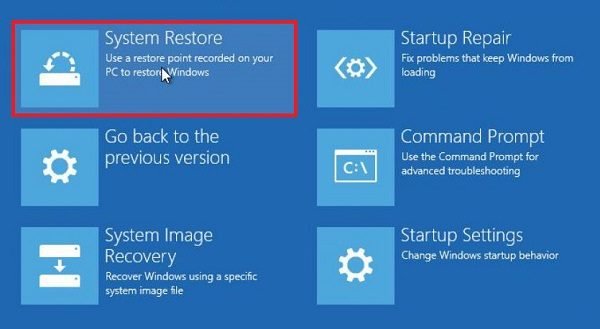
- When in Recovery, click on Advanced Options > Troubleshoot > Advanced Options
- Click System Restore, see if you can go back to an earlier time.
If this works, you will be all set. But if it does not, you have the option to perform startup repair in the Recovery Environment. Do that, and later, try to perform a system restore.
5] Perform Windows In-Place Upgrade Repair
In severe cases of corrupt system files or even corrupt or damaged system image that’s triggering this error, performing Windows in-place upgrade repair will most likely resolve the issue.
Any of these solutions should work for you!
Related post: System restore failed to extract the file, error 0x80071160.
Leave a Reply