System Restore is one of the best ways to revert to the last stable state in Windows 11/10. However, sometimes it fails, and one of the conditions, when it does not work, is after a Windows Update. If you receive Stop Error 0xc000021a, and System Restore stops working after Windows Update, then it’s a known issue for Windows 11/10. In this post, we will share workarounds so that you can restore Windows 11 or Windows 10.

One of the scenarios where the problem occurs is when you clean install Windows, create a restore point, and then install Windows Updates. After installing the updates, when you try to restore, it fails. Instead, you get the Stop error (0xc000021a). It is possible that you cannot even return to Windows desktop in this situation.
When you perform System restore during this scenario, some files are restored only when the computer restarts. This is called staging. In this scenario, Windows restores the catalog files and stages the driver .sys files to be restored when the computer restarts.
However, when the computer restarts, Windows loads the existing drivers before it restores the later versions of the drivers. There is a mismatch in the driver version. Hence the restart process stops, and System restore doesn’t work after Windows Update.
System Restore not working after Windows Update
Now that you know the symptom and the cause, let’s look at the workaround. There are two ways to fix this issue:
- Disable Driver signature enforcement
- Use the WinRE method to restore the system
1] Disable Driver signature enforcement

- Boot your computer into the Windows Recovery Environment (Restart holding down the Shift key).
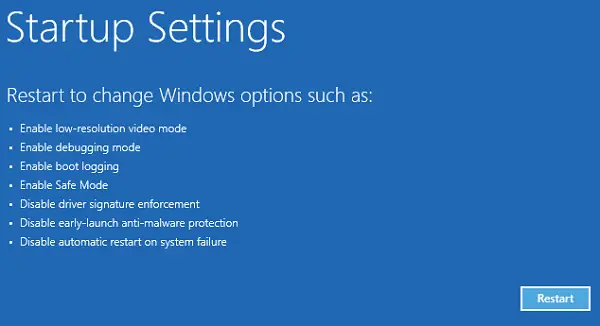
- Select Troubleshoot > Advanced options > More recovery options > Startup settings, and then select Restart now.
- In the list of startup settings, select Disable driver signature enforcement using the arrow keys.
- Allow the startup process to continue.
- Next, when the computer reboots, the system restores process should resume and finish.
2] Use the WinRE method to restore

WinRE also offers an option to perform System Restore, and in this scenario, it works. If you know you are in this situation and have access to the desktop, boot into Windows RE from there, else you need to boot into Windows RE directly. – or the Advanced Startup Options screen
- Select Start > Settings > Update & Security > Recovery.
- Under Advanced options, select Restart now.
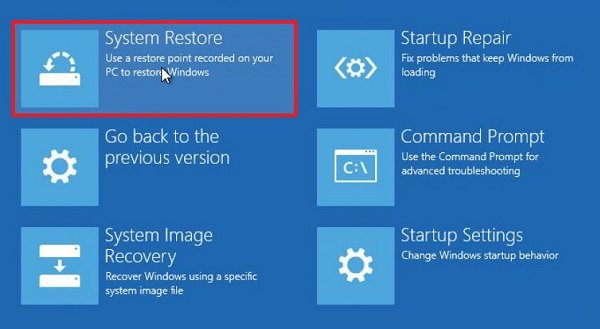
- After WinRE starts, select Troubleshoot > Advanced options > System Restore.
- Enter the Recovery key as on the screen
- Follow the instructions in the System Restore wizard.
This should resolve the problem of System restore not working after Windows Update.
We hope you used the above steps to escape the tricky situation. If system restore fails after an update, always restore using these methods.
These related posts may also interest you:
- System Restore not working, failed, did not complete successfully
- System Restore failed while restoring the directory from the restore point
- System Restore Points are being deleted in Windows
- System Restore Points being deleted on reboot
- System Restore is grayed out.
How do I restore Windows after a bad update?
To restore Windows after a bad update, boot into Safe Mode, go to Settings > Update & Security > Recovery, and select “Go back to the previous version.” Alternatively, use System Restore by accessing System Properties and choosing a restore point created before the update.
Why does my System Restore keep failing?
System Restore may keep failing due to interference from antivirus software. Disabling your antivirus software can often resolve this issue, as it might block System Restore from completing successfully. Ensure to re-enable your antivirus after the restoration process.
How do I force a system to restore?
To force a system restore, search for “Control Panel” and open it. Select “Recovery” > “Open System Restore” > “Next.” Choose the restore point associated with the issue, then click “Next” and “Finish” to start the restoration process.
How do I force a Windows restore?
To force a Windows restore, go to Settings > Update & Security > Recovery, and select ‘Get started’ under ‘Reset this PC’. Choose ‘Keep my files’ or ‘Remove everything’ based on your preference. Follow the prompts to complete the process.
Leave a Reply