If, after you perform a Windows 11/10 update or during an upgrade process and you encounter the SYSTEM SCAN AT RAISED IRQL CAUGHT IMPROPER DRIVER UNLOAD blue screen (BSOD) error, then this post might interest you. In this post, we will provide the solutions that you can try to help remediate this issue.
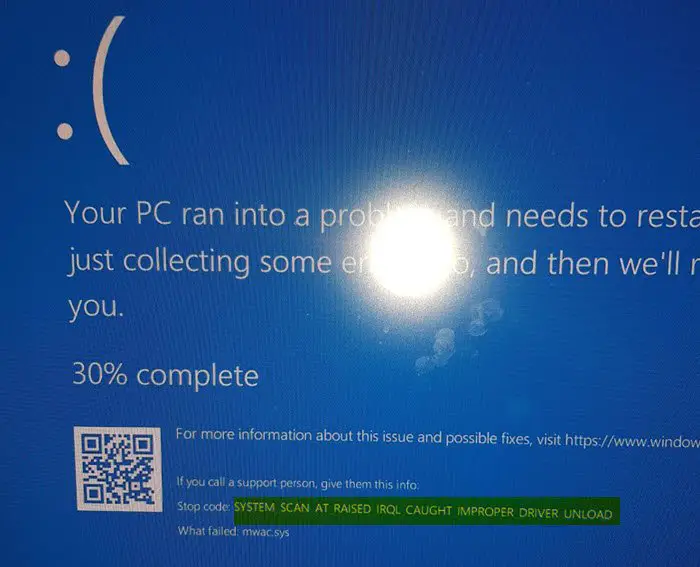
SYSTEM SCAN AT RAISED IRQL CAUGHT IMPROPER DRIVER UNLOAD Blue Screen
The SYSTEM_SCAN_AT_RAISED_IRQL_CAUGHT_IMPROPER_DRIVER_UNLOAD bug check has a value of 0x000000D4. This indicates that a driver did not cancel pending operations before unloading.
This error is caused due to the failure of a driver to unload successfully – and the usual culprits are files like mwac.sys, invprotectdrv64 sys, fpprocess.sys, etc. If you face this issue, first try to identify the file from the Blue Screen. Once you have the file name, identify the driver name with which it is associated.
Having done that, we suggest the following:
- If you installed a new device or drive, then uninstall the driver.
- If you recently updated this driver, use the Rollback feature to go back to the earlier version
- If you have not, then download this driver, update it, and see.
We list our recommended solutions below in no particular order.
- Uninstall the problematic drivers
- Download and install the latest Windows drivers
- Delete the problematic driver file
- Run CHKDSK
- Run Driver Verifier Manager
- Undo Overclocking
- Uninstall third-party antivirus/firewall
- Perform a System Restore
- Repair your computer
When a Blue Screen error occurs, Windows attempts to restart your device automatically. If your system restarts and you are able to use it, you can use the user interface to use the fixes provided below. Otherwise, you have to use the Windows Recovery Environment.
Let’s take a look at the options in detail.
1] Uninstall the problematic driver
Sometimes certain drivers just aren’t compatible with Windows 11/10, and this might cause the BSOD error. In this case, you’ll need to uninstall the problematic drivers. Graphics card drivers are usually the cause of this error.
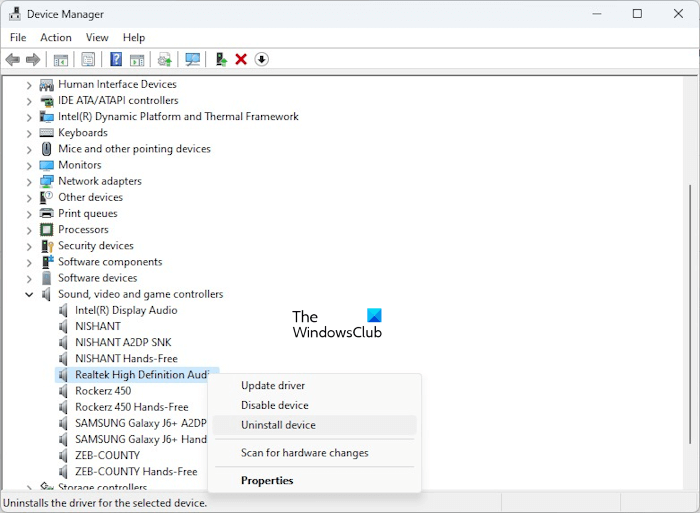
To uninstall the graphics driver, do the following:
- Press Windows Key + X to open the Power User Menu and then press M to select Device Manager from the list.
- Once Device Manager opens, locate your graphic card driver, right-click it, and choose Uninstall device.
- If available, check Delete driver software for this device and click OK.
- Wait for Windows 11/10 to remove your driver and restart your PC.
Alternatively, you can use the Display Driver Uninstaller to remove the graphics card driver.
After your PC restarts, check if the problem appears again. If there are no errors, you can continue using the default driver, or you can try to update the graphics driver to a newer version.
2] Download and install the latest drivers
In order for certain hardware to work with Windows 11/10, it’s necessary that you have an appropriate driver. If a driver for certain hardware is outdated or if it contains bugs, Windows 11/10 won’t be able to use that hardware and you’ll get this BSOD error. In this case, you can try to update the necessary drivers via Device Manager and see if the issue is resolved. Alternatively, albeit I do not recommend it, you can use third-party software to automatically update all your drivers.
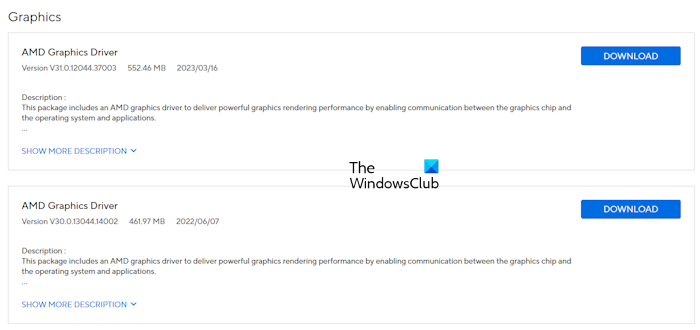
If you don’t know exactly which driver is causing this error, it is always a good idea to update all installed drivers. Updating the driver is relatively simple, and you need to visit your hardware manufacturer’s website and download the latest drivers for your hardware model. Be sure to update as many drivers as you can to fix this error.
3] Delete the problematic driver file
The Blue Screen error message also indicates the driver file that is triggering this issue. In this case, deleting that file from your system can fix this error. The default location of the driver files on a Windows 11/10 computer is:
C:\Windows\System32\drivers
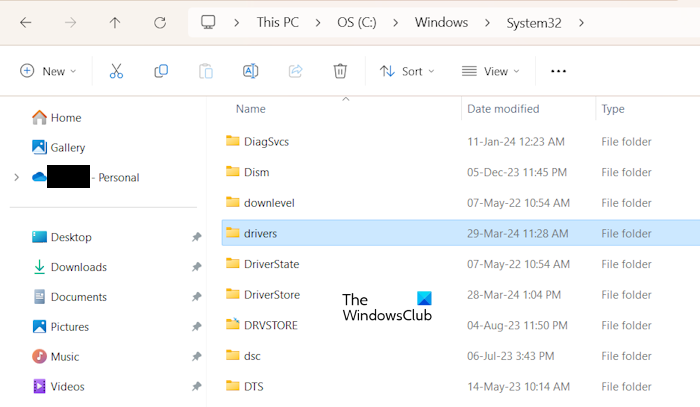
If you can use your system, you can delete the problematic driver file from the directory mentioned above. Before you delete the driver file, we suggest you search for that file on the internet so you can confirm that the problematic file belongs to which software. If you do not find any information regarding the file, do not delete that file. It is better to move the problematic file to an external storage device instead of deleting it.
4] Run CHKDSK
BSOD errors can sometimes occur due to corrupted files on your hard drive, and to find and fix those files, it’s recommended that you perform a chkdsk scan.
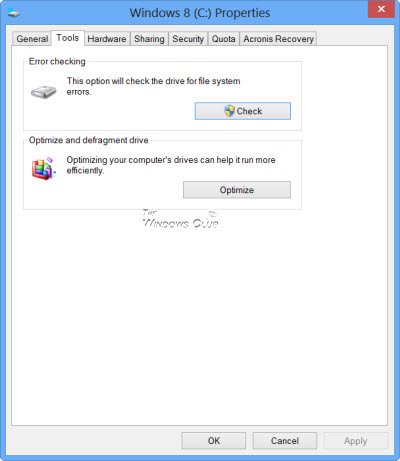
To perform a chkdsk scan, do the following:
- Launch the Command Prompt in admin/elevated mode.
- When the Command Prompt opens, type in the command below and hit Enter. Substitute the X placeholder with the letter that corresponds to your hard drive partition.
chkdsk /r X:
You’ll have to repeat this scan for all hard drive partitions to fix this error. It is worth noting that you won’t be able to scan the C partition while in Windows 11/10, and you’ll get a message saying that your computer needs to restart to scan the C drive.
Furthermore, if you cannot access Windows 11/10 at all due to this error, you can run Command Prompt by following these steps:
- Interrupt the boot process (power on your PC and as soon as you see the Windows logo, press and hold the power button to turn off your PC) three times in a row to start Automatic Repair.
- Choose Troubleshoot > Advanced options > Command Prompt.
- Run the chkdsk scan.
5] Run Driver Verifier Manager
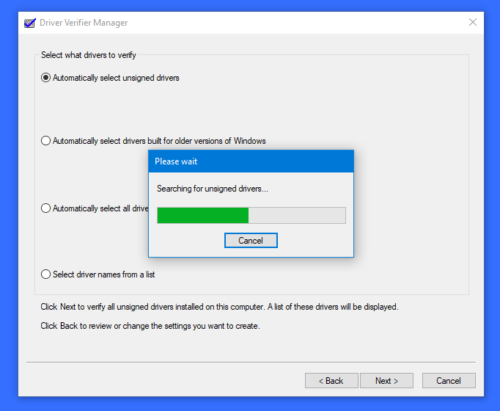
Windows has, what is called, Driver Verifier Manager. It’s a very useful tool to identify problematic drivers. To open it type verifier in Start menu search box and hit enter. The Driver Verifier Manager tests each specified driver at startup. If it detects a problem, it identifies it and then stops it from running.
6] Undo Overclocking
Many users tend to overclock their hardware in order to get better performance, but overclocking your hardware comes with certain risks and it might cause the BSOD error. In this case, you can fix this error by setting your RAM settings to default. Bear in mind that almost any overclocked component can cause this error, so be sure to remove all overclock settings.
If your PC isn’t overclocked, this error could be caused by faulty or recently installed hardware, so be sure to remove any new hardware since it might not be compatible with your PC. If that doesn’t work, check your RAM, motherboard, hard drive, and all other major components.
7] Uninstall third-party antivirus/firewall
Firewall and antivirus are important for your system safety, but sometimes these programs can interfere with Windows 11/10 and cause this BSOD error to appear.
It is known that Barracuda NextGen Firewall F-Series was causing this error to appear, and after removing this program, the issue was resolved. However, it’s noteworthy that almost any third-party antivirus or firewall program can cause this error. In this case, to fix this issue, you’ll have to remove all third-party antivirus programs from your PC using the dedicated removal tool to remove all files associated with your antivirus program.
If removing the antivirus fixes this error, you can now install the same antivirus again, or you can switch to an alternative software or better still stick to Windows native AV program – Windows Defender.
8] Perform a System Restore
If the problem still persists, you can restore your system to the previous point in time. You can do this by opening the System Restore utility on your system. If you cannot use your computer due to the BSOD error, you have to enter the Windows Recovery Environment to perform this action.
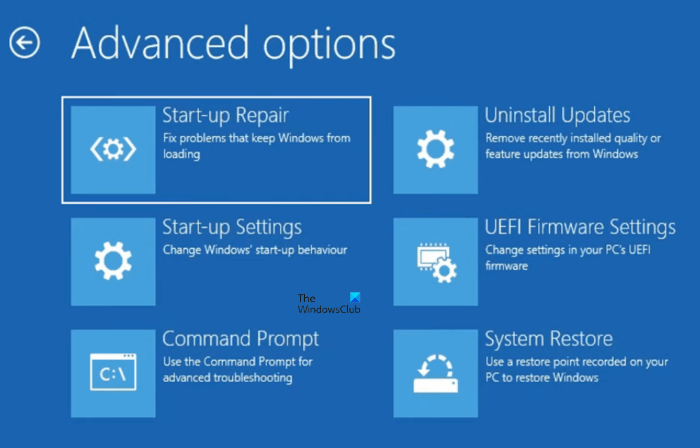
If you are unable to use your system, you have to disrupt the normal boot process of Windows to enter the Windows Recovery Environment. Force shut down your computer. Turn on your computer and immediately press and hold the power button when the manufacturer’s logo or Windows logo appears on your screen. Repeat this process 3 times. After that, Windows will automatically enter repair mode.
Now, select Advanced options > Troubleshoot > Advanced options > System Restore. Select the restore point that was created before the problem started occurring on your system.
You can also try to reset your system without deleting your data.
9] Repair your computer

You can also run Startup Repair in Windows Recovery Environment and see if it helps. First, enter Windows Recovery Environment by interrupting the normal boot process of Windows, then select Advanced options > Troubleshoot > Advanced options > Startup repair. You can also use a bootable USB flash drive with Windows OS to perform this action. However, to create a bootable USB flash drive with Windows OS, you may have to use another working computer.
I hope this helps!
How to fix Irql_less_or_not_equal error?
You may see different BSOD errors with the message DRIVER_IRQL_NOT_LESS_OR_EQUAL, like IRQL NOT LESS OR EQUAL Bugcode 0xA, DRIVER IRQL NOT LESS OR EQUAL (kbdclass.sys), etc. To fix this error, you can try some general troubleshooting fixes, like rolling back the driver, performing a System Restore, performing a cloud reset, etc.
Can a bad drive cause BSOD?
Faulty hardware, like RAM, a hard drive, an SSD, etc., is among the most common causes of BSOD errors on a Windows computer. If your computer has a faulty hard drive, in addition to the performance issues, you may also experience Blue Screen errors. Therefore, if your HHD is faulty, replace it quickly, as you can also lose your data.
Read next: Blue Screen of Death Causes and Solutions.