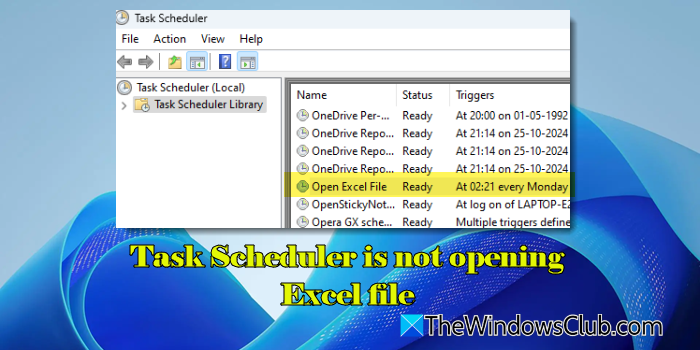
If Task Scheduler is not opening Excel files on your Windows 11/10 PC, this post will sgow you how to fix the issue.

Task Scheduler can be used to open Excel files at a specified time. However, sometimes, it may not work as expected and throw errors. Many users have reported issues where Excel opens, but the designated file does not. Sometimes, it also returns an error stating the file cannot be found, prompting users to check the file name, location, etc. If you’re facing a similar issue, this post is for you.
Fix Task Scheduler is not opening Excel file
If the Task Scheduler if it is not opening Excel files on your Windows 11/10 PC, use these fixes:
- Ensure the task is set to ‘Run only when user is logged on’
- Enter the path to file in ‘Add arguments’ field
- Repair or Reinstall Excel
- Use an alternative
Before you begin, if you are using a script, check if the script is correct.
1] Ensure the task is set to ‘Run only when user is logged on’

GUI programs, like Excel, are designed to have a visible interface as they expect user interaction while running. If you set them to run irrespective of the user’s login status, they will run in the background without displaying their interface. So when Excel runs with this setting, it won’t display any prompts, messages, or even spreadsheets it generates.
To fix this, ensure your task is set to ‘Run only when user is logged on‘.
Open Task Scheduler, right-click the task, and select Properties. In the task’s properties window, go to the General tab. Under the Security options section, select ‘Run only when user is logged on‘.
Also check the box for ‘Run with highest privileges‘ to ensure the task has full permissions, which can help avoid access issues with the file.
2] Enter the path to file in ‘Add arguments’ field

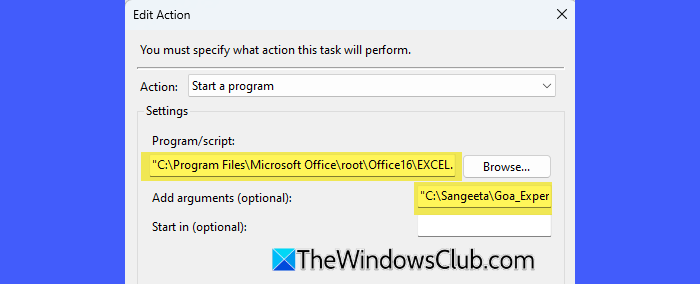
When launching Excel via Task Scheduler, specify EXCEL.EXE as the main program, and the path to the file that you’d like to open as the ‘argument’. Also, if the file path contains spaces, ensure it is enclosed in double quotes so Task Scheduler can correctly interpret it as a single path (without quotes, Task Scheduler might misinterpret spaces as breaks between multiple arguments).
To ensure accuracy, first locate EXCEL.EXE and your Excel file directly in File Explorer. Next, right-click each file, select ‘Copy as path‘, then paste the paths into Task Scheduler’s ‘Program/script’ and ‘Add arguments’ fields. This helps avoid errors, especially with paths containing spaces or complex folder structures.
3] Repair or Reinstall Excel

Next, try repairing or reinstalling Excel to fix issues with missing or corrupt files.
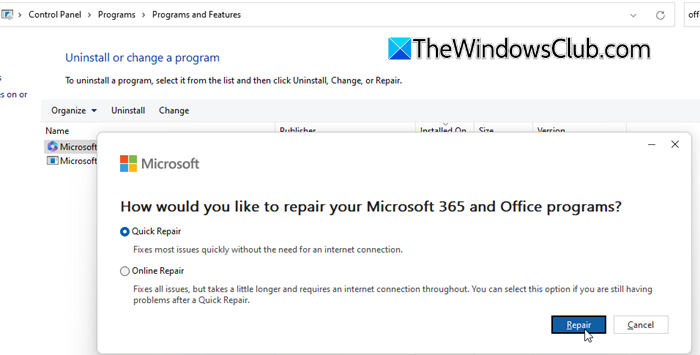
Open Control Panel and select Programs > Programs and Features. Locate Microsoft Office, right-click, and select Change. Click Yes in the User Account Control prompt.
Next, select Quick Repair or Online Repair. Follow the prompts and when the repair process finishes, execute the task.
If issues persist, uninstall and reinstall Office.
4] Use an alternative

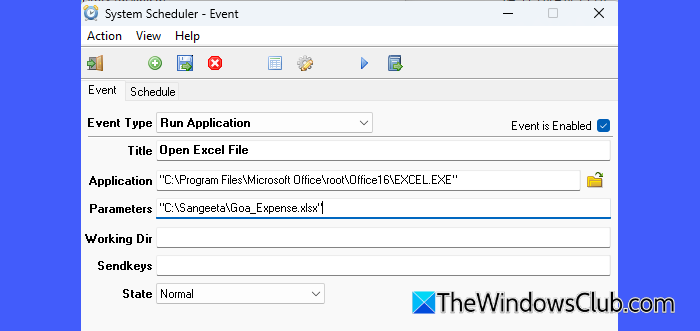
If you’re still unable to fix the issue, consider using an alternative, such as System Scheduler. It can bypass limitations encountered in the built-in Task Scheduler and may help you run your Excel file without any issues.
Download System Scheduler from its official website and install it on your system. Then run it and select Action > New Event. Under the ‘Event’ tab, enter the path of EXCEL.EXE in the Application field and the path to your Excel file in the Parameters field. Next, switch to the ‘Schedule’ tab and schedule the event. Click the Save button to save changes. Your task should now run without issues.
I hope the above solutions will help fix the Task Manager glitch that prevents you from running Excel files on your Windows 11/10 PC.
Read: How to schedule a Batch File to run automatically in Windows.
How to open an Excel File through Task Scheduler?
Open Task Scheduler and click on Create Basic Task in the right pane. Enter a name and description for the task, then click Next. Select when you want the task to start, set the trigger details, and click Next. Select Start a program under Action and click Next. Enter the path to EXCEL.EXE and the full path to your Excel file in the Program/script and the Add arguments (optional) fields respectively. Click Next. Click Finish to create the task.
How do I schedule an Excel File to open automatically?
To schedule an Excel file to open automatically, you can use Windows Task Scheduler or third-party applications like System Scheduler. These tools offer scheduling and automation options for running Excel files. You can also place a shortcut to the Excel file in the Windows Startup folder. This will open the file automatically when you log in to your PC.
Read Next: How to force close a Program which Task Manager cannot terminate.