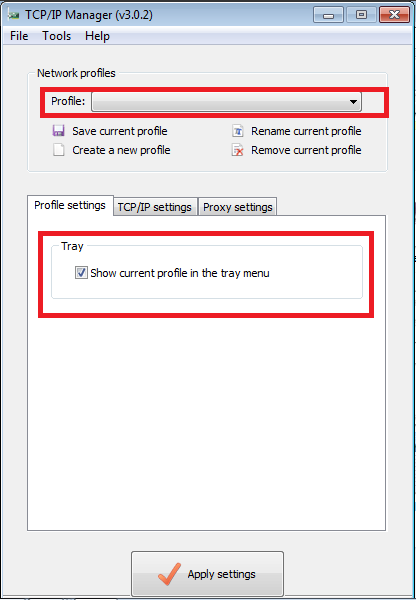
There are some really good programs that make managing different sets of profiles with pre-configured IP settings a breeze. TCP/IP Manager is one of them. The program has the ability to manage up to 10 different profiles with individual TCP/IP settings and no matter where you are, at home or at work, it tracks network configuration at various locations.
TCP/IP Manager for Windows 11/10

TCP/IP Manager can be downloaded for free and consumes less than 500KB of your hard disk space. It is an open-source tool that makes changing network settings a one-click operation.
You all will agree that it is not only tiring but a time-consuming task to manually change the TCP/IP network settings every time you switch to a different environment. Say you are in your office, then switching to your office network from the home network may require a different DNS setting. Moreover, you will have to type/enter the IP address, Subnet mask, default gateway, and DSN one by one thereby wasting your time and energy.
So, why not have a utility that simply allows users to copy and paste the respective network IP addresses directly and eliminate the need of re-typing unnecessarily? And TCP/IP Manager does exactly this! Besides, it also provides the option to choose a specific profile and minimize it to the system tray so that it can be accessed later whenever required by simply clicking on the system tray icon.
How to manage different profiles with individual TCP/IP settings
- Download TCP/IP Manager Binary file. It is of size 643 KB only. Once the download is complete, you will be greeted by an installation wizard. The wizard will guide you through the installation of the manager. Click on ‘Next’ to proceed further.
- Accept the terms of the license agreement and click ‘Next’.
- Once done, the setup will install TCP/IP Manager to a folder. Browse to save it to the desired folder.
- When done, run the program.
- Then, select the first profile, rename it if you would like to, and enter the TCP/IP settings.
- Next, check the options (Show this profile in the tray menu, obtain this setting manually), enter the network connection, etc. Similarly, follow the above steps for the second and other profiles. To apply a selected profile, simply hit Apply Settings button.
Now, whenever you want to change the network settings, simply access the corresponding system tray icon. Simple and easy!
TCP/IP Manager works on Windows 11/10 too. You can download it here.
Read next: Troubleshoot TCP/IP connectivity & configuration issues in Windows.