TeamViewer is a popular tool that enables users to offer or obtain remote assistance on a computer. Being available on all the major PC and Mobile platforms makes it super useful to every kind of person, even on the go. The users who frequently use TeamViewer to get some work done are mostly aware of this one sentence: Initializing display parameters. Normally, it would appear on the screen for a second and load the other person’s screen. But some users have been reporting TeamViewer being stuck on that stage and not moving ahead. In this article, we will be checking out how to get rid of this error on Windows 11/10.
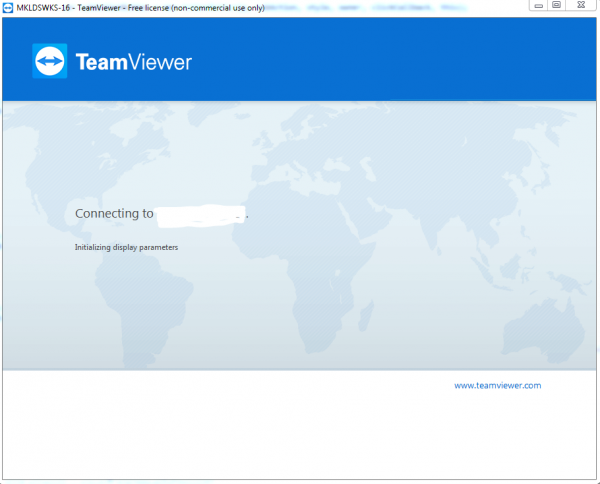
TeamViewer stuck on Initializing Display Parameters
The causes of this issue are pretty vague. It can be connection quality, process conflicts, Remote Access misconfiguration and more. We will be taking a look at the following fixes to get rid of the TeamViewer stuck on Initializing Display Parameters error on Windows 11/10:
- Update TeamViewer for both users.
- Reinstall TeamViewer with Unattended Remote Access.
- Reconfiguring the Remote Access.
- Kill the conflicting processes.
- Optimize connection quality.
1] Update TeamViewer for both the users
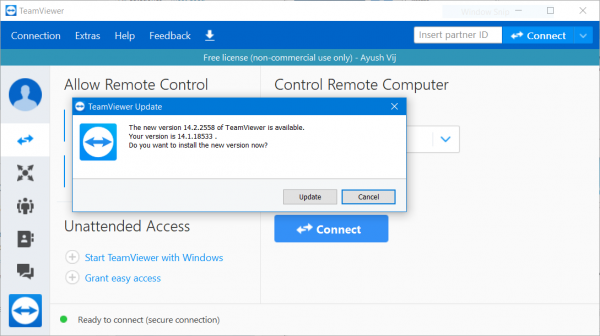
You need to update TeamViewer for both users. For that, start TeamViewer installer again.
When it is installed, run the program and then click on Help in the Menu ribbon and then select Check for updates… If an update is found, you will get notified within a few seconds with a pop up mini window.
Click on Update and follow the onscreen instructions and get your version of TeamViewer up to date.
2] Reinstall TeamViewer with Unattended Remote Access
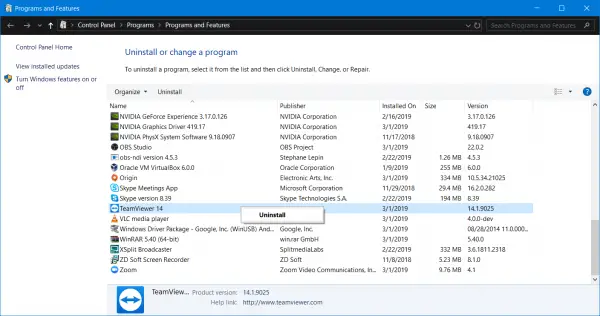
First of all, you need to uninstall TeamViewer from the Control Panel or the Windows Settings App.
Then, hit the WINKEY+R button combination to launch the Run utility, type in regedit and hit Enter. Once Registry Editor opens, navigate to the following key-
Computer\HKEY_LOCAL_MACHINE\SOFTWARE\Wow6432Node\TeamViewer
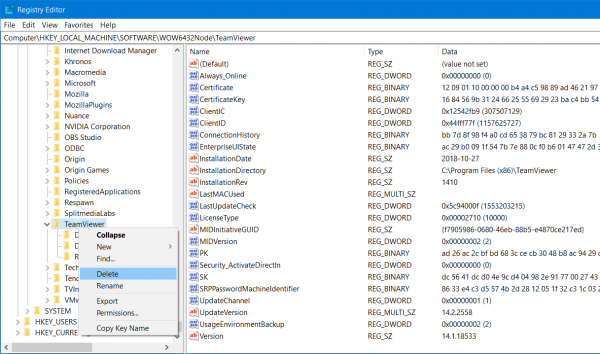
Right click on the selected TeamViewer key and select Delete.
Reboot your computer for the changes to take effect.
Now, get TeamViewer started again, and click on Connection > Open Management Console.
Sign in or sign up to get registered. Select the Add new device radio button under Add > Add computer on the top right corner and select Download now.
Follow the onscreen instructions and complete the installation.
Check if this has fixed your issues.
3] Reconfigure the Remote Access
Right-click on This PC either on your desktop or after searching for it on the Windows Search Box. Click on Properties.
Now, on the left side navigation panel, click on Remote Settings.
Make sure that the box for Allow Remote Assistance Connections to this computer is checked under the section of Remote Assistance.
Now, click on the button called Advanced. A new mini-window will open.
Under the section of Remote Control, check the option of Allow this computer to be controlled remotely.
Click on OK.
Check if that fixes your issues.
4] Killing the conflicting processes
Hit the CTRL + Shift + Esc key to bring up the Task Manager. Navigate to the tab of Processes.
Select and right click on the process entry for BGInfo. Now select End Task.
Check if this has fixed your issues.
5] Optimize the connection quality
Under this method, there are two things that you need to take care of.
First is disabling the loading of the Wallpaper of the computer which is being accessed remotely. To do that, select the Extras menu from the menu ribbon and select Options. Under the section of Remote Control, make sure that you check the option that says, Remove remote wallpaper.
Secondly, you need to optimize the quality for the speed.
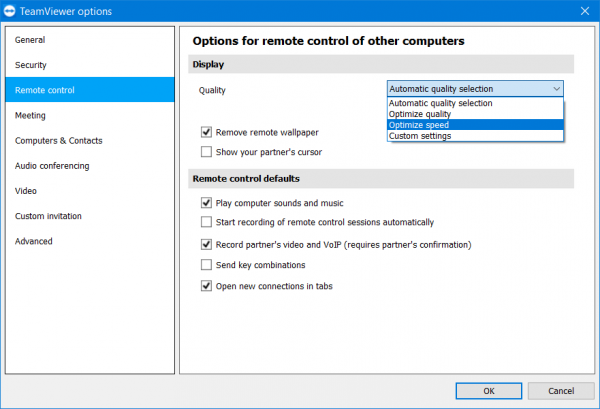
Under the same section of Remote Control, select Optimize Speed for the menu of Quality.
This should fix your issue.
Read: TeamViewer audio not working.
Leave a Reply