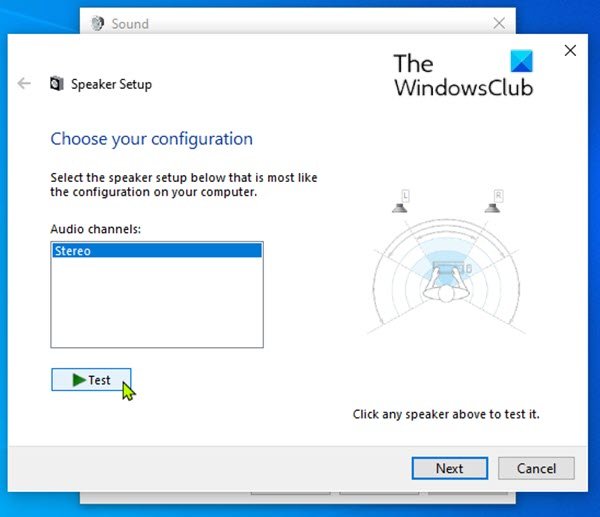
With so many speakers to position properly, setting up a new surround sound configuration can be daunting if you’re a PC user with multiple speaker setups. Conveniently enough, Windows 11/10 includes a small built-in test program that can help you set it up. In this post, we will show you how to test Surround Sound Speakers on Windows 11/10.

Test Surround Sound Speakers on Windows 11/10
Once you have enabled Windows Sonic Surround sound, you may want to configure and test surround sound speakers on Windows, do the following:
- Press Windows + R key combination to invoke the Run dialog.
- In the Run dialog box, type
control mmsys.cpl soundsORmmsys.cpland hit Enter to open Sound settings. - In the window that appears, choose the Playback tab.
- Select the surround sound output device you’d like to test from the list. On many PCs, this will be a device named Speakers.
- Click the Configure button to configure your selected device. You can also right-click the device in the Playback list and select Configure [Device Name].
- A Speaker Setup window will open. In the list of audio channels, select the configuration you’d like to test.
- Next, click the Test button just below the channels list. You’ll hear a test chime played one at a time through all of the speakers in the configuration. As each speaker plays, it will be highlighted in the diagram.
- If you want to stop the testing process while the chimes are playing, click the Stop button.
- If you’d like to test individual speakers, click on them in the diagram located in the right side of the window. When you click a speaker, a chime will play through that specific speaker. This can help you figure out if your speakers are positioned correctly.
If necessary, you can also click Next and follow the wizard to tell Windows which speakers you don’t have connected.
Once done, you can exit the configuration window.
Exit Sound Properties.
That’s how to test Surround Sound Speakers on Windows 11/10!
Related post: How to fix Sound Distortion issues in Windows.
Leave a Reply