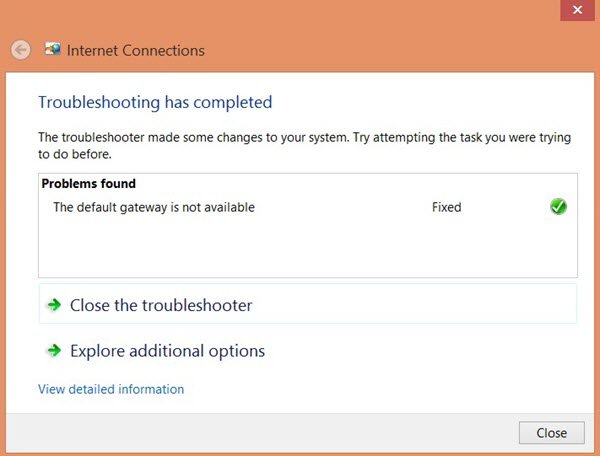
If when you run the Internet Connections Troubleshooter it displays a message – The default gateway is not available on Windows 11/10, then here are some troubleshooting tips you should follow to fix this problem. This error can be seen if your computer is momentarily turning off your network adapter, as a result of which communication to the internet or network is lost. If you see this message, one thing you should try first is to restart the computer and run this Troubleshooter again. If it helps fix the problem, well and good – but if it does not, then read on.

The default gateway is not available on Windows 11/10
Do the following things to resolve your issue:
- Install Network driver
- Reinstall Network adapters driver
- Verify Power Saving Mode
- Reset TCP/IP
- Disable Firewall software
1] Install Network driver
This is the most common solution to this problem. Most people get this error message after a fresh installation of Windows. If you have installed Windows 11/10 without any leftover, you have to install the network driver so that your network adapters can start working. If you haven’t done it yet, this is the time when you need to install it. Generally, you can find the network driver on the Motherboard CD. However, if you have a laptop, you might need to use another computer or mobile to download the driver from the manufacturer’s website.
2] Reinstall Network adapters driver
If you already have the driver but you face this issue on your Windows PC, you can try reinstalling the driver. Many times, when we install an update, an internal setting or file can go missing. At such times, there is a chance of getting such errors. If you uninstall the driver and reinstall it, it might solve your problem.
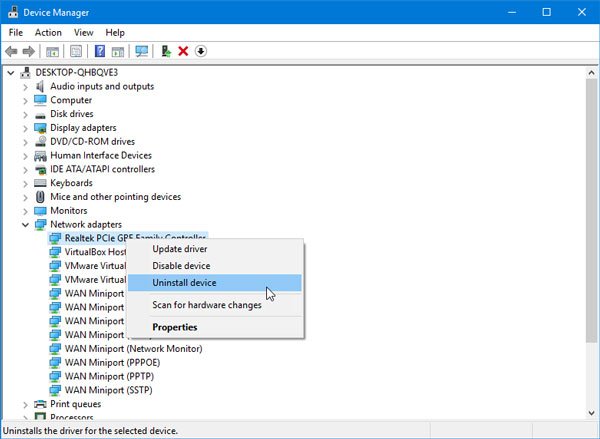
To uninstall the Network adapters driver, you need to open Device Manager. After that, find out Network adapters label and expand it. You should find your network driver on the list. Right-click on the driver, and select Uninstall device.

Following that, you need to confirm the change by clicking the OK button.
After that, restart your computer and install the device driver.
3] Verify Power Saving Mode
If you are using a Windows laptop, the Power Options panel plays a vital role. Generally, laptop users use Wi-Fi and if you are doing the same, but getting the error message, then you need to check some settings related to Power Saving Mode.
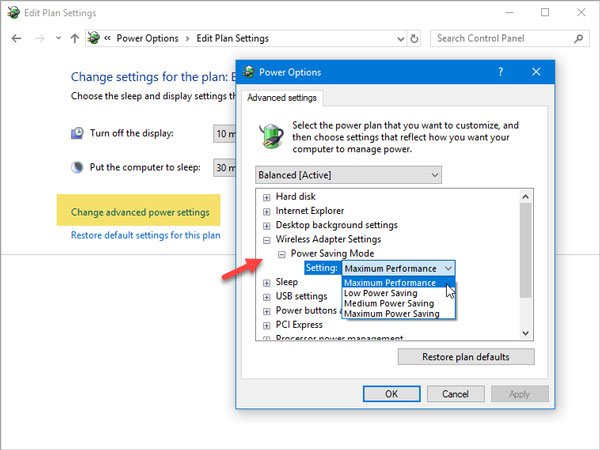
For that, open Control Panel and go to Hardware and Sound > Power Options. After that, click the Change plan settings option of the selected plan.
Next, click the Change advanced power settings option. Now you should find a window named Power Options. Expand the Wireless Adapter Settings and Power Saving Mode. Make sure the Maximum Performance option is selected.

If not, do select it and save the change.
4] Reset TCP/IP
TCP/IP or Internet Protocol is the most important thing if you want to use the internet on your computer. If it is corrupted due to any reason, you have to reset TCP/IP. There is no need to use any third-party software since a simple command does the job pretty well.
If this does not help, use the Network Reset option to reset Windows network settings to default.
5] Disable the Firewall software
There are many people, who install third-party firewall software to manage incoming and outgoing connections. If you have done that, you should try disabling it temporarily. If that solves your problem, you need to either tweak some settings or uninstall it completely.
Also, if you have changed some settings in Windows Firewall, you can reset it to factory default and check if the problem remains or not.
How do I get my default gateway back?
The quickest way to get your default gateway back is by releasing your current IP. To do this, execute the following command ipconfig /release in CMD and hit Enter. This will release any assigned IP addresses and gateways. Now type ipconfig /renew and hit Enter to get a new default gateway.
Hope these suggestions help you solve your problem.
Related read: Fix Network & Internet connection problems in Windows.