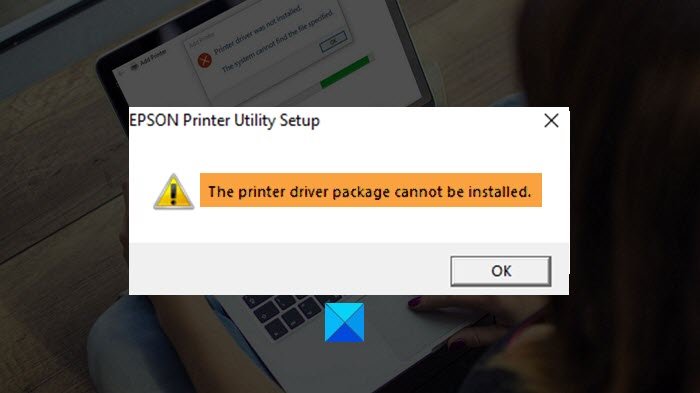
You may have encountered several errors while using Windows. Some of them can be fixed quickly, while some of them may need tweaking some things in your system a bit. One of the common Windows errors is ‘The Printer Driver package cannot be installed‘. There may be specific reasons for this error, but we’re here for the solution. Listed below are some ways you can fix this error and install your printer driver package without any issues.

Fix The Printer Driver package cannot be installed error
Depending on the reason behind the error, the solutions may be different. In this section, we’ll be going over some of the solutions that you can try on your Windows 11/10. One of these is most likely to fix that error.
- Disable and then enable the Spooler service
- Change Printer Port
- Manually Reinstalling The Driver
- Windows Printer Troubleshooting
You may need admin permission for some of these suggestions. Also, try installing the driver after each of them to know which solution worked for you.
1] Disable and then enable the Spooler service
When a printer is connected to a system, there are certain processes allotted to it. The Spooler service overlooks the management of these processes sent to the printer. Disabling and then enabling the Spooler service is likely to fix this.
- Press Windows + R. This will open the Run command on your Windows. Type services.msc in the dialogue box and press the Enter key on your keyboard.
- Navigate to Print Spooler Service. Double click on it and open Properties.
- Click on the Stop button and click Ok.
- Wait for few minutes, and then start the Spooler service.
If this doesn’t fix the issue, you can try deleting Printer Files after stopping the Spooler service and restarting it again after deleting those files. Here are the steps you need to follow to delete Printer Files in your Windows safely:
- Next, open File Explorer using Win key + E
- Navigate to: C:\Windows\System32\spool\
- Locate the PRINTERS folder and delete all the files present there.
- Go back to where you disable the Spooler service and enable it again with startup type as Automatic.
If this fixes the problem, the driver failed to update because something was stuck in the spooler service and did not allow the installation to complete.
2] Change Printer Port

There are chances of this error popping up if one of your USB ports is unresponsive. To change the printer port, navigate to:
- Disconnect the Printer by removing the connected cable
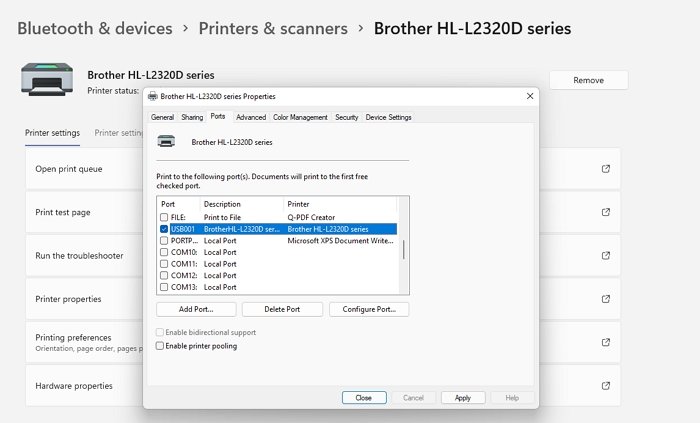
- Go to Settings > Bluetooth and devices > Printer and Scanners
- Click on the Printer, and then click on Printer Properties
- In this section, switch to the Ports tab
- Locat the USB port to which it is already connected. It is usually listed as USB001 or similar.
- Uncheck it, and apply.
- Now connect the printer, and turn it on. Make sure this time you connect to another USB drive.
- Select USB002 or anything which is different from the previous port
- Apply, and now try to update the driver.
3] Manually Reinstall The Driver
Instead of using the software to update the drivers, you can manually update them in two ways. You can either manually download the driver and install it, or you can entirely uninstall the device itself, add it again and try updating the drivers. We’ll discuss both of them briefly in this section.
Manually Updating Drivers
Go to the website of the Printer’s OEM, and locate the driver. Make sure to match it with the version of Windows.
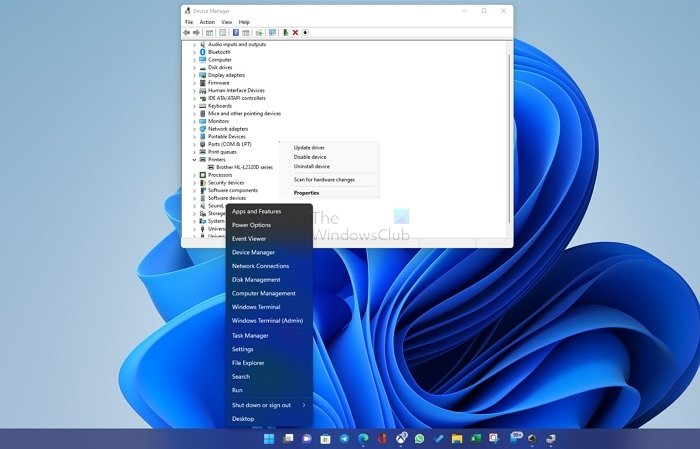
- Press Windows + R to launch Run, then type devmgmt.msc in the dialogue box, and press the Enter key
- It will open the Device Manager. You can also use the search bar on your home screen to type its name and open it simply from there. Once you’ve opened the Device Manager, navigate to Hardware.
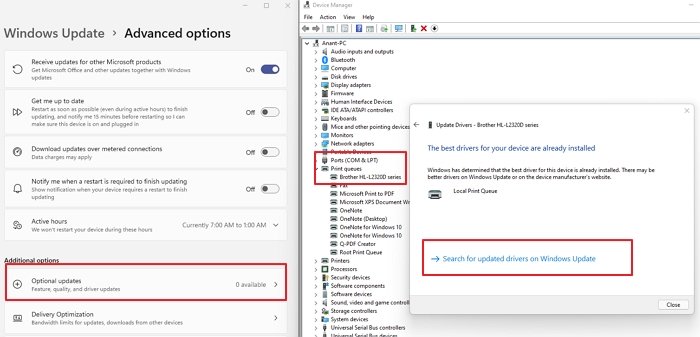
- Please open it and right-click on printer hardware from the dropdown menu. Now choose the option of Update driver.
- It will offer two options, but you need to select Browse My Computer for drivers.
- Click on it, and then navigate to the downloaded driver folder and select the driver.
- It will automatically update the printer driver
Reinstall Printer and Update the Driver
When you uninstall a device from Device Manager, you’ll have to add it again and update its drivers before it is entirely usable again. Here’s how you can add a printer device to your Windows:

- Press Windows + R to launch Run. Type devmgmt.msc in the dialogue box, hit Enter, and that’ll open the Device Manager.
- Look for printer hardware under the Hardware section and right-click on it. Click on Uninstall device.
- The next step is to add the device once again. Once you’ve done that, try manually updating the drivers of your printer again.
- Go to Windows Settings > Bluetooth & Devices > Printers & scanners > Add Device
- Click on it, and then the Windows will automatically begin to look for a connected printer. Ensure the printer is connected properly, and that’s all you need to do.
- Once it does, open the Device Manager again, and update the printer driver.

This solution is probably the most used way to fix this issue. There’s a high chance that using it will fix it for you too.
4] Windows Printer Troubleshooting

Most common Windows errors are often resolved by using the inbuilt troubleshooting feature Windows provides with its products. The same goes for ‘The Printer Driver Package cannot be installed’ as well. Let’s take a look at how to fix this error using Windows troubleshooting.
- Open Windows Settings using Win + I
- Navigate to System > Troubleshoot > Other troubleshooters
- Locate troubleshooter for Printer and click on the Run button next to it.
- Select the printer, and let the wizard complete the process.
- Now try updating the driver.
The Windows troubleshooting feature has worked often for this particular error and for other errors as well. Depending on what might be the cause of the error in the first place, this solution might work for you as well.
Related: Windows encountered a problem installing the Driver software for your Device.
What happens when you don’t install a driver for the printer?
If you don’t install the drive or when Windows update cannot find OEM specific driver, it will use a generic driver that works on all the printers. While it works, printer-specific functions will be missing. OEMs offer custom functions based on their experience and what users need.
Where are printer drivers stored in Windows OS?
All the drivers are available in the C:\Windows\System32\DriverStore\FileRepository folder. While you can access it with an admin account, it is advised not to delete anything. Either it will break the device, or you will have to reinstall the drivers to fix the problem.
How do I find the printer driver version?
- Open Device Manager and open properties window.
- Switch to the Details tab, and locate the Driver version in the Property dropdown
- Select it, and it will reveal the Driver version.
This article went over several solutions that can fix the ‘The Printer Driver Package cannot be installed’ error on Windows. It is an error many printer users have often encountered on their Windows system while trying to install or update their printer drivers. The solutions presented in this article are easy to follow, and one of them will undoubtedly fix this annoying error for you.
Leave a Reply