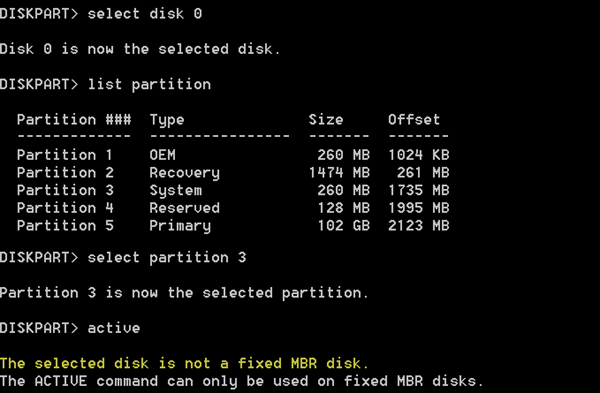
Disk Management and the DISKPART utility on Windows 11 and Windows 10 are useful tools for managing their disk space allocation and more. But some users are reporting an error The selected disk is not a fixed MBR disk when trying to use the DISKPART utility. The whole error states:
The selected disk is not a fixed MBR disk. The ACTIVE command can only be used on fixed MBR disks.

The error occurs only when you try to activate a disk partition on a UEFI System Partition. However, the command only works when you have a BIOS/MBR-based system. The UEFI method has no concept of the active partition. Since you have a UEFI system, the disk type is GPT instead of MBR. To summarize, BIOS needs MBR disk type, while UEFI needs GPT type disk.
The selected disk is not a fixed MBR disk
There are a couple of fixes that may help you resolve the “ACTIVE command can only be used on fixed MBR disks.” You may have to disable UEFI or make a disk a fixed MBR disk. The same error can occur if you use “INACTIVE” command on BIOS/MBR system.
- Disable UEFI
- Fix the Boot Manager
- Convert the disk to MBR.
IMPORTANT: Before you begin, remember to backup your data to an external drive first.
1] Disable UEFI
You may have to disable Secure Boot in the BIOS settings. It is done by booting the computer into Advanced Startup Options and turning off Secure Boot option under UEFI Firmware Settings. Once done, make sure to enable Legacy Support. Save the changes, and reboot your computer.
Every OEM has its way of implementing the options. Secure Boot is usually available under Security > Boot > Authentication Tab. Set it to Disabled.
Do use this as a temporary measure as disabling Secure Boot would make your computer ‘less secure’.
2] Fix the Boot Manager
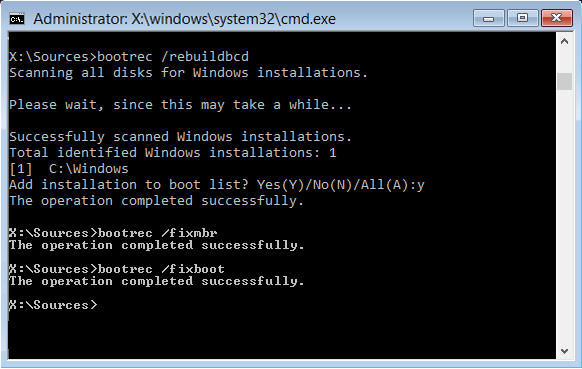
If you can access Advanced Startup Options, then open the Command Prompt and use it to rebuild BCD.
If you cannot, then you will need to make a bootable Windows 10 USB drive and then boot your computer using it. Then when you get the Welcome Screen to click on Next, and then click on Repair your computer on the bottom left portion of the window.
Next click on Troubleshoot > Advanced Options > Command Prompt.

Now, once you have got the Command Prompt window open, execute the following commands one by one in the sequence –
bootrec /FixMbr
bootrec /FixBoot
bootrec /RebuildBcd
Finally, close the Command Prompt window, reboot your computer and see if it helped.
3] Convert the disk to MBR
You could change the drive’s File System from GPT to MBR. But before you do this, backup your data to an external drive first as you will lose your existing data.
Having done that, create a Bootable Windows 10 Media. After booting from it, click on Repair your computer on the first Windows 10 installation setup window. Select the operating system partition from the options you get and then click on Next.
Choose Command Prompt within the System Recovery Options box and type in-
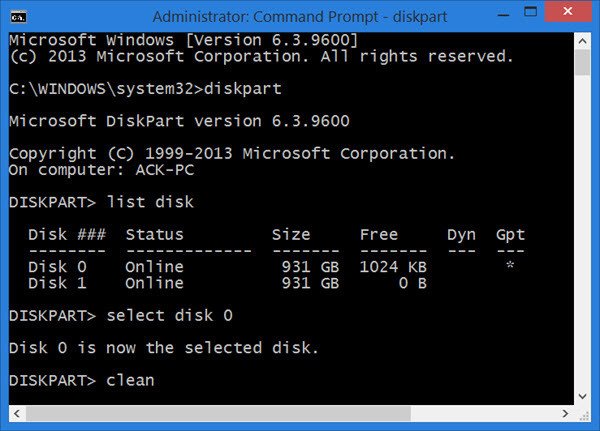
diskpart
This will initiate the Diskpart utility inside of the Command Prompt. Then type in either-
list disk
or
list volume

These commands will help you in either listing all the Disks connects or all the partitions on those disks formed.
From here, you will have to choose one command depending on the list command you entered.
Type in-
select disk #
or
select volume #
Hit Enter. This will select the Disk or Partition you want to select.
Finally, type in-
clean
Hit Enter. This will remove all your data and clean your drive.
Finally, type in the following to convert the select volume as MBR,
Convert MBR
Reboot your computer and check if that fixed your issues.
All the best!
Leave a Reply