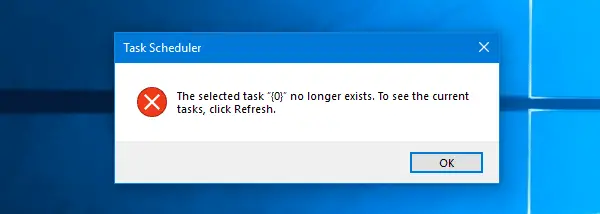
If you often use the Task Scheduler on Windows 11/10 to perform automated tasks, but are now receiving an error message The selected task “{0}” no longer exists, To see the current tasks, click Refresh, you need to follow the following steps to fix the issue. If you click the Refresh button available under the Action menu, it will display the same error message again.

Fix The selected task “{0}” no longer exists Task Scheduler error
Follow these methods to fix the task 0 no longer exists issue:
- Repair Task Scheduler by deleting corrupted tasks
- Synchronize tasks manually in the Task Scheduler
However, before making any changes to your system, it is recommended to create a system restore point or backup your Registry files.
1] Repair Task Scheduler by deleting corrupted tasks
This is quite important since one corrupted file can cause a big problem. To delete a corrupted task or any task from Task Scheduler, you need to take the help of the Registry Editor, when you are unable to use Task Scheduler interface.
- Press Win + R, type regedit, and press the Enter button.
- Following that, navigate to the following path-
Computer\HKEY_LOCAL_MACHINE\SOFTWARE\Microsoft\Windows NT\CurrentVersion\Schedule\TaskCache\Tree\
Here, you can find all the tasks currently set in the Task Scheduler. As you do not know which one is corrupted, you should try deleting the latest one in the Task Scheduler.
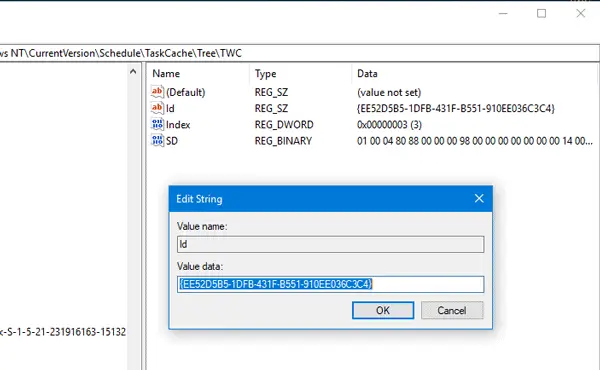
- Before deleting, you should note down the ID. To get the ID, select the task you want to delete, double-click the ID string on your right-hand side, and copy it into Notepad.

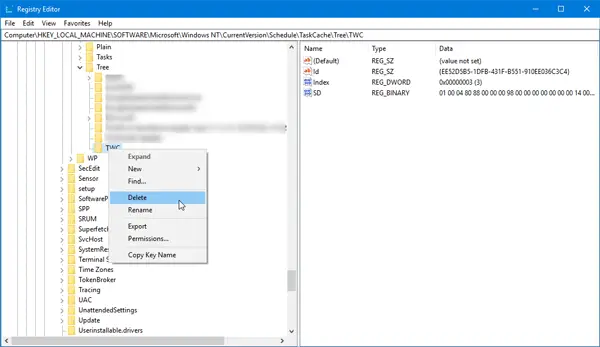
- After that, please right-click on the task name and delete it.

- Next, delete that same GUID (the ID you have copied earlier) from the following folders:
Computer\HKEY_LOCAL_MACHINE\SOFTWARE\Microsoft\Windows NT\CurrentVersion\Schedule\TaskCache\Boot
Computer\HKEY_LOCAL_MACHINE\SOFTWARE\Microsoft\Windows NT\CurrentVersion\Schedule\TaskCache\Logon
Computer\HKEY_LOCAL_MACHINE\SOFTWARE\Microsoft\Windows NT\CurrentVersion\Schedule\TaskCache\Maintenance
Computer\HKEY_LOCAL_MACHINE\SOFTWARE\Microsoft\Windows NT\CurrentVersion\Schedule\TaskCache\Plain
Computer\HKEY_LOCAL_MACHINE\SOFTWARE\Microsoft\Windows NT\CurrentVersion\Schedule\TaskCache\Tasks
- You may not find the same in all folders, but if you see it, delete it. Now navigate to this location:
C:\Windows\System32\Tasks
- Delete the same task you deleted from Registry Editor.
- Restart your computer and check whether you can use Task Scheduler properly.
Read: GPU not showing up in Task Manager in Windows
2] Synchronize tasks manually in Task Scheduler
If there is any problem in the synchronization between Explorer and Registry Editor, you might get this error message while opening Task Scheduler on Windows 10/8/7. You can try synchronizing them manually. In other words, you must check whether all created tasks have created a registry key.
- Navigate to this folder in the File Explorer:
C:\Windows\System32\Tasks
- Open this path in the Registry Editor:
Computer\HKEY_LOCAL_MACHINE\SOFTWARE\Microsoft\Windows NT\CurrentVersion\Schedule\TaskCache\
- Now, check whether all tasks in Windows Explorer are also included in Registry Editor. You need to check two locations in the Registry Editor, and they are as follows:
Computer\HKEY_LOCAL_MACHINE\SOFTWARE\Microsoft\Windows NT\CurrentVersion\Schedule\TaskCache\Tasks
Computer\HKEY_LOCAL_MACHINE\SOFTWARE\Microsoft\Windows NT\CurrentVersion\Schedule\TaskCache\Tree
- If you find an extra task in either location, you can delete it and check whether the Task Scheduler is opening correctly.
These are two primary solutions to this issue, and we hope one of them helps you.
Read: Task Manager not updating in Windows
How do I force Task Manager to open?
If the Windows UI is not working as expected, you can instantly open the Task Manager by pressing Ctrl + Shift + Esc. If this doesn’t help, restart your PC, which should work as expected.
Leave a Reply