Snipping Tool is an essential accessory for capturing an area around the screen or the entire Desktop area. The tool works well on most occasions but sometimes, when a user tries to email, he sees a couple of messages like –
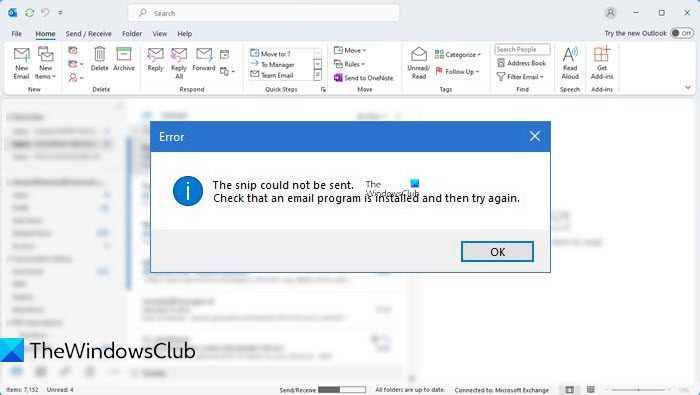
The snip could not be sent, Check that an e-mail program is installed then try again.

If you see The snip could not be sent, Check that an email program is installed and then try again error, then you have to associate an email client with the Snipping Tool in Windows 11/10.
The Snip could not be sent error in Windows 11/10
If your default email program is set to Outlook and every time you try to use the Snipping tool’s email functionality, you see The snip could not be sent message then:
- Set the Default Mail Client in the Registry
- Fix MSI Components Registry Permissions
This should be done because the error occurs in various applications when the MSIComponentID registry value set for Outlook appears wrong or incorrect.
Before you edit the registry, export the keys in the registry that you plan to edit, or back up the whole registry.
1] Set the Default Mail Client in the Registry
Press Win+R in combination to open the ‘Run’ dialog box.
Type ‘Regedit’ in the empty field of the ‘Run’ dialog box and press ‘Enter’.
Now, in the Registry Editor window that opens, navigate to the following path address –
HKEY_LOCAL_MACHINE\SOFTWARE\Clients\Mail
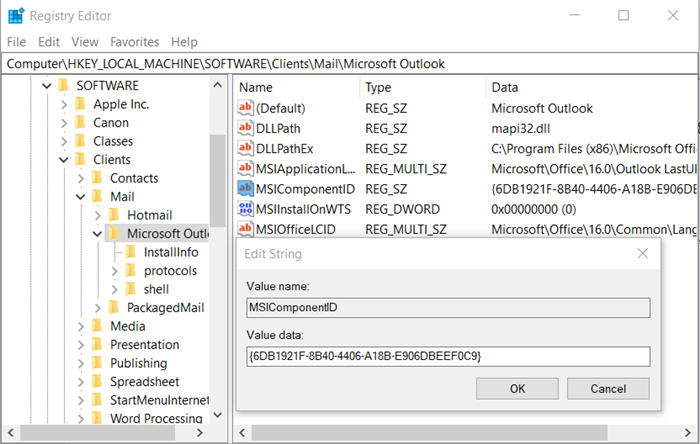
Expand the ‘Mail’ folder to locate ‘Microsoft Outlook’.

Select it and move to the right pane. There, check the MSIComponentID string value. It’s quite possible that you may find the MSIComponentID value either missing or set to a different GUID.
The correct GUID for Outlook is:
{6DB1921F-8B40-4406-A18B-E906DBEEF0C9}
2] Fix MSI Components Registry Permissions
Press Win+R in combination to open the ‘Run’ dialog box.
Type ‘Regedit’ in the empty field of the ‘Run’ dialog box and press ‘Enter’.
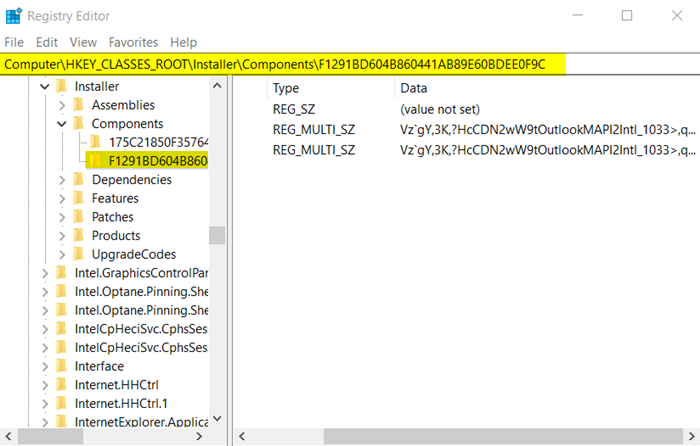
Now, in the Registry Editor window that opens, navigate to the following path address –
HKEY_CLASSES_ROOT\Installer\Components\F1291BD604B860441AB89E60BDEE0F9C.

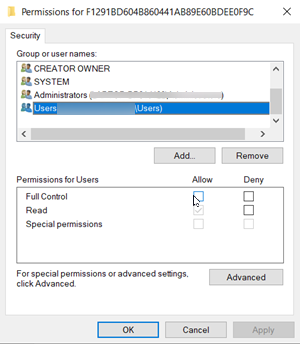
Right-click on the key above and choose ‘Permissions’ from the context menu.

Switch to the ‘Security’ tab.
Here, if you find the ‘Users’ group is not in the list, click ‘Add’, type ‘Users’ and hit the ‘Enter’ key.
Make sure that the Users group have ‘Read’ permission for the key.
That’s it! Hereafter, you should not see ‘The Snip could not be sent’ error in Windows 11/10.
Read: This setting can’t be applied to any of your accounts in Outlook.
Leave a Reply