One of the common errors you get when you try to connect to a shared folder, domain, or network computer is The specific network password is not correct. The error doesn’t go away even if you enter the correct password. The error could occur because of several reasons. Primarily it has to do with the configuration. However, to help you out, I have shared some quick fixes to help you get rid of the error.
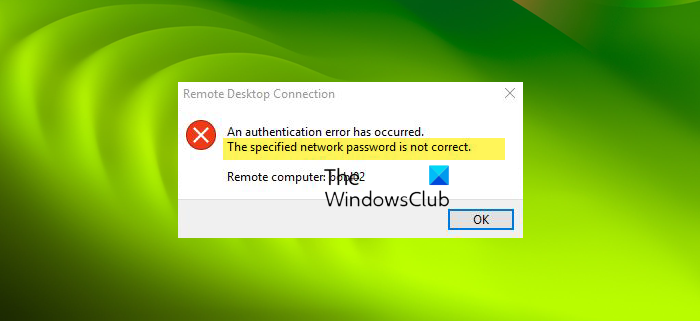
What causes The specified network password is not correct error?
Incorrect password: One of the common reasons for this error is that you are entering an incorrect password. So make sure to double-check the password you are using to connect. Keep an eye on the uppercase and lowercase letters, as passwords are case-sensitive.
Network configuration issues: If you have incorrect network settings or misconfigured the network resources, it can lead to authentication failures. So make sure to check the network configuration settings such as IP address, subnet masks, gateway settings, etc., and ensure that these settings are correct. Also, check for the permissions given for shared folders.
User account and permission problems: The issue could also arise because you have probably set up incorrect file permissions; your file permission settings might be set to read and not read and write. Additionally, the issue could also be with the user account. So reconfiguring everything might fix the issue for you.
Firewall or Security software restrictions: The culprit could be your firewall or security software. They can interfere with the network connections and not let you connect or share a folder over the network. To fix this, you can temporarily disable your firewall or antivirus software and reconnect to the network to see if it works.
Fix The specified network password is not correct error
The error can occur for many reasons, but fixing it isn’t as complicated as it may seem. To help you out, here are some quick troubleshooting methods:
- Verifying Password Correctness
- Ensure The SSDP Discovery Service Is Running
- Run Network Troubleshooter of Get Help app
- Remove and Re-Add the Share With Its Network Credentials
- Update Group Policy for Network Security
- Is your Username the same as your PC Name?
You will need an administrator account to execute some of the suggestions.
1] Verifying password correctness
First, start by verifying your password. Ensure that your password is correct. Pay attention to the uppercase and lowercase letters. You can also try changing the values of uppercase and lowercase letters and see if it works for you. Even if that doesn’t work, you can consider resetting the password through its respective channels.
2] Ensure the SSDP Discovery service Is running
You should also ensure that the SSDP discovery service is running. SSDP, or Simple Service Discovery Protocol, is a service that allows network devices to communicate and discover each other.
So in case, SSDP Discovery Service is disabled, it won’t be able to communicate with the server or other computers.
To check if the service is running, here is what you have to do:
- Press Windows Key + R to launch Run.
- Type services.msc and press Enter.
- Now look for SSDP Discovery Service.
- Right-click on SSDP Discovery and select Properties.
- Next, change the Startup type to Automatic. Also, if the service is not running already, click on the start button.
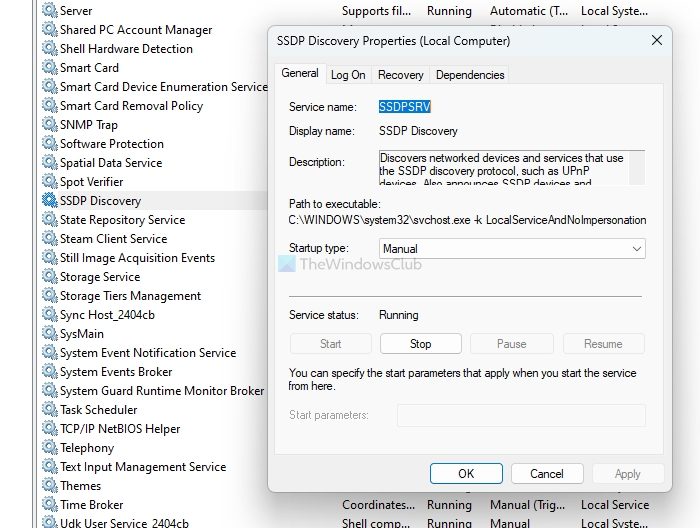
- Once done, click on Apply > OK to save the changes.
- After making changes to SSDP Discovery, you need to make the same changes to the following services:
- TCP/IP NetBIOS Helper
- Computer Browser
- Server services
- Once done, reboot your Computer and try to connect to the specified network, and see if you are getting the same error.
3] Run Network troubleshooter of Get Help app
You can also consider running the Network troubleshooter and see if it resolves your problem. You can restart your router to check if your network connection is working.
Further, you can check your username and password, check the network and shared folder settings and see if there is any misconfiguration.
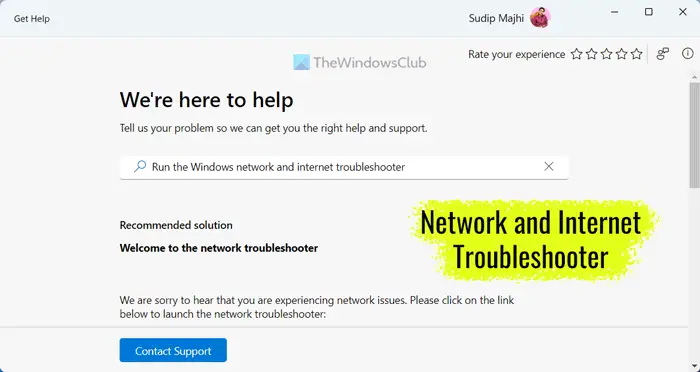
Finally, you can open Windows Help and run the Network Connection troubleshooter. Then see if Windows itself fixes the issue for you or not.
4] Remove and re-add the Share with Its network credentials
Next, you can try removing and re-adding the sharing details with its network credentials. You must reconfigure your network, NAS, or the domain you are trying to connect to, set up the required file permissions, and then check if you encounter any errors.
5] Update Group Policy for Network security
Some users reported eliminating the error by changing the Group Policy editor. To get started with this, follow the below steps:
- Press Windows Key + R to launch RUN.
- Type gpedit.msc and press Enter.
- Next, navigate to the following path: Local Computer Policy > Computer Configuration > Windows Settings > Security Settings > Local Policies > Security Options.
- Now search for “Network Security: LAN Manager authentication level” policy, right-click on it and select Properties.
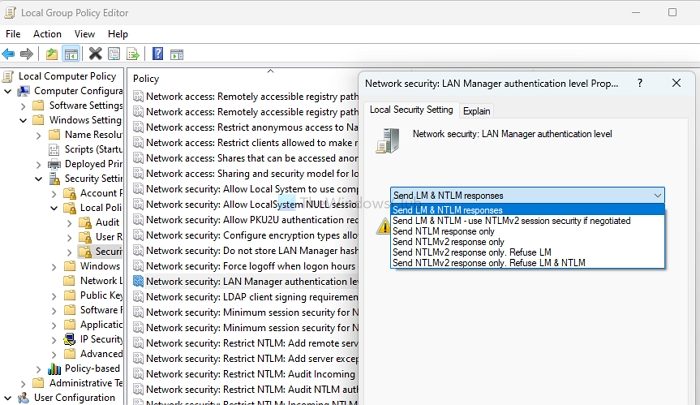
- Now use the dropdown menu to select “Send NTLMv2 response only/refuse LM & NTLM”.
- Once done, click on Apply > OK.
Finally, reboot your PC and then check if you are still getting the same the specified network password is not the correct error.
6] Is your Username the same as your PC Name?
Are your username and password the same as those for unlocking your PC? Then there might be some error.
There is a good chance that your username is something else while your password is the same as your PC. To find out your exact username, you need to follow the below steps:
- Press Windows + X to access the Quick menu.
- Select Windows Terminal.
- Type and run the following command to get your username: whoami
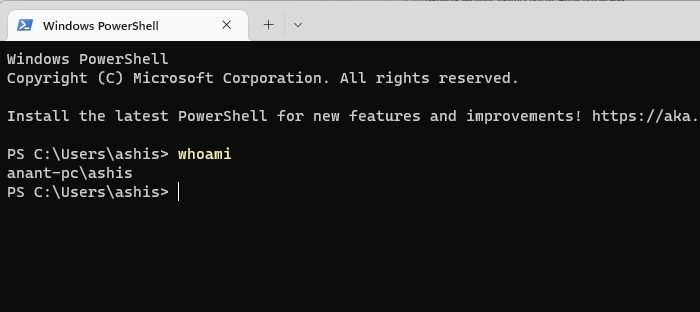
- Once you know your username, use your PC’s password to connect to the network and see if you are still getting any errors.
So those were some of the quick ways to fix the specified network password is not a correct error. In the end, if nothing works for you, you can try re-establishing the connection or re-configuring it to see if it works for you.
How do I remove network credentials in Windows?
Search and open the Windows Credentials setting in Windows. It will display a list of saved credentials associated with your network connections. Select the credential you want to remove and click the “Remove” button. Confirm the action if prompted.
Do Windows credentials expire?
No, the Windows credentials, once stored, are not automatically removed or expire, but if the domain policy is implemented for that account, then you will need to reauthenticate when trying to access the resource.
Leave a Reply