If when you attempt to power on a VMware virtual machine on your Windows 11 or Windows 10 host machine, and the action fails with the error message The VMware Authorization Service is not running, then this post is intended to help you with the most suitable solutions to the issue.
VMware Workstation cannot connect to the virtual machine

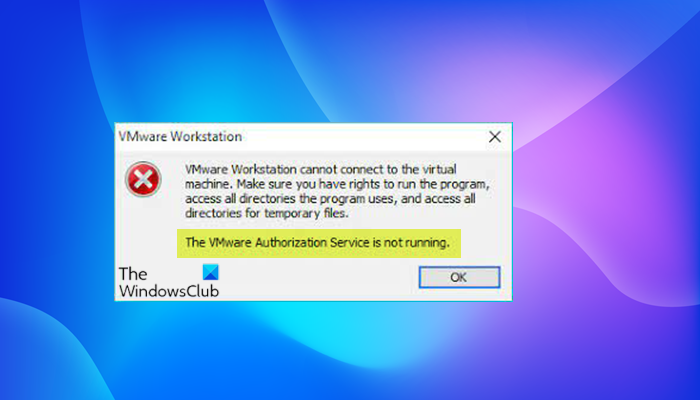
When you encounter this issue, you’ll receive the full error message along the following lines;
VMware Workstation
VMware Workstation cannot connect to the virtual machine. Make sure you have rights to run the program, access all directories the program uses, and access all directories for temporary files.
The VMware Authorization Service is not running.
You’ll encounter this issue mainly due to either of the following reasons;
- The VMware Authorization service is not running.
- The service does not have Administrator rights.
The VMware Authorization Service is not running
If The VMware Authorization Service is not running on your Windows 11/10 PC, you can try our recommended solutions below in no particular order and see if that helps to resolve the issue.
- Restart PC
- Start the VMware Authorization Service
- Provide Administrator Rights to the VMware Authorization Service
- Repair VMware Workstation
- Contact VMware Support
Let’s take a look at the description of the process involved concerning each of the listed solutions.
1] Restart PC
You can begin troubleshooting to fix The VMware Authorization Service is not running on your Windows 11/10 PC by simply restarting your host machine. This action usually resolves minor issues like this. However, if the issue persists after performing the PC restart you can proceed with the next solution.
2] Start the VMware Authorization Service

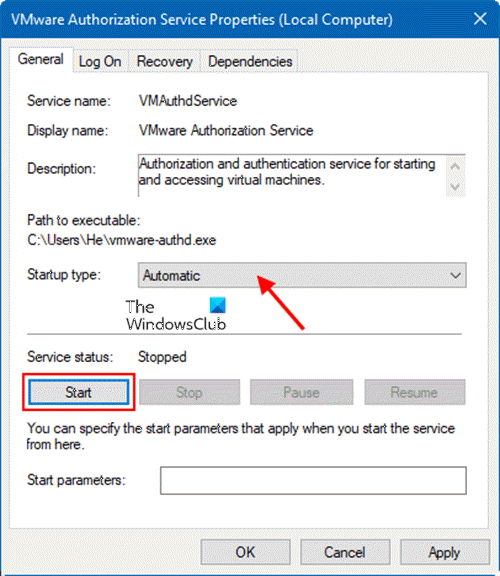
To start the VMware Authorization Service or to check whether it is running on your system, do the following:
- Press Windows key + R to invoke the Run dialog.
- In the Run dialog box, type services.msc and hit Enter to open Services.
- In the Services window, scroll and locate the VMware Authorization Service.
- Double-click on the entry to edit its properties.
- In the properties window, click the drop-down on the Startup type and select Automatic.
- Next, click Start button to start the service if the service is already not showing a status of Started.
Note: The VMware Authorization service depends on the Windows Management Instrumentation service. This service must be running as well. If the VMware Authorization service does not start, or starts and then stops, locate and start the Windows Management Instrumentation service.
- Click Apply > OK to save changes.
- Restart PC.
But if the VMware Authorization service is already showing a status of Started and the issue in hand isn’t resolved, then the service does not have Administrator rights. Try the next solution.
3] Provide Administrator Rights to the VMware Authorization Service
To provide Administrator Rights to the VMware Authorization Service on your system, do the following:
- Disable User Account Control (UAC).
- Next, assign administrator rights to the user account that runs the VMware Authorization service on the Windows system.
- Next, uninstall VMware Workstation
- Reboot the host machine.
- On boot, log in as a local administrator (not as a domain administrator).
- Finally, download and reinstall the latest version of VMware Workstation on your PC.
The issue in view should be resolved now. Otherwise try the next solution.
4] Repair VMware Workstation

This solution requires you to perform a repair upgrade to fix the problem. A repair upgrade is a process of installing VMware Workstation over the existing one on your hard disk, using your installation package file. The procedure if successful can repair broken operating system files while preserving your personal files, settings and installed applications.
To perform a repair using the original VMware Workstation installer, do the following:
- Download the VMware Workstation installer.
- Once the installation package file is downloaded, you can start the repair immediately by simply double-clicking the file to mount it.
- In VMware Workstation Setup window, click on Next to continue repairing.
- Click Repair option and wait while the wizard performs the repairing process.
- Once the repair operation is completed, you can click Restart Now to initiate a reboot, or Restart Later if you plan to restart your system later.
On boot, the issue should be resolved. If not, try the next solution.
5] Contact VMware Support
If none of the solutions presented in this post worked for you, you can contact VMware Support at vmware.com/support/services and see what assistance they can provide to resolve the issue.
Hope this helps!
Related post: How to fix VMware Internal Error while powering on.
Why is my VMware not working?
If VMware is not working on your Windows 11/10 host machine, it could be due to a number of reasons. Generally, to fix the issue, you can shut down the virtual machine, then restart your Host Machine. After your host machine reboots, reopen the Workstation. Download and reinstall VMware Workstation. This ensures that you have the most recent version and that any missing or corrupted virtual network settings are replaced/repaired.
Will VMware run on Windows 11/10?
VMware Workstation runs on standard x86-based hardware with 64-bit Intel and AMD processors and on 64-bit Windows or Linux host operating systems. VMware Workstation Pro and Player run on most 64-bit Windows or Linux host operating systems.
Leave a Reply