Many people use SSD (Solid State Drive), but they don’t know how to increase SSD performance. Upgrading your computer by adding an SSD is the best thing you can do. SSD is a device that speeds up everything you are using on your PC, but without proper maintenance, you may not get the best performance out of it. We have discussed what to do and what not when using SSD on a Windows 11/10 computer.
Following are some of the things we must do when we are running a Solid State Drive or SSD on a Windows 11/10 computer:
- Keep Defrag ON
- Disable Fast Startup
- Check that System Restore is Enabled
- Plan what goes where
- Enable TRIM
Let’s start to talk about them in detail.
1] Keep Defrag ON
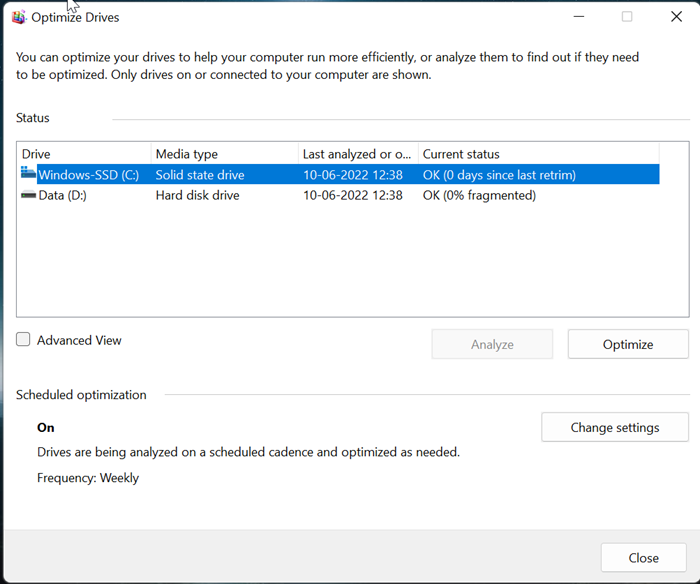
In the beginning, SSD defragmentation was not only unnecessary but also harmful to SSDs. But now Windows does defragment your SSDs automatically and periodically. Windows is smart enough to recognize an SSD and does this task appropriately and intelligently.
It’s better to think of today’s defrag as the best option in Windows as more of an all-around disk-health tool. Windows defrag adapts to your SSD, so keep it ON.
In one word, the answer is YES. Windows does defragment your SSDs automatically and periodically. Windows is smart enough and does this task appropriately and intelligently. Scott Hanselman of Microsoft, says:
Storage Optimizer will defrag an SSD once a month if volume snapshots are enabled. This is by design and necessary due to slow volsnap copy on write performance on fragmented SSD volumes. It’s also somewhat of a misconception that fragmentation is not a problem on SSDs. If an SSD gets too fragmented you can hit maximum file fragmentation (when the metadata can’t represent any more file fragments) which will result in errors when you try to write/extend a file. Furthermore, more file fragments means more metadata to process while reading/writing a file, which can lead to slower performance. As far as Retrim is concerned, this command should run on the schedule specified in the dfrgui UI. Retrim is necessary because of the way TRIM is processed in the file systems. Due to the varying performance of hardware responding to TRIM, TRIM is processed asynchronously by the file system. When a file is deleted or space is otherwise freed, the file system queues the trim request to be processed. To limit the peek resource usage this queue may only grow to a maximum number of trim requests. If the queue is of max size, incoming TRIM requests may be dropped. This is okay because we will periodically come through and do a Retrim with Storage Optimizer. The Retrim is done at a granularity that should avoid hitting the maximum TRIM request queue size where TRIMs are dropped.
2] Disable Fast Startup
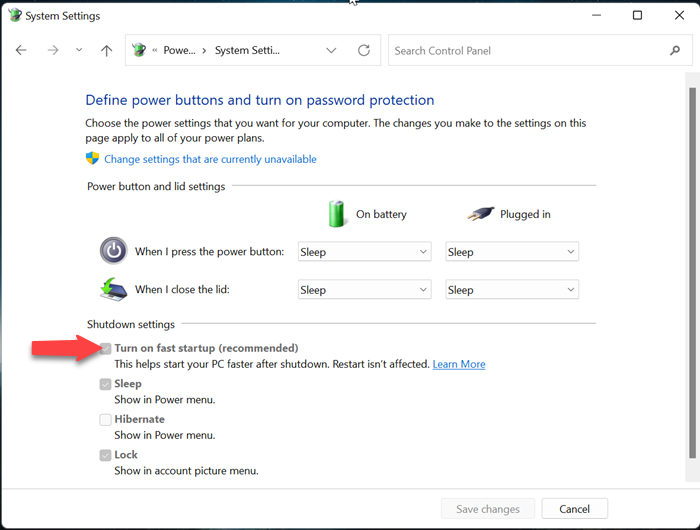
Fast startup helps boost the performance by reducing the booting time, but it’s known to reduce cause problems for some as well. If you have an SSD and you are disabling Fast startup, it means your PC gets a clean full reboot every time you shut down. Disabling fast Startups is not essential but it could be useful.
Follow the below steps to disable fast startup.
- Click on the Start button
- Open the Control panel
- Go to the Hardware and Sound
- Go to the Power Option
- Click on Change what the power button does
- Uncheck the box Turn on Fast Startup
- Click on Save changes
3] Check that System Restore is Enabled
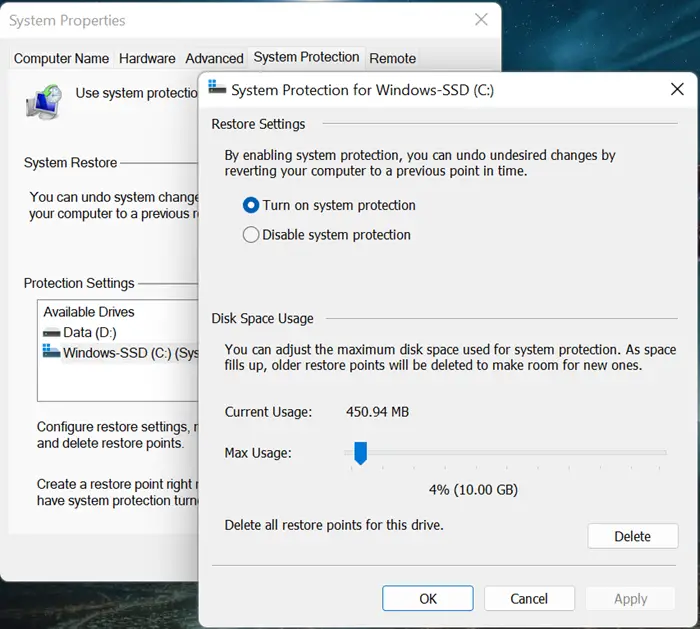
In the early days of SSDs, when they were not very durable, people used to suggest that one should shut down the System Restore feature to improve the performance.
But these days, that advice is redundant. Now, system restore is an extremely essential feature that we recommended for keeping it ON.
Here are the steps to enable it.
- Click on Start
- Open Create a restore point
- System properties tabs will open
- Now, right-click your SSD drive in the list
- Configure in the new Windows
- Then, click on Turn on system protection
After that, System Protection will be enabled.
4] Plan what goes where
We know that SSD (Solid State Drive) is a faster but smaller drive, whereas HDD (Hard Disk Drive) is a larger but slower drive. So we should store our data and files accordingly. We should put the OS files and other such data that we use frequently and want to run faster, on the SSD. If you have large files like movies and songs, you should keep these files on an HDD because these files do not need to ‘run faster’.
5] Enable TRIM
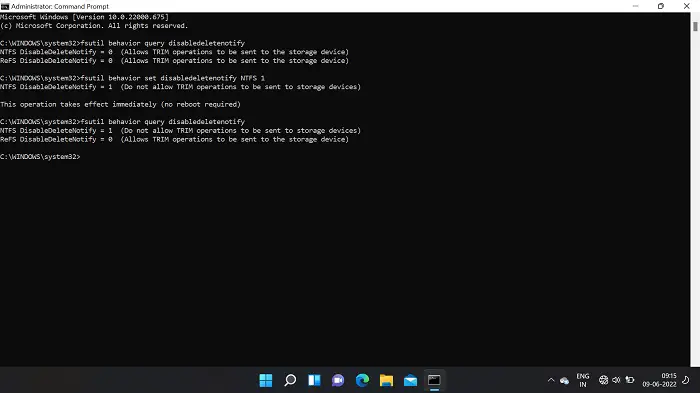
TRIM command allows the Windows OS to communicate with the SSD. There is no need to delete and restore an entire blog to SSD in case any data page is to be deleted. It can effortlessly erase only the required pages. This helps to improve SSDs performance and it must be enabled on your PC.
With TRIM enabled, SSD does not delete all data and instead, deletes only the required data.
Follow the below steps to enable TRIM.
- Go to the Search bar
- Type and Open Command prompt
- In the CMD type
fsutil behavior set disabledeletenotify NTFS 0 - Press Enter
- Now, TRIM will be enabled
Hopefully, these tips will help you in optimizing and improving your SSD’s performance.
Can we recover data from a dead SSD?
SSD has features of fast processing speed and instant boot capabilities. But like common hard drives, they are also prone to different types of damage. There are warning signs that tell if your SSD is failing, but if you miss them and the SSD dies, then it’s still possible to recover data from a dead SSD, even if it’s damaged. We can recover the data by connecting it to another PC, using data recovery software, or by consulting a data retrieval expert.
What should we run on any SSD?
We should run the operating system primarily. Apart from it, you can run programming files and games on your SSD. This will ensure that your computer opens and runs your programs & files smoothly.
How to defrag our hard disk?
Disk Defragmentation runs on a schedule, but you can also analyze and defragment your drives manually. To do this, follow these steps:
- Click on the Start button
- Type and open Defragment and optimize Drive
- Click on Analyse to find if the disk is defragmented or not
- Click on Defragmented disk
That’s it!
Leave a Reply