In this article, we will see the possible fixes if Thunderbolt is not detecting the display on Windows 11. If your laptop has a Thunderbolt port, you can use it to connect an external display by using a docking station or you can also connect the external display directly by using a Thunderbolt-compatible USB C to HDMI converter cable. If your external display is not showing anything after connecting it to your laptop with Thunderbolt, use the solutions provided here.
Thunderbolt not detecting display in Windows 11
Use the following fixes if the Thunderbolt is not detecting a display on your Windows 11 laptop. If you are connecting your display via a USB hub, try to connect it directly to your computer (if the required compatible cable is available to you).
- Check your cable
- Perform a Power Cycle
- Roll back your graphics card driver
- Update the Thunderbolt controller driver
- Apply a Registry fix
- Update your system BIOS
Let’s see all these fixes in detail.
1] Check your cable
The first thing that you should do is check your Thunderbolt cable. Make sure that you are using a compatible cable and the cable is not damaged. If your laptop has multiple Thunderbolt ports, connect your external display to all these ports one by one and see if this helps.
2] Perform a Power Cycle
Perform a power cycle on all your devices, including your computer, external display, and the docking station (if applicable). The steps to perform a Power Cycle are as follows:
- Turn off your devices.
- Disconnect the power cord and all the peripherals connected to your devices.
- Wait for a few minutes.
- Connect the power cord and turn on the switch to provide the power supply to devices.
- Turn on your devices and connect the display to your laptop via the Thunderbolt cable.
3] Roll back your graphics card driver
You can also try to roll back your graphics card driver. This process will install the previous version of your graphics card driver. If your display was working fine with the Thunderbolt cable previously, rolling back the graphics card diver can help. The steps to roll back your graphics card driver are written below:

- Open the Device Manager.
- Expand the Display adapters branch.
- You will see multiple display drivers (one is of your laptop and the other is your external display). Right-click on the graphics card driver associated with your external display and select Properties.
- In the Properties window, go to the Driver tab.
- Click Roll Back driver (if the option is available).
- Follow the on-screen instructions to roll back your graphics card driver.
You can also download the previous version of your graphics card driver from the official website of the manufacturer and then install it manually.
4] Update the Thunderbolt controller driver
In addition to this, you should also update the Thunderbolt controller driver on your system from intel.com.
5] Apply a Registry fix
Modifying the Registry Value for the graphics card worked for some users. You should also try this. It may resolve your issue. Before proceeding, we recommend you create a System Restore Point and backup your Registry so that you can restore your system if any problem occurs.
To apply this fix, you need to know the GUID of your graphics card. The following instructions will help you regarding this:
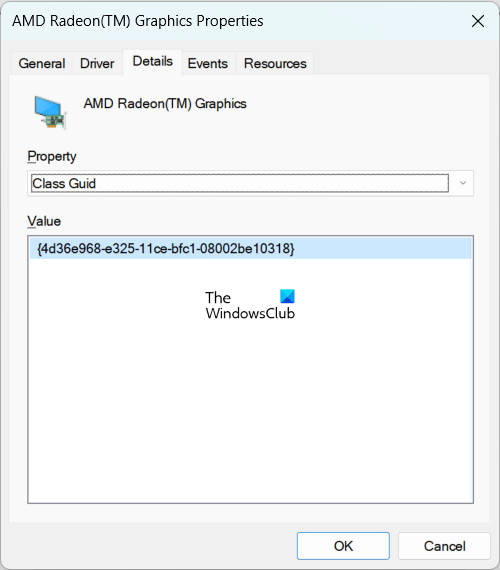
- Open the Device Manager.
- Expand the Display adapters branch.
- Select the graphics card driver associated with your display.
- Right-click on the graphics card driver and select Properties.
- Go to the Details tab.
- Select Class Guid in the Property drop-down.
- You will see the GUID of your graphics card in the Value box.
Right-click on the GUID and select Copy. Open Notepad and paste this GUID there. You will need this GUID later.
Now, Open the Registry Editor. Copy the following path and paste it into the address bar of the Registry Editor. Hit Enter after that.
HKEY_LOCAL_MACHINE\SYSTEM\ControlSet001\Control\Class\
Expand the Class folder by double-clicking. Locate the GUID you have copied to Notepad. Alternatively, you can also paste that GUID in the address bar of the Registry Editor as follows:
HKEY_LOCAL_MACHINE\SYSTEM\ControlSet001\Control\Class\{GUID}
Replace the GUID with the correct GUID in the above path and hit Enter. Make sure that the correct GUID is selected in the Registry Editor. Expand that folder showing the GUID of your graphics card. You will see several subfolders there. Select the 0002 subfolder. If it is not there, you can create it manually. Right-click on the folder showing your GPU’s GUID and go to New > Key. Give the 0002 name to this newly created key.
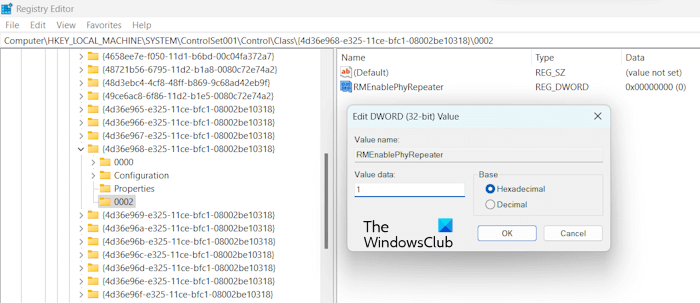
Select the 0002 key and look for the RMEnablePhyRepeater value on the right side. If the value does not exist, create it manually. For this, right-click in the empty space on the right side and go to New > DWORD (32-bit) Value. Give the name RMEnablePhyRepeater to this value.
Now, right-click on the RMEnablePhyRepeater value and select Modify. Write 1 in its Value data. Click OK to save the changes.
Restart your system.
6] Update your system BIOS
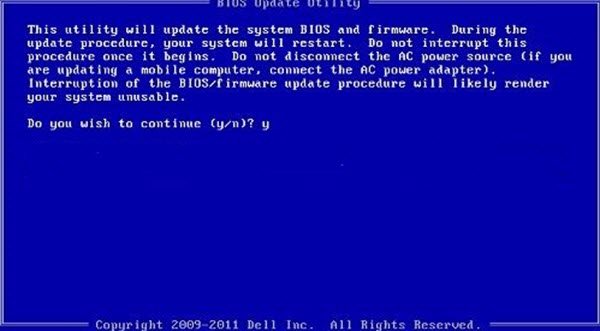
Some users reported that the issue was fixed after updating their system BIOS. You can also try this. Update your BIOS and see if it helps.
Read: Thunderbolt 3 vs USB-C cable difference explained.
Is Thunderbolt compatible with Windows 11?
Yes, Thunderbolt is compatible with Windows 11. If your laptop has a Thunderbolt port, you can use it to connect different devices, like a Thunderbolt external monitor, provided you have a compatible Thunderbolt cable.
Why is my Thunderbolt not recognizing my monitor?
There can be many reasons why your Thunderbolt is not recognizing your monitor, like incompatible cable, broken or damaged cable, outdated firmware of your Thunderbolt controller, corrupted display driver, etc.
Read next: USB-C not working, charging, or recognized on Windows.