If you are a regular Windows 11/10 Sticky Notes user, you might find these tips & tricks to use, save, format, backup, and restore handy. It also tells you how to turn the Sticky Note delete confirmation box back on, in case you have turned it off earlier.
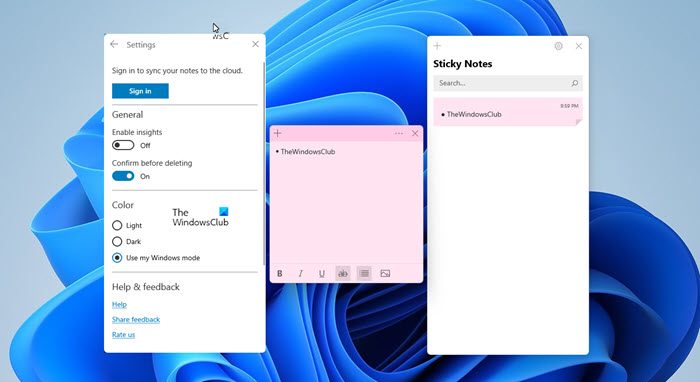
Sticky Notes has become a Trusted Windows Store app, so some of these tips may not work for this version. Before you begin, you may want to read our post on how to import Sticky Notes from Windows 7 to Windows 10.
Sticky Notes in Windows 11/10
- To open a new Sticky Note, type sticky in start search and hit Enter.
- To change its size, drag it from its bottom right corner.
- To change its color, you have to click the 3 dots appearing at the top.
- To create a new sticky note, click on the ‘+‘ sign in its top-left corner.
- To close a sticky note, right-click on its taskbar icon and select ‘Close window’. If you reopen Sticky Notes now, you will see the earlier Notes. The Notes will appear exactly where you left them, even if you restart your Windows computer.
- To delete a sticky note click on the ‘x‘ mark in its top-right corner. In Windows 11/10 now, you have to click you have to click on the ‘trash can’ icon.
- You can use Windows Sticky Notes to create Cortana Reminders.
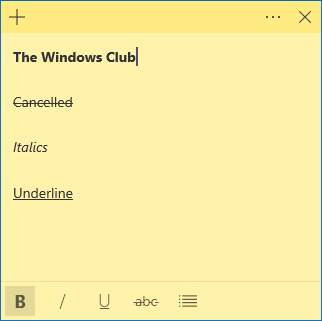
Once it’s running and you start making notes, you can use the following keyboard shortcut keys to format its text:
Select the text where required, and then press the desired keys:
- Bold: Ctrl+B
- Italics: Ctrl+I
- Underline: Ctrl+U
- Strikethrough: Ctrl+T
- Bullet list: Ctrl+Shift+L
- Increase size of text: Ctrl+Shift+>
- Decrease size of text: Ctrl+Shift+<
- See the options when you press Ctrl+Shift+L each time (1 to 5 times).eg. To get Roman numerals: Press 5 times, Ctrl+Shift+L.
- Capitalize (or otherwise) highlighted letters: Ctrl+Shift+A
- Right Align: Ctrl+R
- Center align: Ctrl+E
- Left Align: Ctrl+L
- Single line space: Ctrl+1
- Double line space: Ctrl+2
- 1.5 line space: Ctrl+5
Ctrl+A, Ctrl+C, Ctrl+V, etc. of course, work as usual. Know any more? Do share below in the comments!
Read:
Backup, Save, Restore Sticky Notes
To backup Sticky Notes in Windows, do the following:
Copy all the files and folders from the following location to another place:
%UserProfile%\AppData\Local\Packages\Microsoft.MicrosoftStickyNotes_8wekyb3d8bbwe
Specifically speaking, your Notes are stored in a file named plum.sqlite, which is an SQLite file, located in the following folder:
%UserProfile%\AppData\Local\Packages\Microsoft.MicrosoftStickyNotes_8wekyb3d8bbwe\LocalState
You may copy this plum.sqlite elsewhere as a backup and use it as well to restore on the same or different Windows computer.
Those using earlier versions, can backup the Windows Sticky Notes by backing up this file to another location:
C:\Users\Username\AppData\Roaming\Microsoft\Sticky Notes\StickyNotes.snt
You may have to show hidden/system files via the Folder Options.
To restore it, delete the sticky notes from your desktop and copy-paste the backed up one into this folder:
C:\Users\Username\AppData\Roaming\Microsoft\Sticky Notes folder
How To Retrieve Back The Lost Notes, After Closing Windows Vista’s Sidebar Notes Gadget may interest some Windows Vista users.
Sticky Notes will not start up on boot
If your Sticky Note is open on your desktop during Windows shutdown, it will re-open automatically on startup. If for some strange reason you find that this does not happen, then you may create a desktop shortcut of Sticky Notes and place it in your Windows Startup folder. Use %windir%\system32\StikyNot.exe for the location field.
Read: Sticky Notes crashes frequently.
How to print Sticky Notes in Windows?
There is no built-in way to print a Sticky Note, but you can follow this workaround. You can copy-paste the contents of the Notepad or Word and then print it. You can also increase the size of the Note by dragging its edges, write all you want to, and then use the Snipping Tool or any screenshot tool to capture the image of the Note, save it as PNG or JPG and then print the image.
Turn the Sticky Note delete warning back on
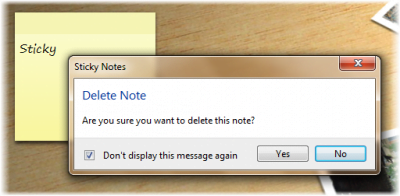
If you have at any point, on selecting delete, opted to NOT have the confirmation box shows up again, by selecting Don’t Display this message again, and would now like to get this delete confirmation box, here is one way to do it. The easier way it via its settings, of course!
Open Registry Editor and navigate to the following key :
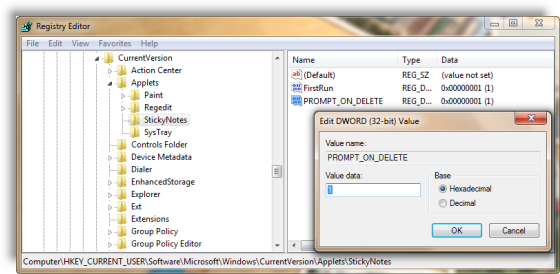
HKEY_CURRENT_USER\Software\Microsoft\Windows\CurrentVersion\Applets\StickyNotes
Now delete the value called PROMPT_ON_DELETE or set its value to 1.
If you do not want to touch the Windows registry, you could simply download our freeware FixWin to fix the issue quickly.
Read: How to use Sticky Notes to send Email.
Change Sticky Notes Font
Windows uses the Segoe Print font. Changing the default is not supported in Sticky Notes. What you can do is type your text in the desired font in a text editor like Word, and copy-paste it here. The Sticky Note should display the text in that font. Let us know if this works for you.
Read: Where are Sticky Notes saved in Windows?
Sticky Notes lets you sync notes
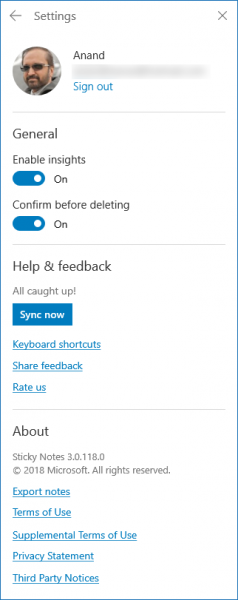
Sticky Notes now lets you Sync Notes, Export Notes to Outlook and more!
Read next: Windows Sticky Notes location.
See this post if you see Check your account, Sticky Notes is currently not available to you message.
You can also password protect Notes in Windows using some of these free Sticky Notes software.