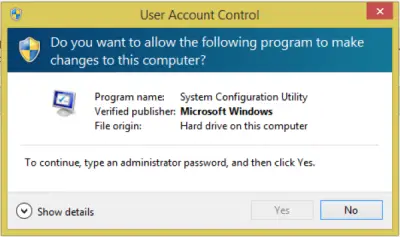
In today’s post, we will attempt to resolve the UAC (User Access Control) error message prompt – Do you want the following program to make changes to this computer? To continue, type an administrator password and then click Yes – some Windows 11/10 users might encounter when they try to open a program or perform any other action on their PC.
To continue, type an administrator password – UAC

As you can see from the image above, there is no field to type in a password and Yes is grayed out.
Turning off UAC might resolve this, but it’s strongly recommended to NOT turn off UAC. It is very good protection if rogue programs want to make changes that can harm your computer.
So, if you encountered this error after you upgraded to a new version of Windows, the problems that prevent you from accessing files and folders can occur for one or more of the following reasons:
- Folder ownership has changed.
- Files are being stored in a Windows.old folder from your previous installation.
Some of your account information may have changed if you recently upgraded your computer to Windows 10 from an earlier version of Windows. Therefore, you may no longer have ownership of some files and folders. You might be able to resolve this issue by restoring your ownership of the files and folders – but first run SFC scan and if that doesn’t remediate the issue, you can continue with the instructions below.
1. Open File Explorer.
2. Navigate to This PC > Local Disk (C:) > Users.
3. Right-click on your User profile folder and select Properties.
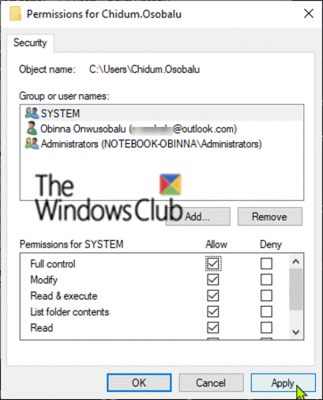
4. Click the Security tab, under Group or user names section, select your user name and click on Edit.
5. Click on Full control check box under Permissions for authenticated users and click on Apply and OK.

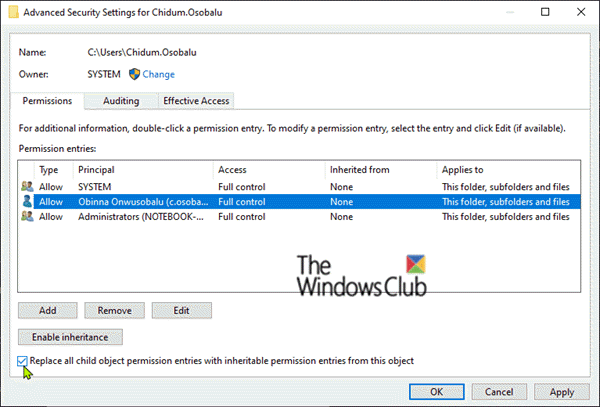
6. Now, select Advanced under Security tab.
7. Select your User profile under Permission entries and click Edit, customize the permissions level and click OK.
8. Check the option Replace all child object permissions entries with inheritable permission entries from this object.
9. Click on Apply > OK to save changes.

10. Restart your PC and check if the issue is resolved.
However, if you didn’t perform a Windows upgrade but experiencing this issue, then you can try System Restore. If the error is triggered when you try to perform a system restore, since itself is a program – then follow the instructions below and then retry the system restore operation.
1. Boot into Safe Mode with Command Prompt.
2. In the command prompt, type the command below and hit Enter.
net user Administrator /active:yes
The command above when executed will enable the Windows 11/10 inbuilt administrator account – it will now show up outside of safe mode.
3. Reboot your PC and log in as the administrator again. And retry system restore.
If there are no restore points for one reason or the other, you can carry out a Windows In-place upgrade repair. The procedure will retain your personalized settings, installed apps, and personal files but will replace any corrupt or damaged system files with fresh copies.
How do I change UAC settings in Windows 11?
To change UAC settings in Windows 11, type uac in the Search box, and click on the Change User Account Control settings option in the search result. The User Account Control Settings window will open where you can use the available slider to set the notification level to Always notify me when apps try to install software or make changes to my computer, Don’t notify me when I make changes to my computer, etc. Press the OK button to save the new setting.
How do I fix UAC disabled error?
If you face This App can’t be activated when UAC is disabled error on your Windows 11/10 computer, then you need to re-enable the User Account Control (UAC) from the User Account Control Settings window. You can also do this using the Registry Editor. Create an EnableULA DWORD value under the System key (present in HKEY_LOCAL_MACHINE root key) and set its Value data to 1 to enable the UAC setting.
That’s it! Hope this is helpful.
Leave a Reply