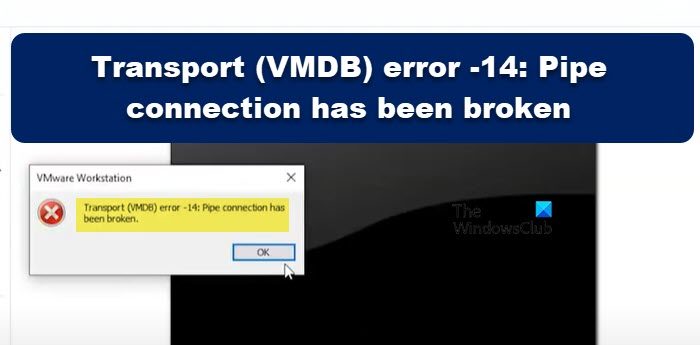
Transport (VMDB) Error -14 appears in VMWare Workstation when starting a Virtual Machine. The error is due to various reasons, such as an incorrect driver, another virtualization tool running in the background, and a lack of resources. In this article, we will discuss this issue and see what can be done if the Pipe connection has been broken in VMWare.

What is Transport (VMDB) Error?
VMDB Transport error is caused when there are issues with VMWare Virtual Machine Disk. The VMDB file stores information related to the configuration of your VM. One of the reasons for the same is a corrupted VMDB file. However, the most common error for the same is a bug or glitch in the VMWare Software. If the reason for the issue is the former, there are some hard decisions we need to take. If you get the error message due to a bug, it can be resolved without deleting the VM.
Fix Transport (VMDB) error -14: Pipe connection has been broken
If you see Transport (VMDB) error -14 in VMWare Workstation and the Pipe connection has been broken, follow the steps mentioned below to resolve the issue.
- Resolve Mismatch Version Error
- Disable Hyper-V
- Take a backup and remove the VM
- Reinstall VMWare Workstation or Player
Let us talk about them in detail.
1] Resolve Mismatch Version Error

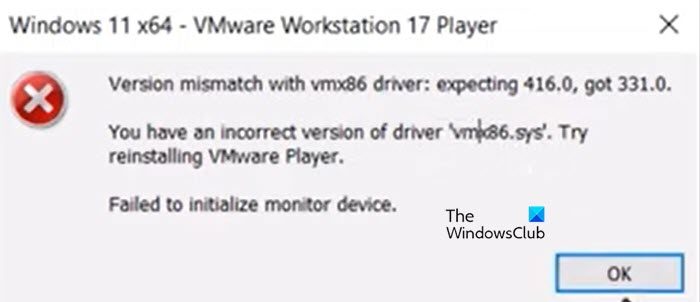
The pipe connection breaks when there is a mismatch with the vmx86 driver. When launching the virtual machine, the following error message appears and only after clicking the OK button, do victims see “Pipe connection has been broken”.
Version mismatch with vmx86 driver.
You have an incorrect version of driver ‘vmx86.sys’. Try reinstalling VMWare Player.
If you are riding the same boat, follow the steps mentioned below to resolve the issue.
- Open Services application.
- Look for the following VMWare Services, make them automatic, and then restart them (click on Stop > Start). This can be done by right-clicking on the service, selecting Properties, and changing the Startup type to Automatic.
- VMWare Authorization Service
- VMWare DHCP Service
- VMWare NAT Service
- VMWare USB Arbitration Service
- If services are already running, make sure to restart them.
- After configuring the required services, let us update VMWare Workstation. To do the same, open the app, go to Players > Help > Software Update > Check for Update > Download and Install.
- Now, restart VMWare. Make sure to close all instances of VMWare Workstation, you can open Task Manager and end every related task.
Finally, open VMWare and check if the issue is resolved.
2] Disable Hyper-V

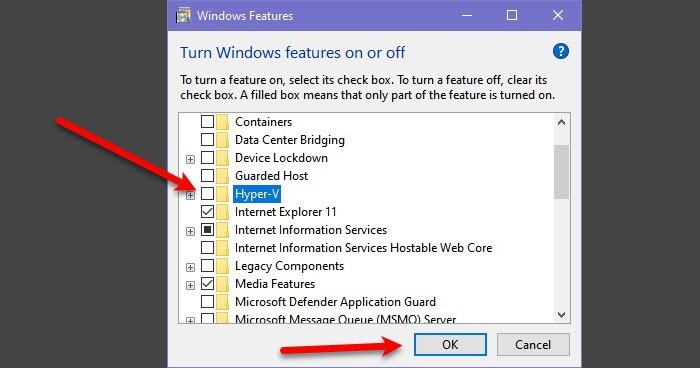
Hyper-V is a Microsoft Hypervisor technology that allows users to create Virtual machines in Microsoft’s own Hyper-V Manager. If the feature is left enabled, it will conflict with VMWare services and cause issues. In this case, we can disable the feature from Control Panel and let VMWare services flourish. To do the same, follow the steps given below.
- Open Control Panel from the Start Menu.
- Change the View by to Large icons.
- Then click on Programs and Features.
- Now click on Turn Windows features on or off.
- Look for Hyper-V and untick the box associated with it.
After disabling Hyper-V, check if the issue is resolved.
Read: VMware Workstation and Device/Credential Guard not compatible
3] Take a backup and remove the VM
If you still get the error message, take a backup and remove the Virtual Machine because VMDB errors occur when the machine is corrupted. So, go ahead and take a backup of the VM, remove it, create a new one, restore all the backups, and check if the issue persists.
4] Reinstall VMWare Workstation or Player
If nothing worked, your last resort is reinstalling the VMWare Workstation application installed on your computer. It is possible that the copy of the app installed on your computer is corrupted. That is why we will uninstall the application and reinstall it. Follow the instructions given below to uninstall VMWare Workstation from your computer.
- Open Settings.
- Go to Apps > Installed apps or Apps & Features.
- Look for VMWare Workstation.
- Windows 11: Click on the three dots and select Uninstall.
- Windows 10: Select the app and click on Uninstall.
- Click on Uninstall to confirm your action.
Once you have removed VMWare, go to vmware.com, and download a fresh copy of the same. After downloading the application, go to the Download folder, launch the installer, and follow the on-screen instructions to complete the installation process.
Hopefully, you will be able to resolve the issue using the solutions mentioned in this article.
How to fix Pipe connection has been broken?
The Pipe connection will brake in VMWare if there is some glitch in the VMWare Workstation. If you get this error, the very first thing you need to do is restart the application, close it completely, and then start it again. If that doesn’t work, follow the steps mentioned in this article to resolve the issue.
Also Read: VMware does not support the user level monitor of this host.
Leave a Reply