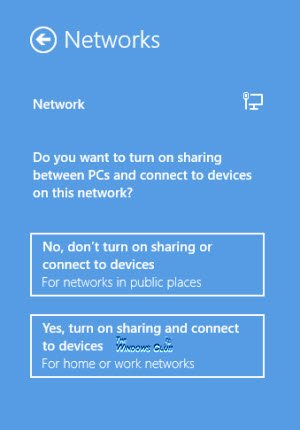
The first time you connect to a network, Windows 8 will ask you if you want to turn sharing on between PCs and connect to network devices. You can always answer Yes or No, depending on which Windows 8 will set the appropriate rules for your firewall. If you wish to change these settings you can always do so, later on.
In Windows 7, to turn sharing on or off on your network, you had to go to the Network and Sharing Center and choose homegroup and sharing options. With Windows 8, things have become a lot easier.
TIP: Windows 10 users may go here to see how to enable or disable Network Discovery or Sharing.
Turn Network Sharing on or off
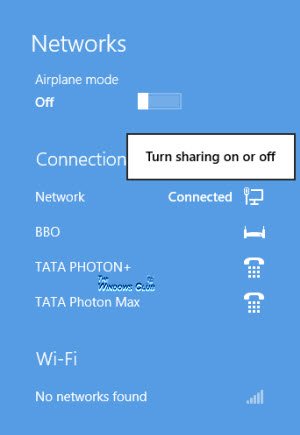
To do so, from the Windows 8 desktop, click the Network icon in the notification area. This will bring up an interface on the right side that will show you the available Networks. Right-click on the Network you are currently connected.

An option to Turn sharing on or off will be visible. Click on it.

You will now be asked Do you want to turn on sharing between PCs and connect to devices on this network.
Click on Yes turn on sharing and connect to devices. This network sharing setting is only available for Wi-Fi, Ethernet, VPN, and dial-up connections, and not for domain networks.
That is all you need to do in Windows 8 to enable or disable Network Sharing.
Once you turn on sharing, your Windows 8 device will prepare your files and folders for sharing on the network.