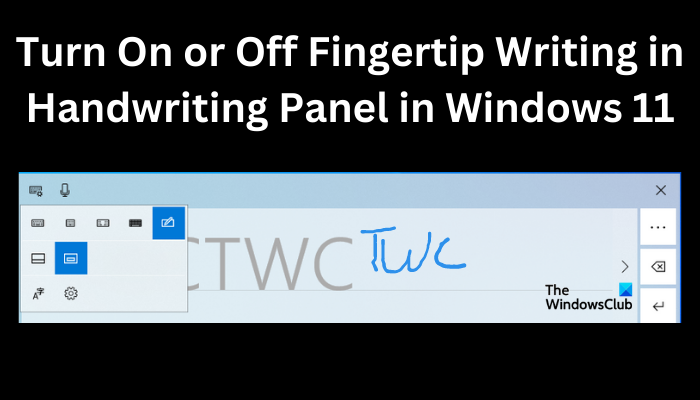
The Handwriting Panel in Windows allows you to write in it using a fingertip or stylus (pen). In this post, we will look at how you can turn on or off Fingertip Writing in Handwriting Panel using Group Policy and Registry Editor in Windows 11/10.

The Handwriting Panel has been improved to provide a seamless and more intuitive fingertip-writing experience. One of the best features of the handwriting panel is the ability to enable fingertip writing instead of using the stylus or the pen. You can turn on this feature if you don’t have the stylus, if you enjoy writing better with your fingertip, or for curiosity purposes.
It’s easy to turn on or off the fingertip in the handwriting panel. The panel displays in the bottom right of the Windows PC screen. The feature is essential for students, professionals, or any other user that needs a different way to input text. You can open the handwriting panel by clicking the touch keyboard icon in the tray area of Windows 11, but we will look at this shortly.
How do I open and use handwriting on my laptop?
Follow the steps below to open and use the handwriting input panel on a Windows PC.
- Go to the Taskbar tray area at the bottom right and click the keyboard icon to open the Touch keyboard.
- The Touch keyboard will open to its default settings. To set the fingertip or stylus click on the handwriting icon in the Touch keyboard settings section.
- Now, write the text you want using your fingertip if it’s enabled, a pen, or holding on the mouse left button and draw the letters.
Turn On or Off Fingertip Writing in Handwriting Panel in Windows 11/10
You can use the Windows Registry Editor (regedit) or Group Policy Editor (gpedit) to turn on and off fingertip writing in the handwriting panel on a Windows 11 PC. However, editing registries can interfere with how your PC works, so we recommend proceeding with these steps cautiously.
Let us look at these two methods one by one.
1] Enable or Disable Handwriting Panel using Registry Editor

To turn on or off fingertip writing in the handwriting panel on Windows 11 using the Windows Registry Editor, follow the steps below.
- Open the Run dialog box by pressing the Windows key + R. Type regedit and press Enter on the keyboard to open the Windows Registry Editor.
- Follow the path below:
Computer\HKEY_CURRENT_USER\Software\Microsoft\TabletTip
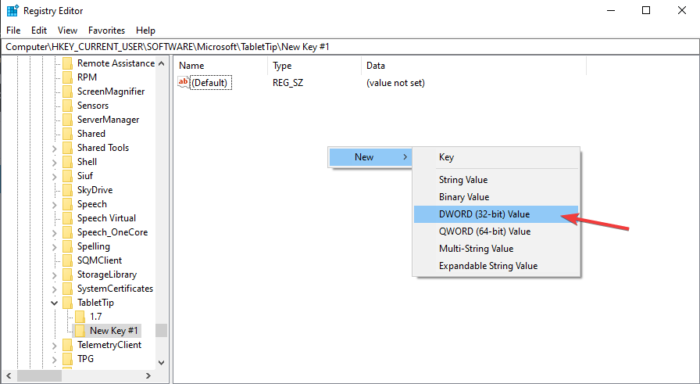
- Go to TableTip > New > Key, and name the new key as EmbeddedInkControl.
- Select New and then click DWORD (32-bit) Value. Name the REG_DWORD as EnableInkingWithTouch.
- Next, double-click EnableInkingWithTouch and set the Value data as 1 to turn on the fingertip writing on the handwriting panel, or set the Value data as 0 to turn off the fingertip writing on the handwriting panel.
- Select OK to save the changes you made and restart your computer to boot with the new changes.
That’s how you turn on or off fingertip writing on Windows 11.
Read next: Windows Touch Keyboard Settings, Tips and Tricks.
2] Turn On or Off Handwriting Panel using Group Policy Editor

Follow the steps below to turn on or off fingertip writing in the handwriting panel on Windows 11 using the Group Policy Editor.
- Open the Run dialog box by pressing the Windows key + R, type gpedit, and then press Enter on the keyboard. This will open the Local Group Policy Editor.
- Under the Computer Configuration, go to Administrative Templates > Windows Components > Handwriting.
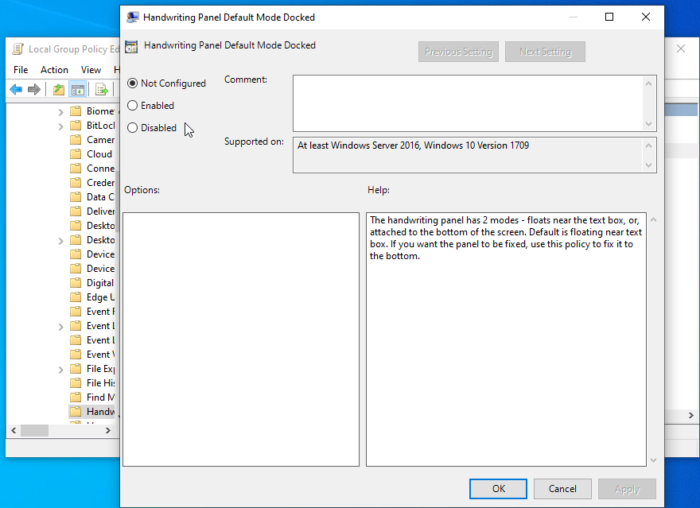
- On the right panel, you will see Handwriting Panel Default Mode Docked; right-click on it and select Edit.
- Tick the box next to Not configured to turn on the fingertip writing or you can click Disable to turn it off. Then select Apply and Ok to apply the changes.
We hope one of the methods helps you enable or disable fingertip writing on Windows 11.
How do I turn on my Stylus Pen on my laptop?
To turn on your stylus pen on your laptop, go to the Windows settings by pressing the Windows key + I. Head to Devices and choose Bluetooth & other devices. Long-press the shortcut button on your stylus pen for about seven seconds to enable it to pair with your computer. On your laptop, choose your pen from the list of devices listed to pair. Select Pair to complete the pairing process. You can now open the handwriting mode of the Touch keyboard and start writing with your pen.
Why is my Windows Touch Pen not working?
The reason why the Windows touch pen is not working is that your pen battery levels are extremely low, your pen is not paired, or it is faulty and needs to be replaced with a working one. If the battery levels are low, the touch pen will blink red, and you need to recharge it. Remember to long-press the top button of the touch pen for about five to seven minutes to enable pairing. Make sure Bluetooth is turned on on your PC.
Leave a Reply