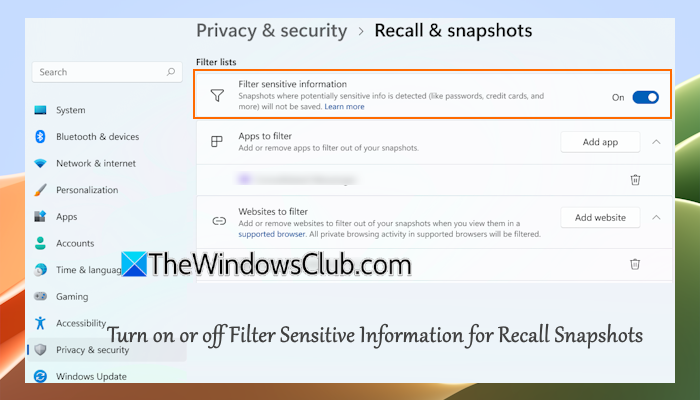
In this tutorial, we will show you how to turn on or off Filter Sensitive Information for Recall Snapshots on a Windows 11 PC. When using Recall on a Copilot+ PC in Windows 11, Windows periodically takes snapshots of the computer screen and saves them on your PC. However, when Recall detects potentially sensitive information like a credit card number, general password, driver’s license number, bank account number, etc., it won’t save snapshots. It happens because of the Sensitive information filter setting that remains enabled by default to ensure data confidentiality. But you can change this setting with a few simple steps.
We already have the features to include or exclude an app or website to filter out of Recall snapshots, delete snapshots from a specific timeframe, delete all Recall snapshots, etc. Now, we can choose whether or not the snapshots be saved when potentially sensitive info is detected.
How to turn on or off Filter Sensitive Information for Recall Snapshots in Windows 11

The steps to turn on or off filter sensitive information for Recall snapshots in Windows 11 are as follows:
- Use the Win+I hotkey to open the Settings app
- Click on the Privacy & security category
- Access the Recall & snapshots page present under the Windows Permissions section on the right part
- In the Filter lists section, press the Filter sensitive information toggle to turn off this setting
- In the Windows Security prompt, press OK to allow your Recall settings to be modified.
Related: Recall is now saving snapshots; But no snapshots saved
Now Recall will take and save snapshots even if there’s potentially sensitive information available on the screen. Even though the Sensitive information filter setting is turned off, your sensitive information remains on your device. The snapshots are also encrypted so that only you will be able to access them.
To enable the Filter Sensitive Information again for Recall snapshots, open the Recall & snapshots page in the Settings app. Now use the toggle for the Sensitive information filter setting to turn it on.
Hope this helps.
Now read: How to uninstall the Recall feature in Windows 11
How do I enable Recall feature in Windows 11?
To turn on or enable the Recall feature in Windows 11, you need to turn on the Save snapshots option. Navigate to the Settings app > Privacy & security > Recall & Snapshots. There, use the Save snapshots toggle to turn it on. In case the Recall feature is completely disabled on your PC, then to enable the Recall feature, open the Windows Features (or Turn Windows features on or off) window. Look for the Recall option and select it. Press OK and restart your PC. Once the Recall feature is activated on your PC, you can enable it by turning on the Save snapshots option in Windows Settings.
What are the system requirements for Recall in Windows 11?
The minimum system requirements for Recall in Windows 11 include a Copilot+ PC meeting Secured-code standard, 16 GB RAM, 256 GB storage capacity, and 40 TOPs NPU (neural [processing unit). In addition, you should have at least 50 GB of free storage space to enable Recall. You also need to enable Bitlocker or Device Encryption and enroll in Windows Hello Enhanced Sign-in Security with at least one biometric sign-in option enabled.
Read next: How to download and install Recall on an unsupported computer.
Leave a Reply