The settings used for printing documents from the Web are controlled via a web browser. You can customize it to show or hide certain elements. For example, you can configure your Chrome browser to display or hide Header and Footer when printing.
Enable or disable Header and Footer when printing in Chrome
When you choose to print a web page in a browser like Google Chrome, you can enable or disable the Header and the Footer from the printing. The Header includes page details like the title, page number, and the total number of pages. On the other hand, Footer displays the URL of the page and the date. Depending on your preferences you can take an action.
- Launch Google Chrome.
- Click the Customize and control Google Chrome icon.
- Select Print option.
- Hit the More Settings drop-down button.
- Scroll down to Options.
- Check or uncheck Headers and footers box.
- Hit the Print button.
In some cases, Headers and footers are often found to be helpful and needed for certain documents. However, sometimes, they are simply not essential.
Launch the Google Chrome browser.
Click the Customize and control Google Chrome icon, visible as 3 vertical dots in the upper right corner of the screen. If you are using a different browser, only the first step may vary. For example, in the case of Edge, you’ll need to choose the Settings and more (3 horizontal dots) icon and in the case of Firefox, open the Application menu.
Select the Print option from the menu.

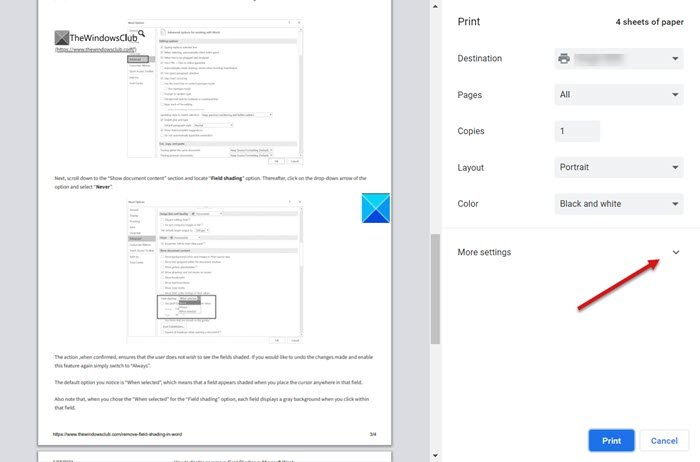
When a new screen appears, scroll down to the More Settings option. Hit the drop-down button next to it to expand its menu.
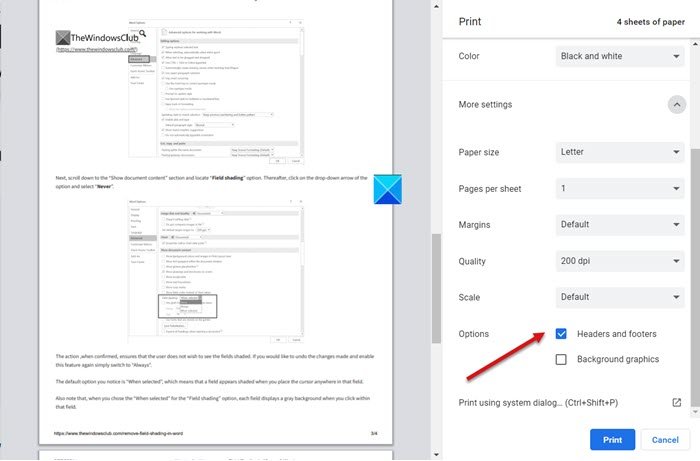
Now, scroll down to the Options section.
There, you’ll find the Headers and footers option.

Check or uncheck the box marked against this option.
Depending on the option you chose, the Headers and footers will be enabled or disabled while printing in Windows.
Hope it helps!
Leave a Reply