In this post, we will show you how to tweak Windows File Explorer using WinSetView. WinSetView is an open-source tool that allows you to set desired views for different types of folders in the Windows operating system. In other words, it allows you to change how files are displayed in Windows File Explorer.
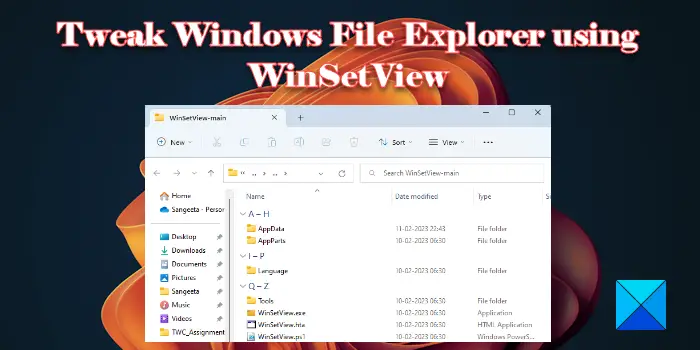
Windows has a variety of folders, such as Downloads, Documents, Pictures, etc. Based on the nature of files, Windows assign a specific layout to display the content of these folders in the File Explorer window. For example, the files or folders within the Pictures folder are displayed as Large icons, whereas the files or folders within the Documents folder are displayed in the Details view. This display layout can be changed using the View dropdown in the File Explorer toolbar. Once you change this, the layout applies to all the folders of the same type.
For example, changes made to the Pictures folder will also be applied to the Pictures Library folder. However, what if you want more control over the folder views and apply a view setting across all the folders, irrespective of their type? This is what WinSetView allows you to do. In this post, we will learn how to use WinSetView to globally set File Explorer folder views.
Tweak Windows File Explorer using WinSetView
Tweaking Explorer using WinSetView is easy. WinSetView works by modifying the registry keys associated with Windows Explorer. It does not modify the File Explorer and takes a backup of the default settings before making any changes to them. So you can experiment with the software and if you didn’t get the desired output, you may roll back to the backup anytime.
Once you have downloaded WinSetView, extract the contents of the zip folder. Close all open applications and then double-click on the WinSetView.exe file to launch the software. Keeping other applications open while running WinSetView may interfere with the updation of the open/save dialog views. WinSetView can be launched without using administrator privileges. This is because changes made are exclusive to the current user profile. It will not affect the other users on the same computer.
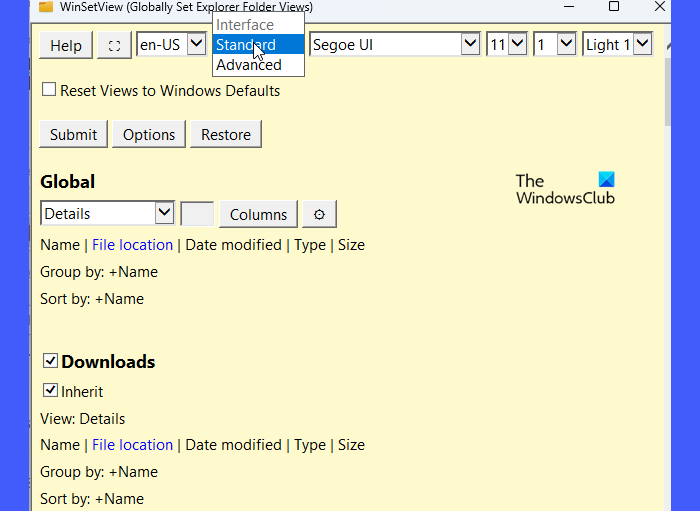
The buttons on the top row of the WinSetView window are for theme customization. A noticeable feature in this row is the Standard dropdown. You may use this dropdown to switch between the Standard and the Advanced interface in WinSetView. The Advanced interface offers advanced features, such as saving WinSetView interface selections to an INI file or loading default folder view settings into WinSetView.
Follow these steps to use WinSetView to set File Explorer Folder view:
- Select a default view
- Select default column headings
- Select views for specific Folder types
- Select preferred Options
- Apply selections to Windows File Explorer
Let us see these in detail.
1] Select a default view
Notice the Global section on top. This section lets you select a default view that you want to apply to the main folders (or all folders) in File Explorer. You may choose between Details, Tiles, List, or Icons view (Small/ Medium/ Large/ Extra Large). For the icons view, you may also set the size of the icon.
2] Select default column headings
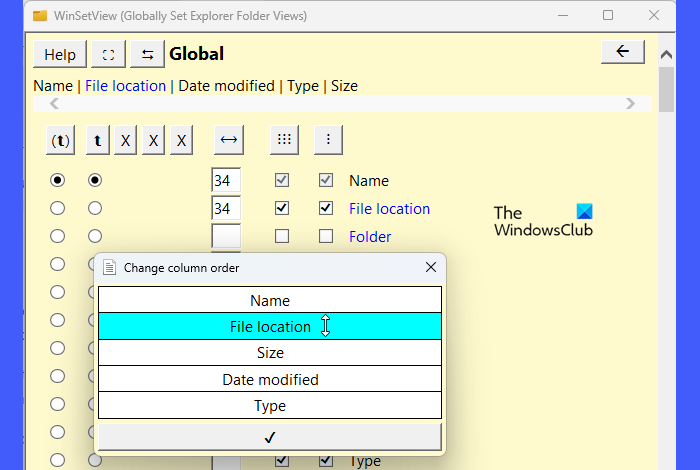
Click on the Columns button to open the Column headings selection window. From this window, you may select the column headings that want to display in the default view. You may also select options to group or sort items in the current folder based on the selected column headings. To change the order of the column headings, you may click on the Change column order button on top.
TIP: You can also use FixWin to Reset the Folder View to Default.
3] Select views for specific Folder types
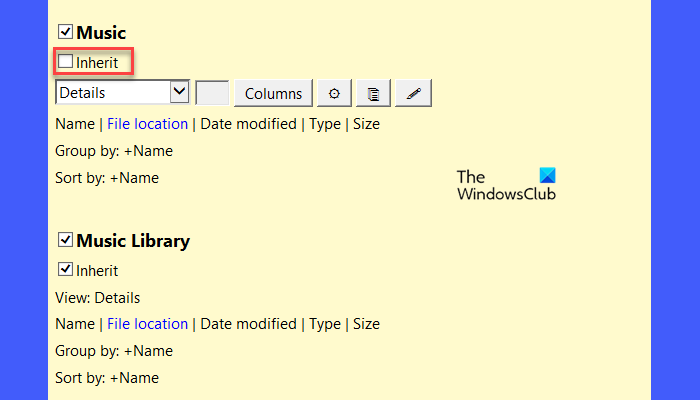
Notice the Inherit checkbox below each folder type in the WinSetView window. These checkboxes are all in a checked state. This means, all the folders will inherit the Global settings by default (irrespective of their template type). If you want a specific folder to have settings that differ from the global settings, you may uncheck the Inherit checkbox below the folder name. As soon as you uncheck the checkbox, you will see options to select the default view and column headings for that particular folder. If you leave it unchecked without making any changes, the folder will display its content in Windows default view settings. Changes made to one folder type will apply to another folder of the same type as long as the Inherit button is checked.
4] Select preferred Options
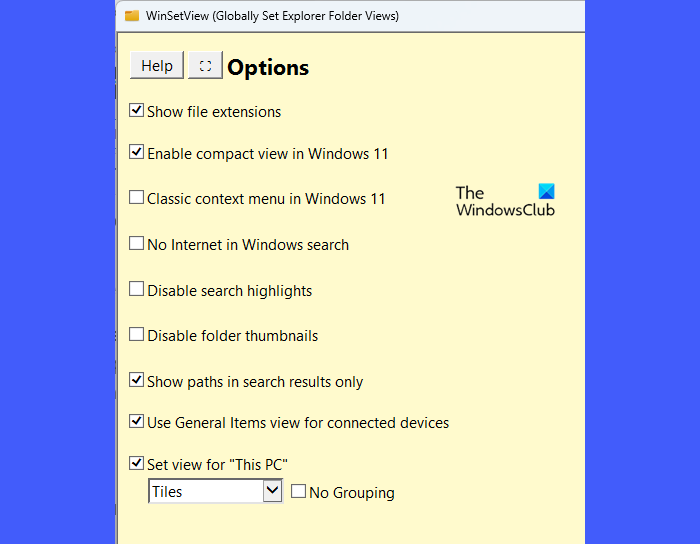
Click on the Options button just above the Global section. This will open the Options window where you can select your preferred options, such as show file extensions for known file types, enabling compact view in Windows 11, disabling search highlights, disabling folder thumbnails, showing the path in search results only, etc.
TIP: Use Ultimate Windows Tweaker to tweak more of Explorer
5] Apply selections to Windows File Explorer
Once you review Folder view settings and options, click on the Submit button near the Options button to apply the settings to Windows File Explorer. This will run the WinSetView PowerShell command line script to execute changes made to the Folder view settings.
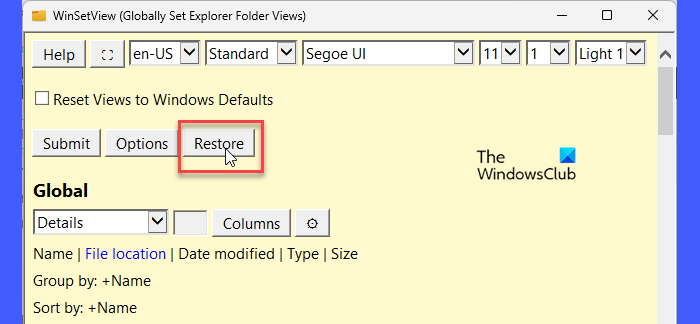
To revert to the previous state, relaunch WinSetView and click on the Restore button that appears next to the Options button.
To switch back to the default Windows folder view settings, click on the Reset Views to Windows Defaults checkbox on top of the WinSetView window and then click on the Submit button.
You can download WinSetView from github.com by clicking here. To read more about the tool, you may see the complete manual here on the WinSetView website.
Read: How to change Library folder template on Windows.
How do I change Folder View in Windows 11 for all folders?
To change the default Folder View for all folders in Windows 11, open a folder that has the template that you want to apply to all other folders of the same type. Make desired changes to folder layout view settings. Then click on the See more icon on the toolbar on top. Select Options. In the Folder Options window, switch to the View tab. Click on the Apply to Folders button. Click Yes in the alert prompt that appears and then click on the OK button.
How to reset Folder View settings in File Explorer?
Open the folder in File Explorer. Click on the See more icon (three horizontal dots) among the toolbar icons at the top. Click on Options in the dropdown that appears. Click on the View tab in the Folder Options window and then click on the Reset Folders button. Click on the Yes button in the Folder Views dialogue box. Then click on the OK button to exit Folder Options.
Read Next: Windows forgets Folder View settings.
Leave a Reply