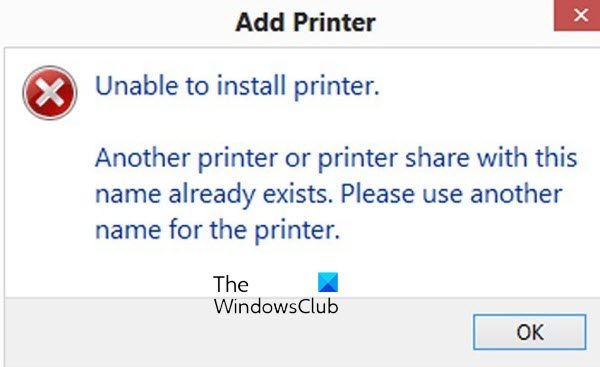
Installing a printer on Windows isn’t as complicated as it might seem. All you have to do is install the printer driver and follow along with the onscreen steps. However, sometimes you do encounter random errors. One such error is Unable to install printer. Another printer or printers shared with this name already exists. Please use another name for the printer.
What does this error mean?
The error is self-explanatory. It simply means another printer is installed on your computer with the same name as the current printer you are trying to install.
Each printer installed on your computer must have a unique identifier. But the error occurs when two printers use the same identifier.
There is also a good chance that you have removed your existing printer and trying to reinstall the new driver. In this case, the registry entry for the printer still exists on your computer, preventing you from reinstalling your printer.
Fix Unable to install printer, Another printer with this name already exists
Now that you know what the error stands for, here are a few fixes that you can use to get rid of the error:
- Removing the existing printer with the same name
- Delete the old printer from the registry
- Restart the Print Spooler service
You will need an administrator account to execute these suggestions. We also recommend making a system restore point in case sometime goes wrong.
1] Removing the Existing Printer With the Same Name
If you have an existing printer installed on your system, remove it before installing the new driver. To remove the printer driver, follow these steps:
- Press Windows Key + I to launch Settings.
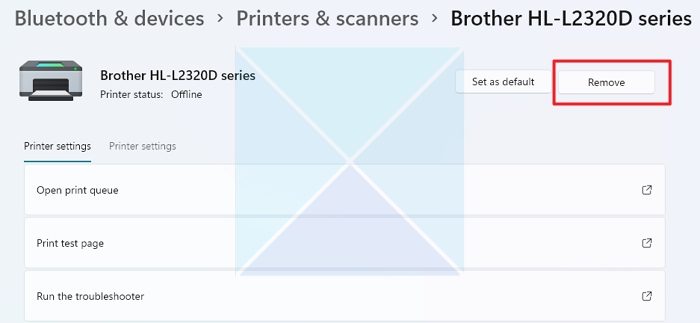
- Go to Bluetooth & Devices> Printers & Scanners.
- Next, select your printer and click the Remove button to uninstall your printer.
- Once the printer is removed, reboot your PC and reinstall it; it should work just fine.
2] Delete the Old Printer From the Registry
You may still encounter the error even if you have removed the existing printer driver. This is because the printer details are still stored in the registry files.
So you must delete the existing printer registry and then reinstall your printer. However, before making changes to the registry files, make sure to take a backup of your registry to be on the safer side.
Here are all the steps that you have to follow:
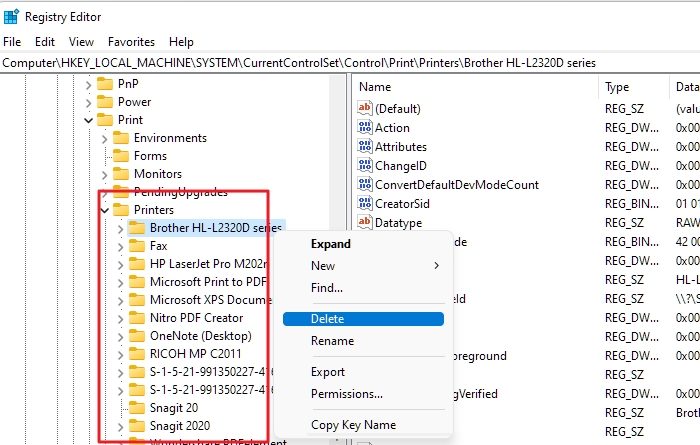
- Open Registry Editor
- Go to the following path:
HKEY_LOCAL_MACHINE\SYSTEM\CurrentControlSet\Control\Print\Printers
- Over here, look for keys or values related to the printer name you are trying to use. Then right-click on the registry file and delete it.
- Once done, reboot your PC, reinstall the printer driver, and see if it works.
Related: Deleted printer keep reappearing.
3] Stop the Print Spooler Service
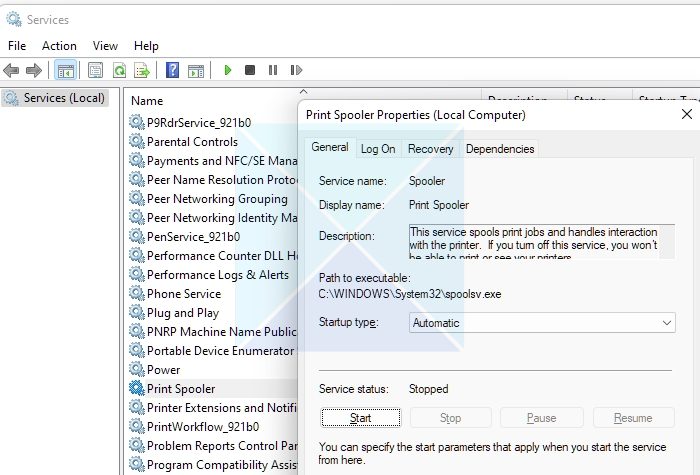
If you cannot remove the printer using the registry or direct method, the Printer spooler service may be blocking it. Print Spooler is a Windows service responsible for managing all the print jobs on your PC. So in case it’s not working, your printer won’t work either.
To restart the service, follow these steps:
- Launch Run by pressing Windows Key + R.
- Type services.msc and press Enter.
- Now search for Printer Spooler and right-click on it and select Properties.
- Next, if the service is running, click the Stop button to stop the service.
- Once done, try removing your printer, and it should work.
Read: Fix Printer Connection and Printing problems in Windows
So that was a quick fix for the unable to install printer, Another printer with this name already exists in error. Ensure no existing printer with the same name or registry is installed on your PC. If there is, remove them; you shouldn’t have any issues. However, you must consider resetting your PC if nothing works for you.
How to fix the share name that already exists?
If you share a printer on a network, you need to give it a unique name, similar to how you do it when you add it to your PC. So if you are getting the same share name when sharing the printer on the network, it’s best to change the name of your printer or ask the admin to change the other printer’s name.
How to change the name of your printer?
You can do it by going to Windows Settings > Bluetooth & Devices > Printers and selecting the printer. Switch to Printer settings, and click on Printer properties. Under the general tab, you will get the option to change the printer’s name.
Leave a Reply