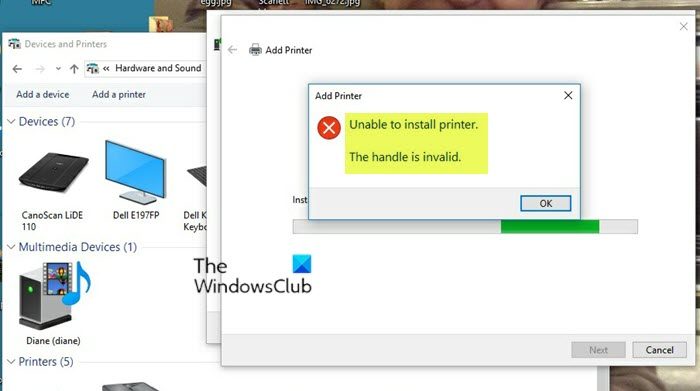
If when you try to install a printer on your Windows 11 or Windows 10 computer, and you encounter the error message Unable to install printer – The handle is invalid, then this post is intended to help you. In this post, we will offer the most suitable solutions affected PC users can apply to resolve this issue.

What does Handle is invalid mean?
When you encounter the handle is invalid error message when logging into your Windows 11/10 computer, it’s most likely due to a Windows update or Driver that did not install correctly or was not entirely installed. In most cases, this problem occurs after a significant software change goes awry. You may also encounter an Invalid file handle error during delete, rename, copy, etc. operations.
Unable to install printer – The handle is invalid
If you’re faced with this issue, you can try our recommended solutions below in no particular order and see if that helps to resolve the Unable to install printer – The handle is invalid error that occurs on your Windows 11/10 computer.
- Run SFC and DISM scan
- Run Printer Troubleshooter
- Update Printer driver
- Download and install Universal Printer Driver
Let’s take a look at the description of the process involved concerning each of the listed solutions.
Before you try the solutions below, check for updates and install any available bits on your Windows device and see if the error reappears when you attempt installing the printer.
1] Run SFC and DISM scan
You can begin troubleshooting the Unable to install printer – The handle is invalid error that occurs on your Windows 11/10 computer by running SFC and DISM scan – to do this, follow the instructions in the guide on how to fix Devices and Printers page is blank.
If this action didn’t work for you, you can try the next solution.
2] Run Printer Troubleshooter

Running the Windows in-built Troubleshooter will restart your printer and drivers and check for any errors. Your printer must be connected during this procedure.
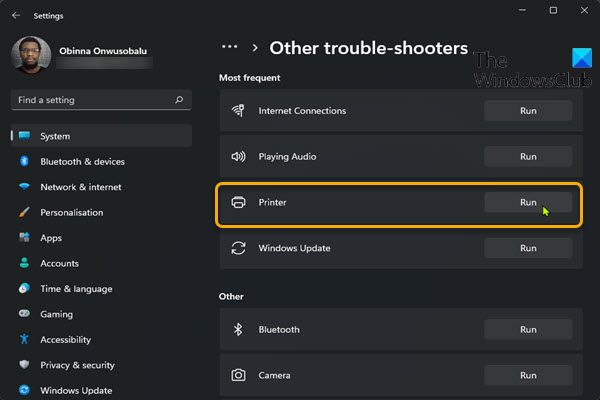
To run the Printer Troubleshooter on your Windows 11 device, do the following:
- Press Windows key + I to open Settings app.
- Navigate to System > Troubleshoot > Other troubleshooters.
- Under the Most frequent menu, find Printer.
- Click Run.
To run the Printer Troubleshooter on Windows 10 PC, do the following:
- Press Windows key + I to open Settings app.
- Go to Update and Security.
- Click the Troubleshooter tab.
- Scroll down and click on Printers.
- Click the Run the troubleshooter button.
- Follow on-screen instructions and apply any recommended fixes.
After running the troubleshooter, try installing the printer again and see If the error in view is still unresolved. Try the next solution if that’s the case.
3] Update Printer driver
This solution requires you to make sure you have installed the latest print drivers for your printer. You can download the latest version of the printer driver from the manufacturer’s website.
Alternatively, you can update the printer driver via Device Manager. Here’s how:
- Press Windows key + X to open Power User Menu.
- Press M key on the keyboard to open Device Manager.
- Once you’re inside Device Manager, scroll down through the list of installed devices and expand the Print queues section.
- Next, right-click on the printer that you’re having issues with and choose Update driver from the context menu.
- At the next screen, click on Search automatically for updated driver software.
- Wait until the scan is complete. If a new driver version is found, follow the on-screen instructions to download & install it on your computer.
- Restart your device.
4] Download and install Universal Printer Driver
PC users that were trying to install HP printers on their Windows 11/10 system reported they were able to resolve the issue in hand by downloading and installing Universal Printer Driver (UPD) for Windows from support.hp.com website.
Hope this helps!
Related post: Fix Unable to install Printer, Error 0x00000c1 on Windows 11/10
How do I download Microsoft PDF print drivers?
Open Control Panel on your Windows system. Click Devices and Printers. In the Devices and Printers window, navigate to the Printers section. Locate Print to PDF, right-click the entry and choose Set as default printer from the menu. Once done, you should see a green checkmark next to Print to PDF, which is set as a default printer. Next, you can attempt to print any file, and since the default printer is a PDF printer, it will automatically ask you to save it as a PDF file on your PC.
Where are the printer drivers located in Windows 11/10?
The printer drivers are stored in C:\Windows\System32\DriverStore\FileRepository on your Windows 11/10 system. It’s recommended that PC users do not manually remove any drivers from the Windows system. You can try to remove the printer driver from the Print Management console, go to Start and search for Print Management and open it. Once you find the printer, right-click on it, and choose to uninstall. It will remove the printer drivers along with the printer.
Leave a Reply