Microsoft Surface helps you leverage the latest technologies – but sometimes, this very feature becomes a problem. For example, when a Surface device is enrolled in Surface Enterprise Management Mode (SEMM), it prevents any unauthorized changes to Surface UEFI settings. So, to restore control of Surface UEFI settings to the user, the device has to be unenrolled from SEMM. Here’s the way to unenroll Microsoft Surface from SEMM.
Unenroll Microsoft Surface from SEMM
You can choose to unenroll your Microsoft Surface from SEMM via two methods namely-
- Unenrolling Surface from SEMM with a Recovery Request
- Unenrolling Surface with UEFI reset package
The process of getting Microsoft Surface unenrolled from SEMM is sometimes described as reset or recovery.
1] Unenroll Surface from SEMM with a Recovery Request
Boot the selected Surface device to be unenrolled from SEMM to Surface UEFI.
Next, enter the Surface UEFI password when prompted.
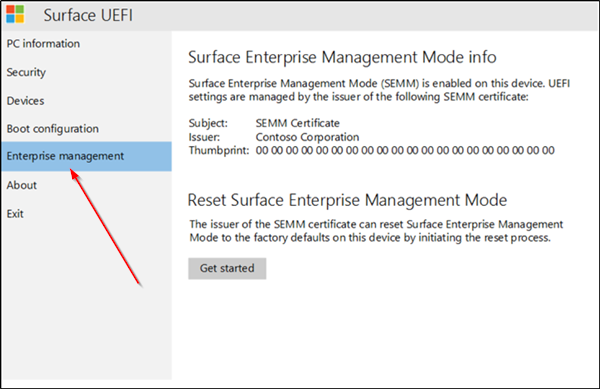
When you see the ‘Surface Enterprise Management Mode info’ screen, select the ‘Enterprise management’ tab, as shown in the image above. (The Enterprise management page is displayed in Surface UEFI on devices enrolled in SEMM).
Hit the ‘Get Started’ button and choose ‘Next’ to kickstart the Recovery Request process.
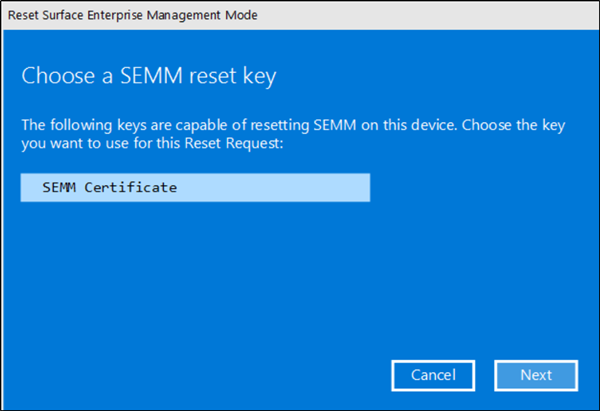
Once you finish with the above steps, select SEMM Certificate from the list of certificates displayed on the ‘Choose a SEMM reset key page’ and then press Next.
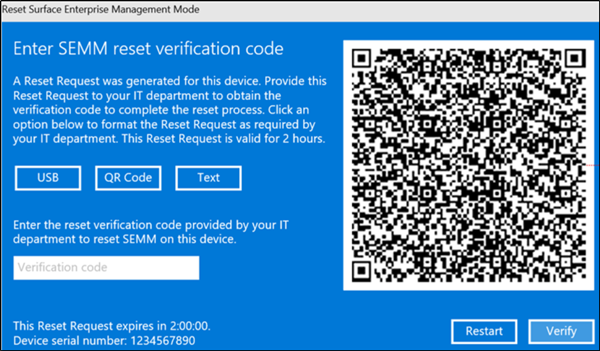
Now, when directed to the ‘Enter SEMM reset verification code’ page, choose the QR Code or Text buttons to display your Recovery Request (Reset-Request).
While using the QR Code Recovery Request (Reset-Request), use a QR reader app on a mobile device to read the code. The QR reader app will translate the QR code into an alphanumeric string. You can then email or message that string to the administrator that will produce the reset verification code with Microsoft Surface UEFI Configurator. Alternatively, to use the Recovery Request (Reset-Request) as text, simply type the text directly into Microsoft Surface UEFI Configurator.
When done, open Microsoft Surface UEFI Configurator from the Start menu on another computer, click ‘Start’ > ‘Recovery Request’ and choose ‘Certificate Protection’ to authenticate the Recovery Request with the SEMM certificate.
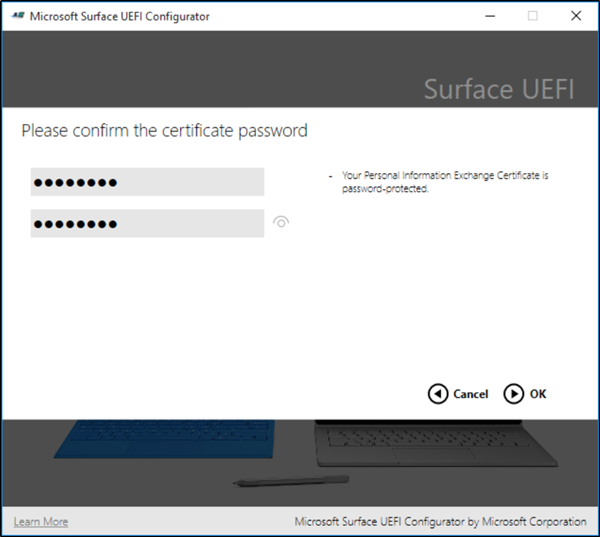
Now, Browse to and select your SEMM certificate file, and then click OK. At this stage, if you are prompted to enter the certificate password, type and confirm the password for the certificate file, and then click OK. (Microsoft Surface UEFI Configurator).
Enter the Recovery Request (Reset-Request), and then click ‘Generate’ to create a reset verification code.
The reset verification code will be shown in Microsoft Surface UEFI Configurator.
Click the Share button to send the reset verification code by email.
Enter the reset verification code in the provided field on the Surface device and then click or press ‘Verify’ to reset the device and unenroll the device from SEMM.
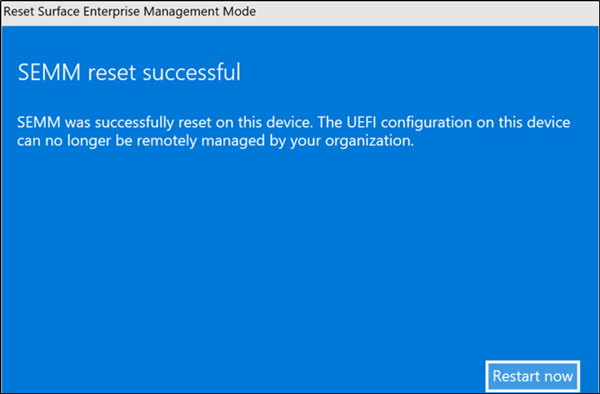
Now, hit the ‘Restart now’ on the SEMM reset successful page to complete the removal from SEMM.
Finally, click ‘End’ in Microsoft Surface UEFI Configurator to complete the Recovery Request (Reset-Request) process and close Microsoft Surface UEFI Configurator.
2] Unenroll Surface with UEFI reset package
The package comes as a Windows Installer (.msi) file and resets the Surface UEFI configuration on a Surface device to its default settings. It also removes the SEMM certificate, and unenrolls the device from SEMM.
For creating a reset package, you will need the serial number of the device you want to unenroll as well as the SEMM certificate used to enroll the device.
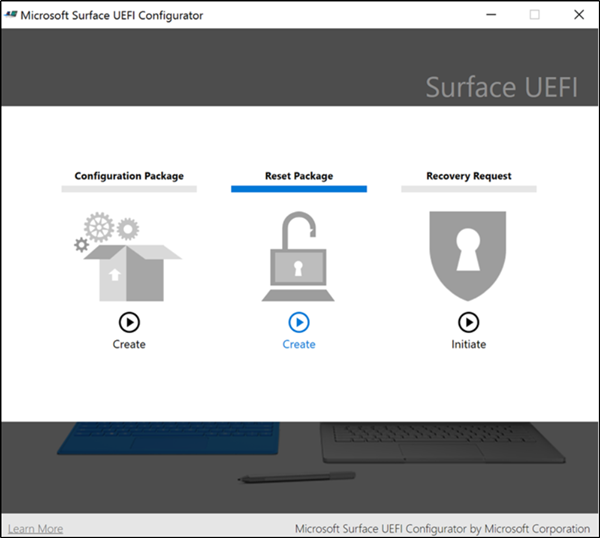
If you know it, open ‘Microsoft Surface UEFI Configurator’ from the Start menu, go to Start and click ‘Reset Package’.
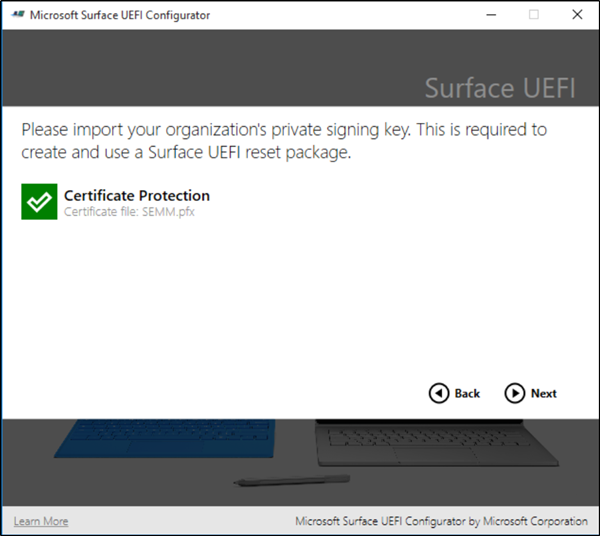
Now, choose ‘Certificate Protection’ to add your SEMM certificate file with the private key (.pfx).
Later, browse to the location of your certificate file, select the file, and then click OK.
Hit ‘Next’ after that.
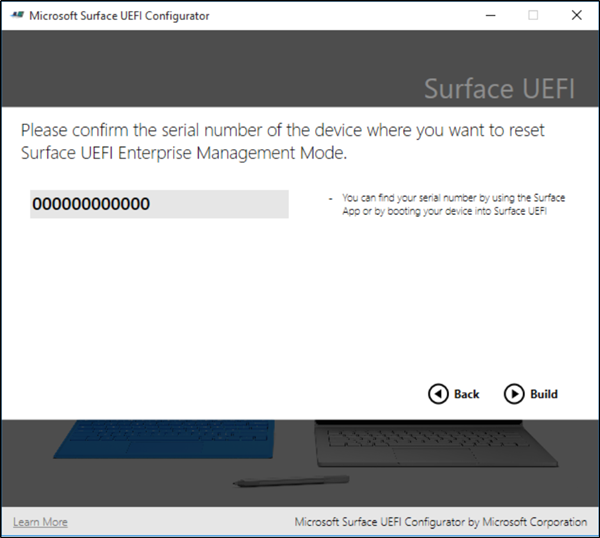
When prompted, enter the serial number of the device you want to unenroll from SEMM, and then click ‘Build’ to generate the Surface UEFI reset package.
When the ‘Save As’ dialog box appears, specify a name for the Surface UEFI reset package. Specify the location where you would like to save the file, and then click Save.
After the process of package generation gets completed, you’ll get a confirmation message. Click End to complete package creation and close Microsoft Surface UEFI Configurator.
Now, all you need to do is run the Surface UEFI reset package Windows Installer (.msi) file on the Surface device to unenroll the device from SEMM. You will also be required to reboot to complete the unenroll operation.
Read: Download Surface Recovery Image for Windows 11/10 devices.
Leave a Reply