Some Windows Updates when successfully installed on your Windows computer are marked as Permanent and do not offer an Uninstall option. In this post, we explain this behavior and also provide a walkthrough on how to uninstall such updates.

Before we jump right into it, a bit of background.
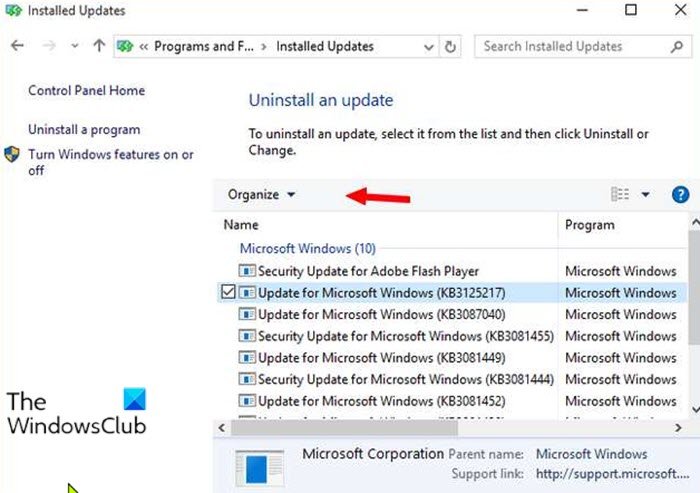
If an installed update causes issues, PC users can open Control Panel, navigate to Programs and Features and select Installed updates – All installed updates are listed.
Normally, selecting an update shows an Uninstall button – but for some update packages, the Uninstall button is greyed out or isn’t available, as you can see from the lead-in image above.
Additionally, trying to uninstall the update via Advanced Options or via command prompt is futile.
Microsoft has published a document explaining in which cases a patch isn’t uninstallable. The options available are to roll back the system to a previous build before installing the update, perform a system restore, or restore the system image backup (if you have previously created a system image backup prior to the update). But what to do, if these options are not available or simply not working for you?
Uninstall Windows Updates marked as Permanent without Uninstall option
Some updates are essential for Windows and are integrated deeply into the system. Servicing Stack updates (which are now implemented as a combined package) are mandatory to install further updates – also installer updates are uninstallable. Microsoft declares such updates as “permanent” within the .msu file, while ordinary update packages are quoted as “removable”. Sometimes a KB article or the Update Release Notes, under the Removal information section, will indicate that the update is not uninstallable.
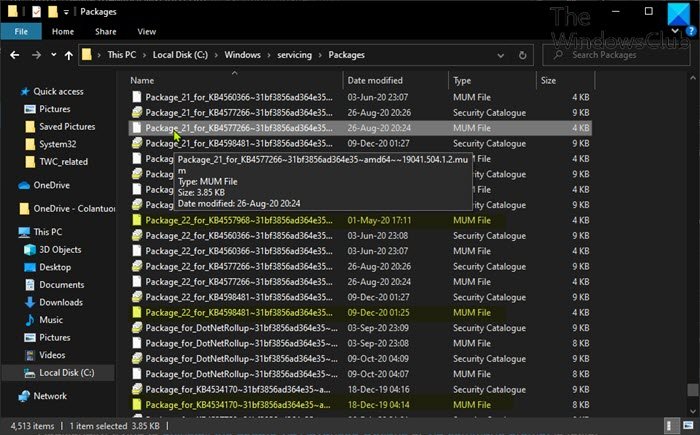
An update is set as permanent or removable within .mum (Microsoft Update Manifest) files within an .msu package. These .mum files may be found after installing an update at the following location as shown on the image below:
C:\Windows\servicing\Packages\

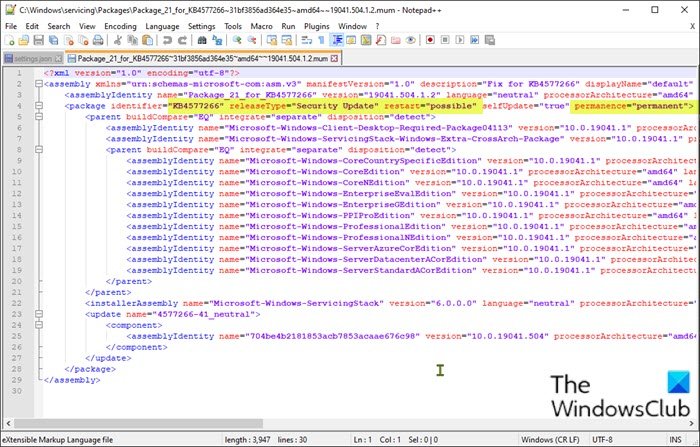
The .mum files are simply XML files containing information about the update (KB number, language requirements, restart after installation required and so on).
As shown in the image below, the XML attribute permanence=”permanent” quotes an update as not uninstallable, while a missing attribute or an XML attribute value permanence=”removable” quotes an update as uninstallable.

Only updates with a missing or permanence=”removable” attribute are uninstallable via the usual methods.
To uninstall these updates marked as “permanent” from your Windows 10 device, do the following:
First, create a system restore point or create a system image backup, and then proceed as follows.
- Press Windows key + E to open File Explorer.
- Navigate to the directory path below:
C:\Windows\servicing\Packages\
- At the location, enter the search expression into the search box (for instance KB4577266*.mum), to filter the relevant files for the uninstallable update package.
- Take ownership of the MUM file.
- Once you have taken ownership of the MUM file, open the .mum file with any Text Editor.
- In the text editor, identify the entry permanence=”permanent” and change it to permanence=”removable”.
- Save the modified .mum file.
- Repeat the steps above for all .mum files associated with the update package.
Once you’re done modifying all the necessary .mum files, you can try to uninstall the package via Control Panel – the Uninstall button should be available now.
That’s it!