If DaVinci Resolve displays the Unsupported GPU processing Mode error message, then it could be because of an incorrect response from the Graphics Driver, where the Graphics Driver restricts the app from accessing the CUDA functionality. The error message says:
Unsupported GPU Processing Mode
Please review the GPU drivers and GPU configuration under preferences.
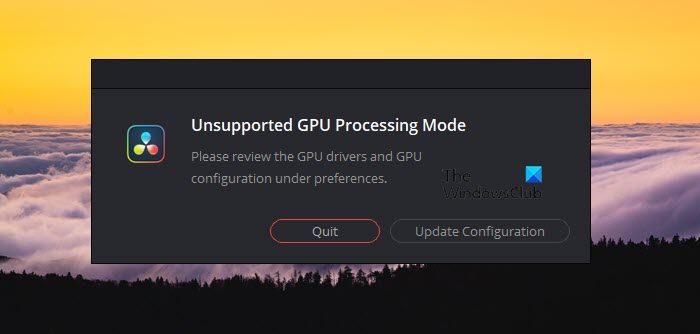
Fix Unsupported GPU Processing Mode in DaVinci Resolve
If you are receiving the Unsupported GPU processing mode error message in DaVinci Resolve, execute the solutions mentioned below:
- Update/Downgrade the Graphics driver
- Manually set the GPU processing unit
- Check Environment variables
- Reinstall AMD Adrenalin
- Repair the DaVinci Resolve
- Reinstall DaVinci Resolve
Let’s get to know more about these solutions.
1] Update/Downgrade the Graphics driver
DaVinci Resolve is a very picky app when it comes to the Graphics Driver. Therefore running any unsupported version can put you in this dilemma, so according to the requirement, update or downgrade the Graphics driver, and then check if the problem still resists.
In Windows, we can check if Driver updates are available under Optional Updates. Follow the steps mentioned below to do the same,
- Click Win + I to open Settings, and then click on Windows Update.
- Go to the Advanced options, and select Optional Updates on the right side
- Now, expand Driver updates to see if any updates related to Graphics or other drivers are available.
If relevant driver updates are available, install them to upgrade your driver to a new version.
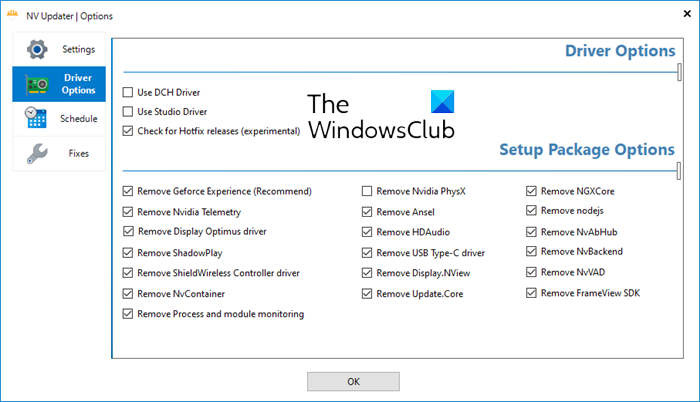
There are other methods to update the display driver – using a free driver update tool or downloading the driver’s installation file from the manufacturer’s website are two of them.
If you see the error after updating your driver, then you will have to roll back the driver.
2] Manually set the GPU Processing unit
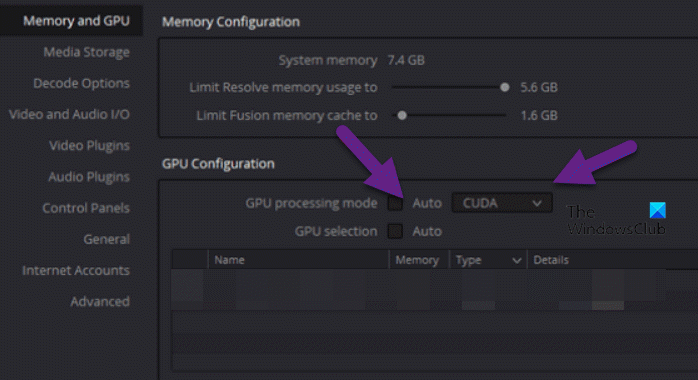
There are times when due to some reason or other, the app can’t decide the GPU processing unit and tends to show the above-mentioned error message. Here, we have to manually set the GPU Processing unit, and make it clear for the app.
To do the same, follow the steps mentioned below:
- Launch the DaVinci Resolve app, click on DaVinci Resolve, and then select the Preferences tab from the top-left screen.
- In the System tab, go to the Memory and GPU section.
- There, uncheck the box next to GPU processing mode.
- Now, either select CUDA if running an NVIDIA graphics card or OpenCL and then hit the Enter button.
Finally, check if the issue is resolved.
3] Delete or Disable CUDA_VISIBLE_DEVICES Environmental Variable
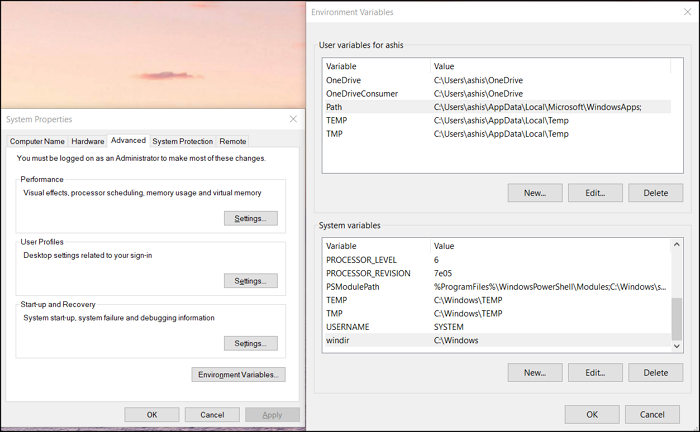
The CUDA_VISIBLE_DEVICES environmental variable allows applications that use CUDA to specify which GPU should be used to perform the task. We will disable it as it is malfunctioning at the moment. For that, follow the steps mentioned below.
- Go to the Start Menu, search Environment variables, and then open Edit the system environment variables.
- Once the System Properties window appears on the screen, select the Environment Variable option.
- Search and locate CUDA_VISIBLR_DEVICES in the variables.
- Now, either remove it completely or set the value to 0.
After you are finished with the process, reboot your device, and hopefully, the app will function properly again.
4] Reinstall AMD Adrenalin
For AMD users, a software called AMD Adrenaline manages and controls the AMD devices. However, this app is known for creating dispersion in the AMD Graphics drivers. Hence, we are going to reinstall the app, and factory reset the configurations that are locally stored. So, go ahead and uninstall AMD Adrenalin. Now go to the amd.com and download and install the setup. While installing the software make sure to hit the Factory reset option.
5] Repair the DaVinci Resolve
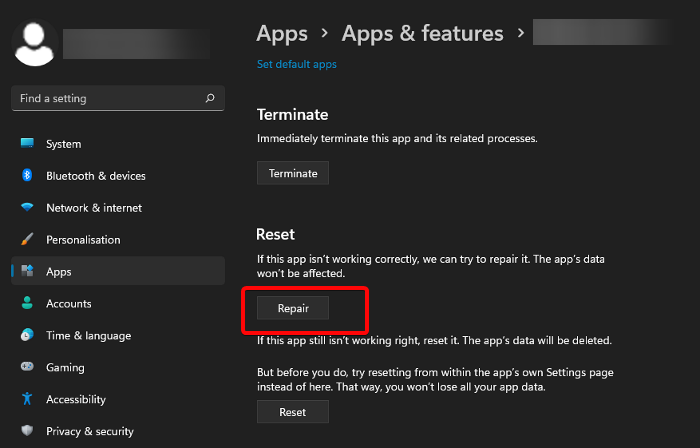
The fault can also lie in the app itself as sometimes the app files and related services can get corrupted. This later on causes multiple issues including the one we are facing at the moment. It’s advisable to repair the app and then try to access it to avoid such issues.
Here’s how to repair any app:
- Click Win + I to open Settings.
- Click on Apps, and then navigate to Apps & Features or Installed Apps.
- Find the DaVinci Resolve app.
- Windows 11: Click on the three dots and select Advanced Options.
- Windows 10: Select the app and click on Advanced Options.
- Finally, click on Repair.
Once done, check the app to see if it continues to grace your screen with the error message or not. If it does not work, again go to the Advanced Options of DaVinci Resolve and click on Reset. This should do the job for you.
Read: DaVinci Resolve rendering zero-byte files
6] Reinstall DaVinci
Last but not least, uninstall the app and then install DaVinci again. This is recommended only if all of the above-mentioned solutions don’t work, as this will only work if some files were not installed during the initial installation process.
Hopefully, you are able to resolve the issue using the solutions mentioned in this post.
Read: Your GPU memory is full in DaVinci Resolve
How do I fix the unsupported GPU processing mode?
As mentioned earlier, a lot of users are experiencing a problem where DaVinci Resolve seems to have a problem with GPU processing mode. This can be due to the Graphics Driver, environment variables, or the fault in the app. In such scenarios, we recommend, updating/ downgrading the Graphics driver, manually setting the GPU processing unit, and so on. We have talked about the solutions that you need to resolve the issue.
Also Read: DaVinci Resolve not opening or keeps crashing on startup
What GPU is supported by DaVinci Resolve?
If you want the best performance for DaVinci Resolve, the best you can get is NVIDIA GeForce RTX 4090. However, it is not the only good GPU for DaVinci Resolve, Yes, it is the best, but there are some other good ones such as AMD Radeon RX 7900 XTX or GeForce RTX 3080 and 3090. But in case, you want the best of the best, go for NVIDIA GeForce RTX 4090 24GB.
Leave a Reply