In Storage Spaces, with an upgraded pool, you can optimize drive usage and remove drives from pools without affecting the pool’s protection from drive failure. If you created a storage pool in Windows 8.1 and either upgraded to Windows 10 or migrated the storage pool drives to Windows 11/10, it is recommended that you upgrade your existing pools for Windows 11/10. In this post, we will show you how to upgrade Storage Pool for Storage Spaces in Windows 11/10.
Upgrade Storage Pool for Storage Spaces

We can upgrade Storage Pool for Storage Spaces in Windows 11/10 in 2 quick and easy ways. We’ll explore this topic under the methods outlined below in this section:
Let’s take a look at the description of the step-by-step process in relation to each of the methods.
Do note that, upgraded storage pools aren’t compatible with previous versions of Windows. Also, to upgrade a storage pool, you must be signed in as an administrator on your Windows PC.
1] Upgrade Storage Pool for Storage Spaces via Settings app

To upgrade Storage Pool for Storage Spaces via Settings app in Windows 10, do the following:
- Press the Windows key + I to open Settings.
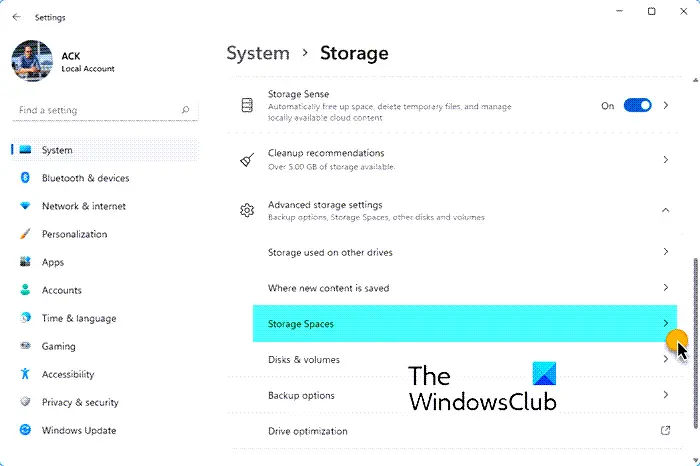
- Tap or click System.
- Click on Storage on the left pane.
- Next, scroll down and click on the Manage Storage Spaces link on the right pane.
OR
- Press Windows key + R to invoke the Run dialog.
- In the Run dialog box, type control and hit Enter to open Control Panel.
- From the top right corner of the window, set the View by option to Large icons or Small icons.
- Click Storage Spaces.
- Click the Change settings button, click on Yes if prompted by UAC.
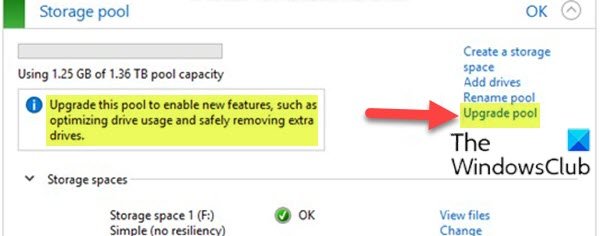
- Click the Upgrade pool link for the storage pool you want to upgrade.
- Click the Upgrade pool button to confirm.
- Once done, exit Control Panel.
2] Upgrade Storage Pool for Storage Spaces via PowerShell
To upgrade Storage Pool for Storage Spaces via PowerShell in Windows 10, do the following:
- Press Windows key + X to open Power User Menu.
- Tap A on the keyboard to launch PowerShell in admin mode.
- In the PowerShell console, type in the command below and hit Enter:
Get-StoragePool
- Make note of the friendly name of the storage pool you want to delete.
- Now, type the command below into the elevated PowerShell window and hit Enter. Substitute the <Name> placeholder with the actual friendly name of the storage pool you made a note of from the output previously.
Upgrade-StoragePool -FriendlyName "<Name>"
- When prompted in PowerShell, tap Y on your keyboard and hit Enter to confirm.
- Exit PowerShell when done.
That’s it on the two ways to upgrade Storage Pool for Storage Spaces in Windows 11/10!
Read next: How to optimize Drive Usage in Storage Pool for Storage Spaces.