Not all users can upgrade to Windows 11 because of hardware requirements. Microsoft also released an official tool to test your computer hardware requirements for Windows 11. If your computer does not have supported hardware for Windows 11, you cannot upgrade to it. However, there is a way to upgrade an unsupported computer to Windows 11 using Rufus. I will show you how to do that in this article.

Upgrade an unsupported computer to Windows 11 using Rufus
To upgrade an unsupported computer to Windows 11 using Rufus, you need a USB flash drive with a Windows 11 ISO file. Windows Media Creation tool allows users to create an Installation media with Windows 11 ISO. However, you cannot use the Media Creation Tool, as your computer does not have hardware supported by Windows 11.
Here are the steps to follow:
- Download the Windows 11 ISO file
- Download Rufus software
- Run Rufus software and create a bootable USB flash drive with Windows 11 ISO
- Run the setup file
Installing Windows 11 on a computer with unsupported hardware or processor is also possible through a Registry tweak. However, this method is not for everyone, as all users are not familiar with modifying the Registry. Moreover, incorrect Registry modifications can also make your system unstable. Hence, proceeding with Rufus is the easiest method.
Let’s start.
1] Download Windows 11 ISO

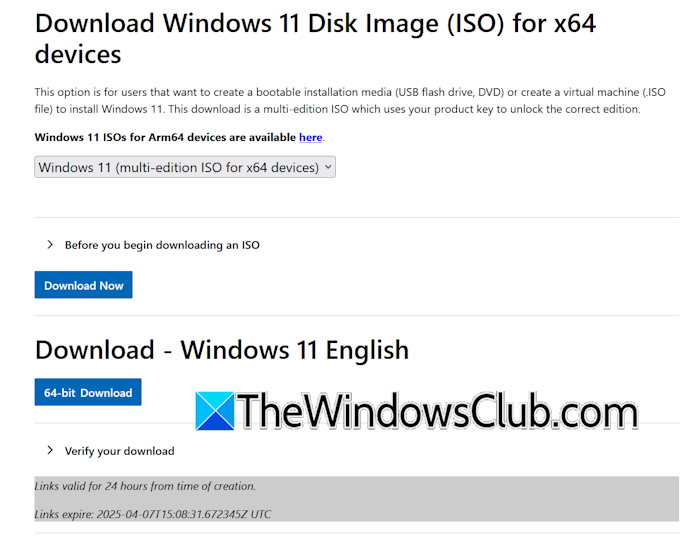
The first step is to download the Windows 11 ISO file. Visit the official website to download the latest Windows 11 ISO file. You can also use Rufus software to download the Windows 11 ISO file but I suggest you download it directly from Microsoft’s website.
2] Download and run the Rufus software
The next step is to download Rufus software. Rufus is available as an installer and portable version. You can download any one of its versions. Now, connect the USB flash drive to your computer, then run the Rufus software.

It will automatically detect the USB flash drive connected to your computer. If you have connected multiple USB flash drives, select the correct one to make it a bootable drive with Windows 11 ISO. Now, click on the SELECT button and select the Windows 11 ISO file from your system. Based on your hard drive partition scheme, select the right option. Under the Format Options section, leave all the options to their default values. You can also rename the USB Flash Drive or leave this option as is.

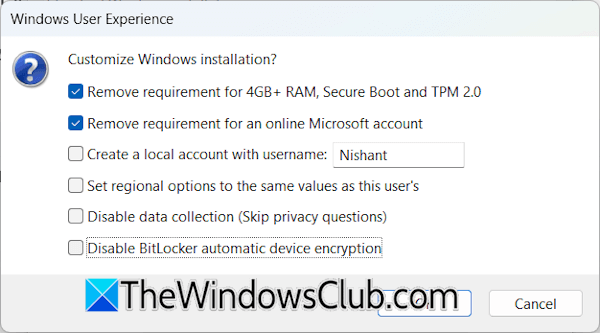
When you are done, click START. A new popup window will appear. Here you have to select the customization options for Windows 11 installation. This window will allow you to bypass the hardware requirements. Select the checkbox that says “Remove requirement for 4GB+ RAM, Secure Boot, and TPM 2.0.”
You can also remove the requirement for an online Microsoft account. When you are done, click OK. When you click OK, you will receive a warning message that all data on the selected USB flash drive will be deleted. Click OK and Rufus will start creating the bootable USB flash drive with Windows 11 ISO. This process will take some time.

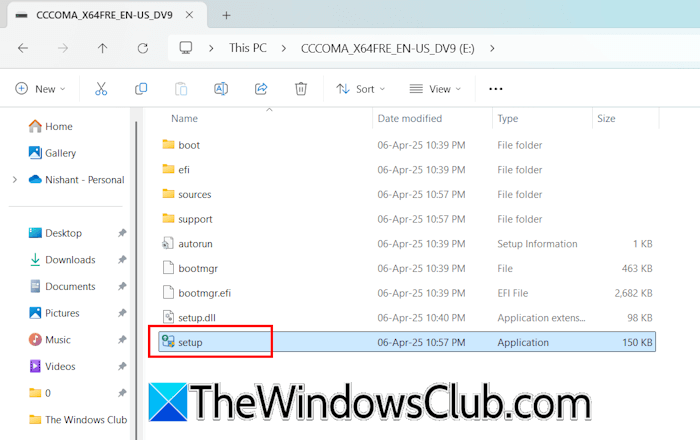
When the process is finished, you will be ready to upgrade your system to Windows 11. Now, open File Explorer. You will see your bootable USB flash drive there. Open it. Now, run the setup file to upgrade to Windows 11.
That’s it. I hope this helps.
Related:
- How to bypass Windows 11 Secure Boot requirement?
- How to bypass Windows 11 Online Account requirements?
How to upgrade to Windows 11 from bootable USB?
First, download the Windows 11 ISO file and use it to create a bootable USB flash drive. When the bootable USB is ready, open it and locate the setup file. Run that setup file to upgrade to Windows 11.
Is Rufus safe?
Rufus is a third-party tool for creating a bootable USB flash drive with installation media. It is safe, and you can use it to install Windows 11 or Windows 10. Rufus also helps you bypass Windows 11 hardware requirements.
Read next: How to Install Windows 11 on an unsupported PC without TPM.