Some Windows users have complained that when they connect a USB drive to their Windows PC, the USB drive shows up as 2 different drives when they plug it in. If you are facing the same issue, we have you covered with all working fixes. So, check out below.

Fix USB drive showing up as 2 Drives on PC
If your USB drive is being shown as two separate drives on your Windows PC, follow the below methods to fix the issue:
- Use some basic troubleshooting tips
- Run the Hardware and Device Troubleshooter
- Clean and repartition USB using Command Prompt.
- Use a third-party tool to clean and repartition USB.
1] Use some basic troubleshooting tips
Since this issue can be a result of some generic problems, you can follow some basic tips and tricks as discussed below:
First, try disconnecting and reconnecting the USB to check if the problem is resolved. You can also use a different USB port to plug in the drive.
You can also restart the PC to check whether the issue is gone.
If you see only one USB drive with a letter, you can try assigning the same drive letter to another drive to see if it helps. To do that, open Disk Management and right-click on the USB drive. Next, choose the Change Drive Letter and Paths option, click on Add, select the same drive letter as the other partition, and tap on OK.
Another thing you can do is update your USB drivers to fix the issue.
Check the USB with another computer and see if you face the same issue.
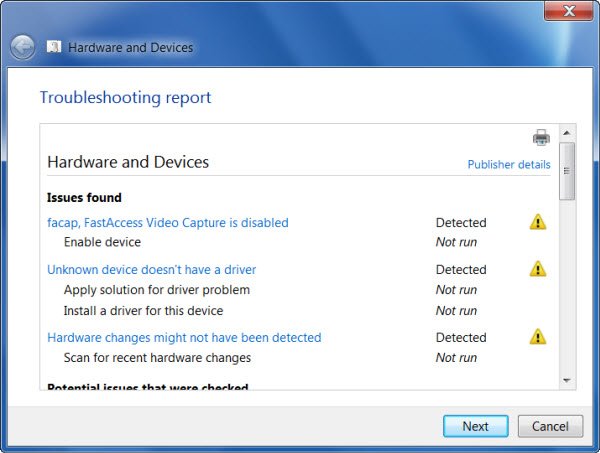
2] Run the Hardware and Device Troubleshooter

Run the Hardware and Device Troubleshooter and see if it helps.
3] Clean and repartition USB using Command Prompt

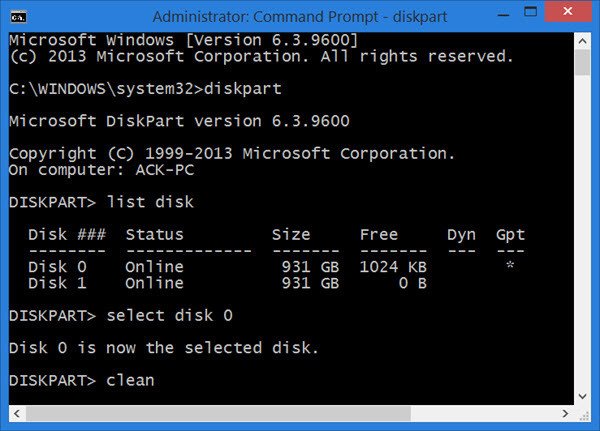
If the above tips don’t help, you can clean and repartition your USB drive with the help of Command Prompt or Windows PowerShell. This fix has helped some affected users resolve the issue and might just fix the problem for you as well.
TIP: Before attempting this fix, back up the necessary data from your USB drive. Cleaning the USB will delete all existing data and partitions and restore it to its original state. So, if you don’t want to lose some data, back it up.
Now, you can follow the below steps to do so:
First, open the Command Prompt with administrator rights.
Next, enter the below commands one by one:
diskpart
list disk
select disk E
In the last command “E” is the drive letter assigned to your USB drive. So, replace it accordingly.
After that, enter another command to clean up your USB drive:
clean
In case you receive an error, the drive folder must be opened. So, close it and then enter the above command.
Next, type another set of commands and press Enter:
create partition primary
format f=ntfs quick
You can replace “ntfs” with “fat32” in the above command if needed.
Now, enter the below commands:
active
assign
list disk
exit
Finally, close the Command Prompt and see if the problem is resolved.
4] Use a third-party tool to clean and repartition USB
If the Windows built-in Diskpart tool cannot clean your USB drive and fix this issue, you can use a third-party tool to do so. Various good free Disk Partition managers let you manage partitions on drives.
Read: USB Flash Drive Showing 0 Bytes in Windows.
Why is my USB stick showing up as a D drive?
If your USB drive shows up as the D drive on your PC, it indicates that your operating system has assigned the D drive letter to your USB stick as default. To change the drive letter for your USB stick, you can open the Disk Management app and use the Change Drive Letter and Paths option from your USB’s right-click menu.
How do I merge USB drives?
To merge partitions on your USB drive, you can use Disk Management. Open it, select the target USB, right-click on the partition except for system or recovery partitions, and select Delete Volume. After that, right-click the unallocated space, choose New Simple Volume, and follow the prompted instructions. Lastly, format the drive.
Leave a Reply