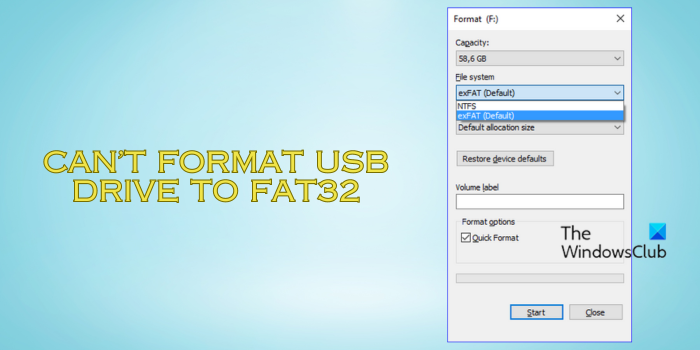
Are you unable to format a USB drive to the FAT32 system on your Windows 11/10 computerm? Some users have reported that Windows does not let them format their USB drives to FAT32.
However, many users have reported they can’t format their USB drives. Some people have reported getting error messages like the below:
The volume is too big for FAT32
and,
Virtual Disk Service error:
The volume size is too big.
Such errors and issues while formatting a USB to FAT32 could be caused if your USB is greater than 32 GB in size. You might also face this issue if your USB is infected with malware or if it is write-protected.

How to format a USB drive to FAT32?
To format a USB drive to FAT32 on Windows, you can use File Explorer. Here are the steps to do that:
- First, open the File Explorer using Win+E.
- Now, choose the This PC option and right-click on the target USB drive.
- Next, from the context menu, select the Format option.
- In the Format window, set the File System to FAT32.
- You can also enable the Quick Format option.
- Finally, press the Start button to start formatting the drive.
You can also use the Windows Disk Management application to format USB to FAT32. Open Disk Management from the Win+X menu and locate the USB drive. Right-click on the drive and click on the Format option from the context menu. After that, set the target file system to FAT32 and press the OK button.
Fix USB won’t format to FAT32 on Windows 11/10
If you are unable to format your USB drive to FAT32 format on Windows 11/10, here are the solutions you can follow to fix the issue:
- Remove write protection from USB.
- Format USB to FAT32 using CMD.
- Format USB to FAT32 via PowerShell.
- Use a third-party USB formatting tool.
1] Remove write protection from USB

If your USB drive is write-protected, you won’t be able to format the drive. Hence, if the scenario is applicable, you can remove the write protection from the target USB drive. Here’s how to do that:
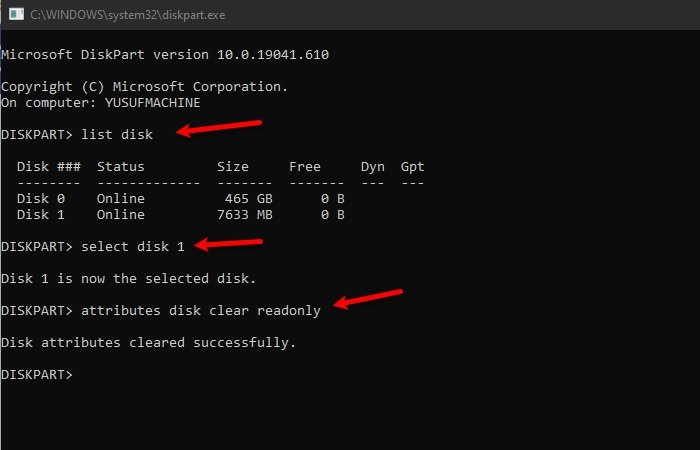
First, run the Command Promot as an administrator; open Windows Search, type cmd in the search box, go to the Command Prompt app from the results, and choose the Run as administrator option.
Now, type the below commands and press the Enter button, one by one:
DISKPART
list disk
select disk <USB-Drive>
In the above command, replace <USB-Drive> with your USB drive letter.
Next, remove write protection using the below command:
attributes disk clear readonly
Once done, check if you can format your USB drive to FAT32 or not.
Read: USB error There is no media in the specified device.
2] Format USB to FAT32 using CMD

If you can’t format a USB drive to FAT32 via File Explorer, it is recommended to format it using Command Prompt. However, before attempting this method, make sure you have removed write protection from the drive using the solution (1). Now, follow the below steps:
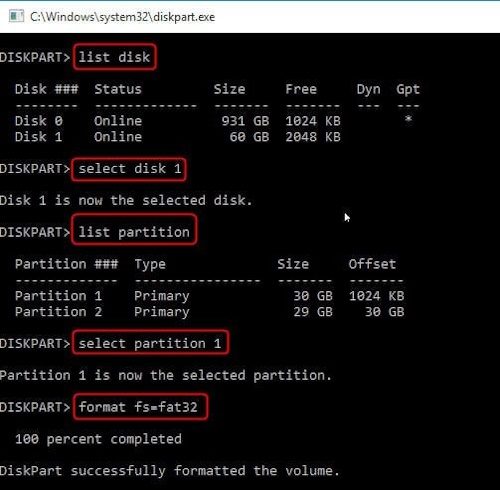
First, open Command Prompt with administrator rights. Now, enter the following commands:
diskpart
list disk
select disk <drive-letter>
list volume
select volume <drive-letter>
In the above commands, replace <drive-letter> with your USB drive’s number.
After that, enter the following command to format the USB drive to FAT32 format.
format fs=fat32 quick
Once done, exit the Command Prompt window and check if the issue is resolved.
See: USB ports are not working in Windows.
3] Format USB to FAT32 via PowerShell

Windows provides flexibility to perform a task using different methods. So, if the above methods fail, you can also use Windows PowerShell to format USB to FAT32 via the command line in Windows. Here’s how:
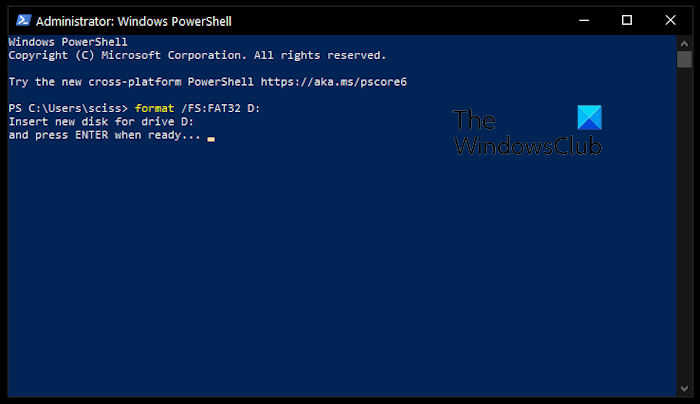
First, open the Windows PowerShell as an administrator using the Search function.
In the opened window, enter the below command:
format /fs:fat32 D:
In the above command, change the D letter to the letter of your USB drive that you are trying to format.
It will now format your USB drive to the FAT32 file system.
Read: Fix Power surge on the USB port error on Windows PC.
UPDATE: Microsoft is removing the 32GB size limit for FAT32 partitions from the format command line in Windows 11. Although FAT supports volumes up to 2TB, Windows has a 32GB limit in place.
4] Use a third-party USB formatting tool
When Windows built-in tools fail to perform a task, you can opt for a third-party solution. So, the next thing you can do to fix this issue is to format your USB drive to FAT32 using a third-party free FAT32 Format Tool. There are multiple USB formatting software that you can download and install on your PC to format USB to FAT32 or another file system.
If you are looking for a free one, Rufus is a good software to create bootable USBs and format USBs.
Read: USB or External Drive shows wrong size or incorrect capacity.
I hope this post helps you format USB to FAT32 without errors or problems.
Can I format a 128GB flash drive to FAT32?
Yes, you can format a 128 GB USB drive to the FAT32 system on Windows. However, there are certain limitations to doing that. Windows doesn’t allow formatting USB drives over 32GB using its built-in tools like File Explorer. You will be required to use command-line utilities like Command Prompt and PowerShell to do that. You can also use a third-party formatting tool.
See: Bootable USB not detected in Windows.
How do I force a USB drive to format?
If Windows cannot format a USB drive, there are various other methods you can use. You can use the Disk Management tool, Command Prompt, or Windows PowerShell to do so. There are some free Partition Manager software like Rufus, EaseUS Partition Master Free, AOMEI Partition Assistant Standard Edition, and Rufus that are used for the same.