A Design Checker is a feature in Microsoft Publisher that finds issues such as design and layout problems; it identifies the potential problems in your publication and provides solutions to fix them. Users should run the Design Checker before printing and sending an email of their publication.
How to use Design Checker in Publisher
Follow the steps below to use the Design Checker in Microsoft Publisher:
- Launch Publisher
- Click File
- Click Info on the left pane in backstage view
- Click Run Design Checker.
- A Design Checker Pane will appear on the right
- The potential issue is shown in the Select an item to fix box.
- Make your changes to publication.
- Close the Design Checker
Launch Publisher.
Click the File tab.
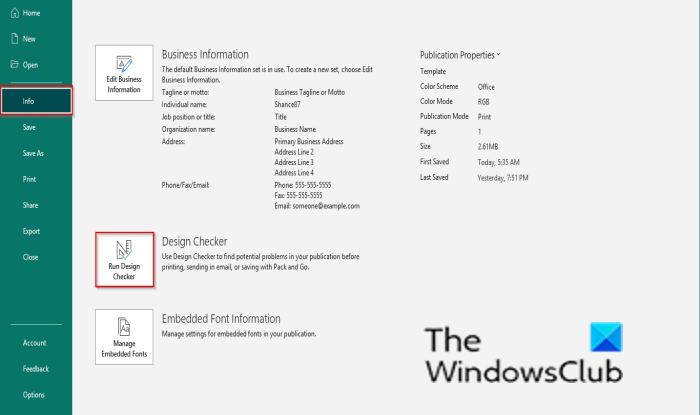
Click Info on the left pane in backstage view
Click Run Design Checker.
A Design Checker Pane will appear on the right
The potential issue is shown in the Select an item to fix box.
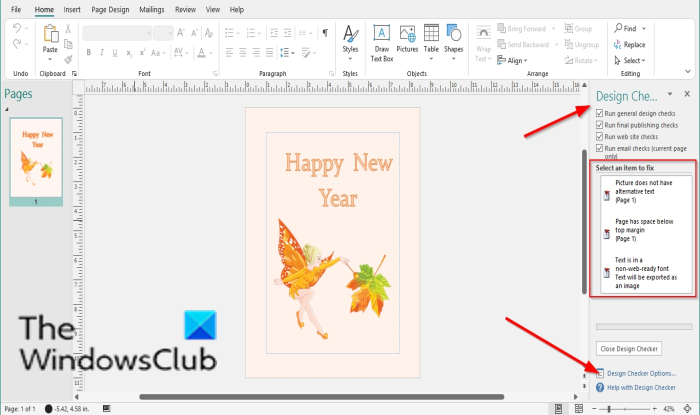
In the Design Checker pane, you can check the checkboxes of other options to see other issues found in the publication. These options are:
- Run general design checks: Select this option to check for design issues, such as empty text boxes that can negatively impact your publication.
- Run commercial printing checks: Select this option to check for issues such as RGB mode that can negatively impact printing your publication at a commercial printing business.
- Run website checks: Select this option to check for potential problems, such as pictures without alternative text, that can negatively impact your web publication.
- Run e-mail checks (current page only): Select this option to check for issues, such as text that contains a hyphenation, which may cause gaps in the message when it is viewed in certain e-mail viewers.
If you want to see the Design Checker settings, click Design Checker Options.
A Design Checker Options dialog box will appear.
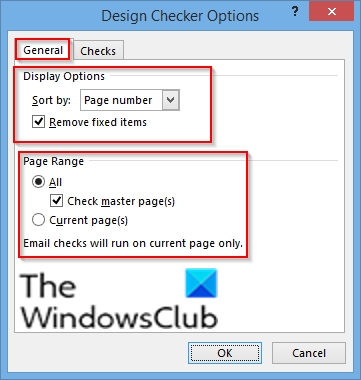
On the General tab, you can change the settings under the section Display options to sort the issue in the publication, namely:
- Page number: sort the issues by page numbers.
- Description: sort issues alphabetically by their description.
- Status: Sort issues by status.
Under the section Power range, you can check the page range you want Design Checker to check, namely:
- All: includes all categories
- Check master pages: includes master pages when you select All as the page range.
- Current pages: Checks only the current pages.
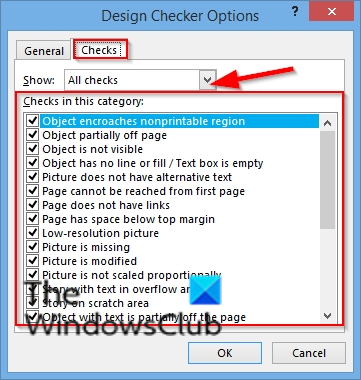
On the Check tab, you cal select an option from the Show list such as All checks, General checks, Final publishing checks, Web site checks, and Email checks.
In the Check in this category section, select the checkboxes that you want the design checker to run.
After changing your settings, click OK.
Make your changes to publication.
Close the Design Checker.
What happens if you print in RGB instead of CMYK?
Usually, RGB is not considered ideal for printing and packaging. In most printing processes, the RGB color space is converted to CMYK before printing. This is because the colors produced with RGB on the digital space do not create the same color output in the physical print.
Which color format is the best for printing?
CMYK is the best color profile for printing. RGB color profile looks great on a digital device. But if you print the RGB color profile, you will not get the exact quality. On the other hand, CMYK uses base colors of Cyan, Magenta, Yellow, and Key (or Black). In printing, CMYK helps achieve true colors.
We hope this tutorial helps you understand how to use the Design Checker in Publisher.
Now read: How to use the Page Options in Microsoft Publisher.
Leave a Reply