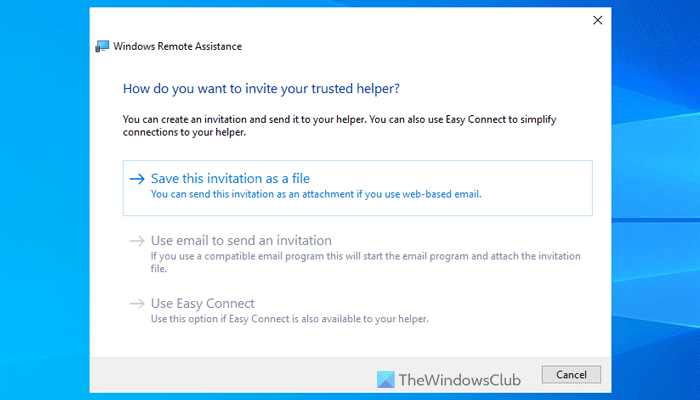
If the Use email to send an invitation option is grayed out in the Windows Remote Assistance wizard in Windows 11/10, Windows Server 2022, or any other older version, here is how you can fix the problem. It is possible to fix the problem by installing an email client.

Use email to send an invitation option grayed out in Windows Remote Assistance
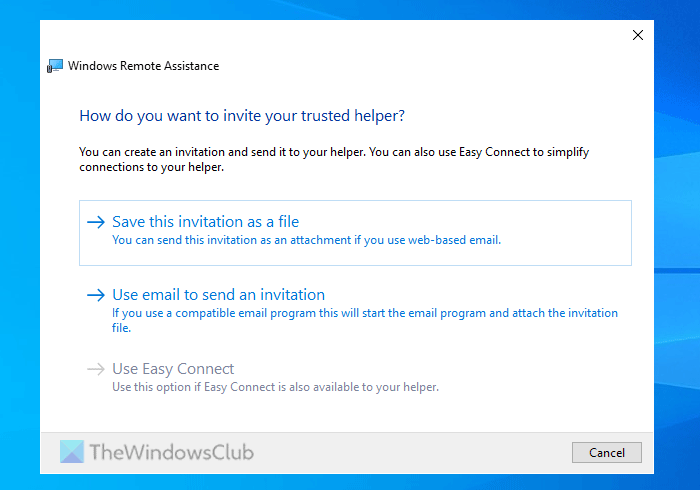
When you open the Windows Remote Assistance panel, it displays three options to connect to another computer:
- Save this invitation as a file
- Use email to send an invitation
- Use Easy Connect
The second option is probably the easiest way to connect a remote computer that is not connected to your network. However, this option doesn’t work if your computer doesn’t have an email client. Whether it is Windows 11/10 or Windows Server, you must have an email client to fix this problem.
If the Use email to send an invitation option is grayed out in Windows Remote Assistance, follow these instructions:
- Install email client
- Verify Group Policy setting
To learn more about these solutions, continue reading.
1] Install email client

It is a working solution regardless of the version of Windows you are using. As Windows Server doesn’t come with an email client, this has become quite a common problem on such computers.
However, we have tried a few third-party email clients, and here is the list so that you can do the same:
- Thunderbird: Thunderbird is probably the best option for your Windows Server. It is very easy to install and set up. It took less than five minutes to install and be ready to use.
- Vivaldi Mail: Vivaldi Mail is yet another top-notch email client that we have used to fix this problem. The user interface is pretty modern and uncluttered. You can attach multiple email accounts to this email client.
- Mailspring: If you need a neat and clean UI with some essential features, Mailspring is probably the best option. You can use your Gmail, Outlook, Hotmail, or any other IMAP account without any problem.
Read: Best Free Email Clients for Windows Server
2] Verify Group Policy Setting

If you have enabled Remote Assistance through Local Group Policy Editor, it is suggested to disable that change. Many people claimed that their incorrect settings caused this issue randomly. Therefore, follow these steps to verify the Group Policy setting:
- Press Win+R > type gpedit.msc and hit Enter.
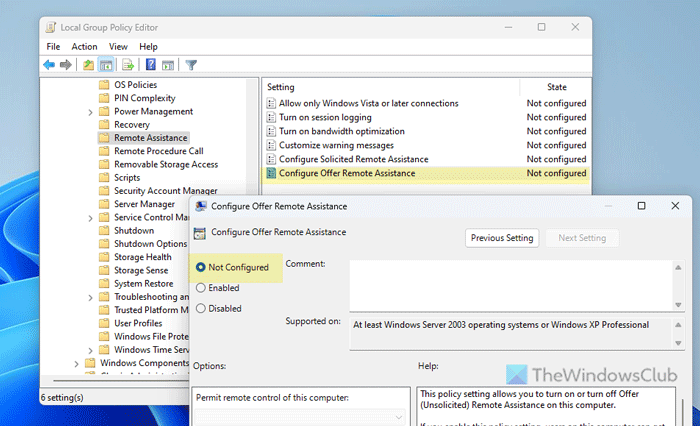
- Go to this path: Computer Configuration > Administrative Templates > System > Remote Assistance.
- Double-click on the Configure Offer Remote Assistance setting.
- Choose the Not Configured option.
- Click on Apply and OK.
- Close all windows and restart your computer.
I hope these solutions have fixed your problem.
Read: Remote Administration Tools: Risks, Threats, Prevention
How do I send a Windows Remote Assistance invitation?
To send a Windows Remote Assistance invitation, you can use three options:
- Save the file on your computer and send it via any platform.
- Send an email invitation.
- Use Easy Connect. However, it works only if both computers are connected to the same network.
How to enable Remote Assistance and configure the invitations settings?
To enable Remote Assistance in Windows 11/10, you can use the Control Panel or Local Group Policy Editor. However, you need to use the Server Manager to enable remote assistance and configure the invitation settings on the Windows Server. For that, use the Add Roles and Features option and select Remote Assistance in the Features tab.
Leave a Reply